Open Settings
Open the Settings app on your iPhone Air.
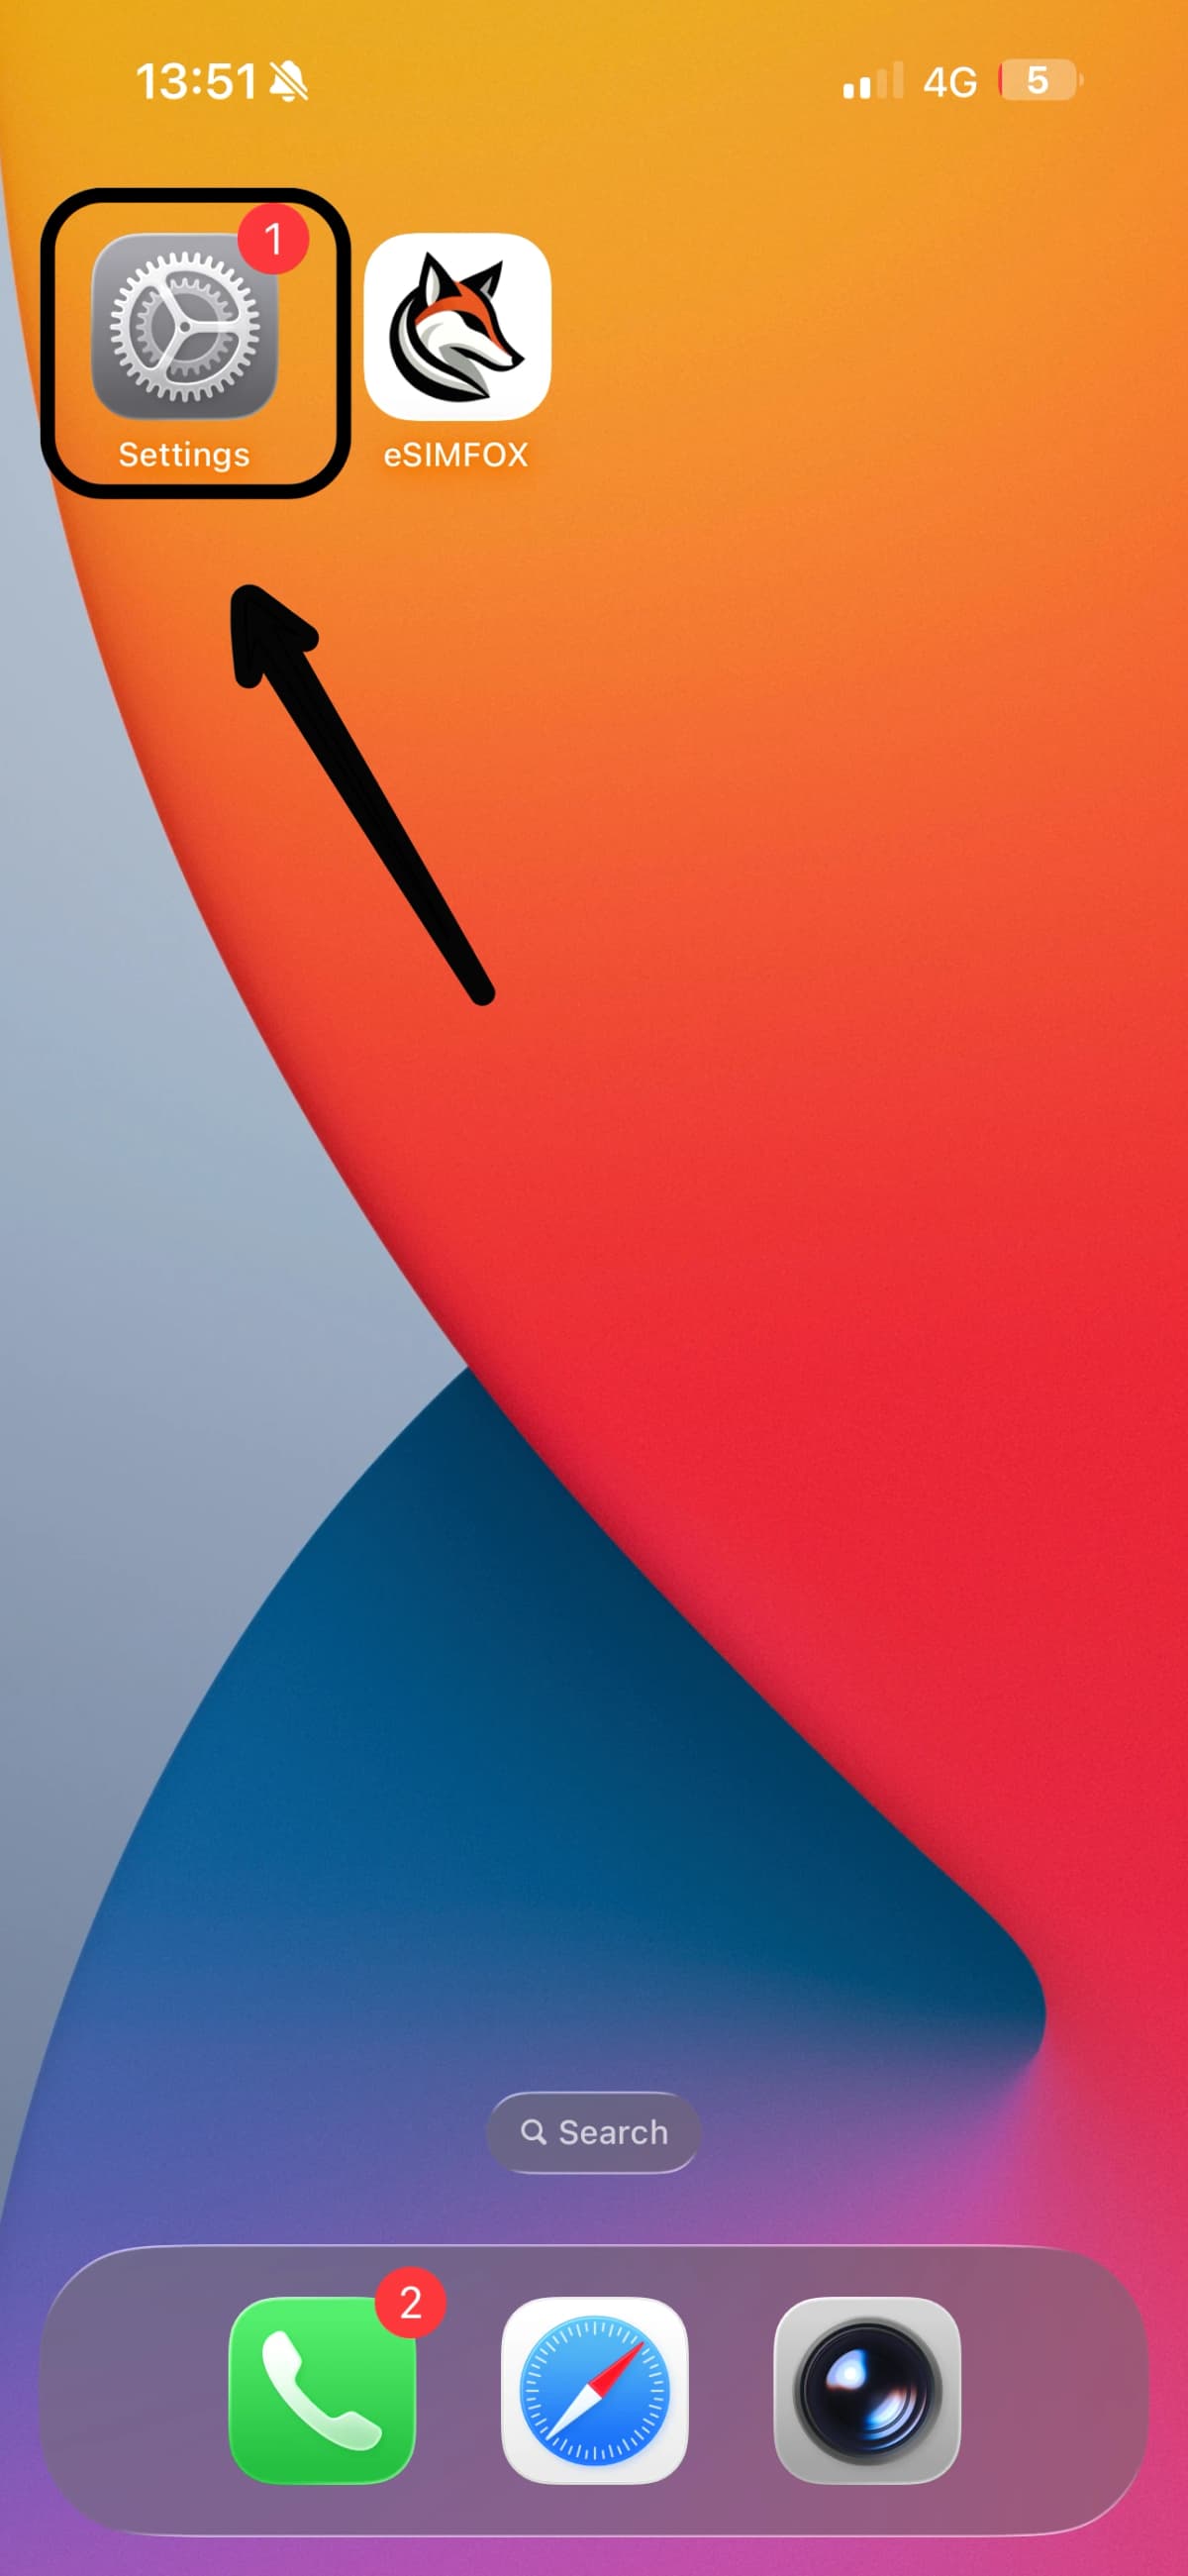

Setting up an eSIM takes most travelers under three minutes. Follow the steps below and your eSIMFOX plan will be ready before you board.
Installation downloads the eSIM profile, so connect to Wi-Fi or reliable mobile data first. Installing calmly at home beats airport Wi-Fi.
Your iPhone Air must be carrier-unlocked to use a travel eSIM. If you bought it on a contract, check the carrier-lock status in your settings.
You'll find the QR code and the manual activation details in your eSIMFOX confirmation email and in your dashboard.
Your eSIM is reusable. Keep it installed after your trip and simply top it up for the next destination — a deleted eSIM cannot be reinstalled with the same QR code.
Open the Settings app on your iPhone Air.
Tap the Cellular menu item (called Mobile Service in some regions).
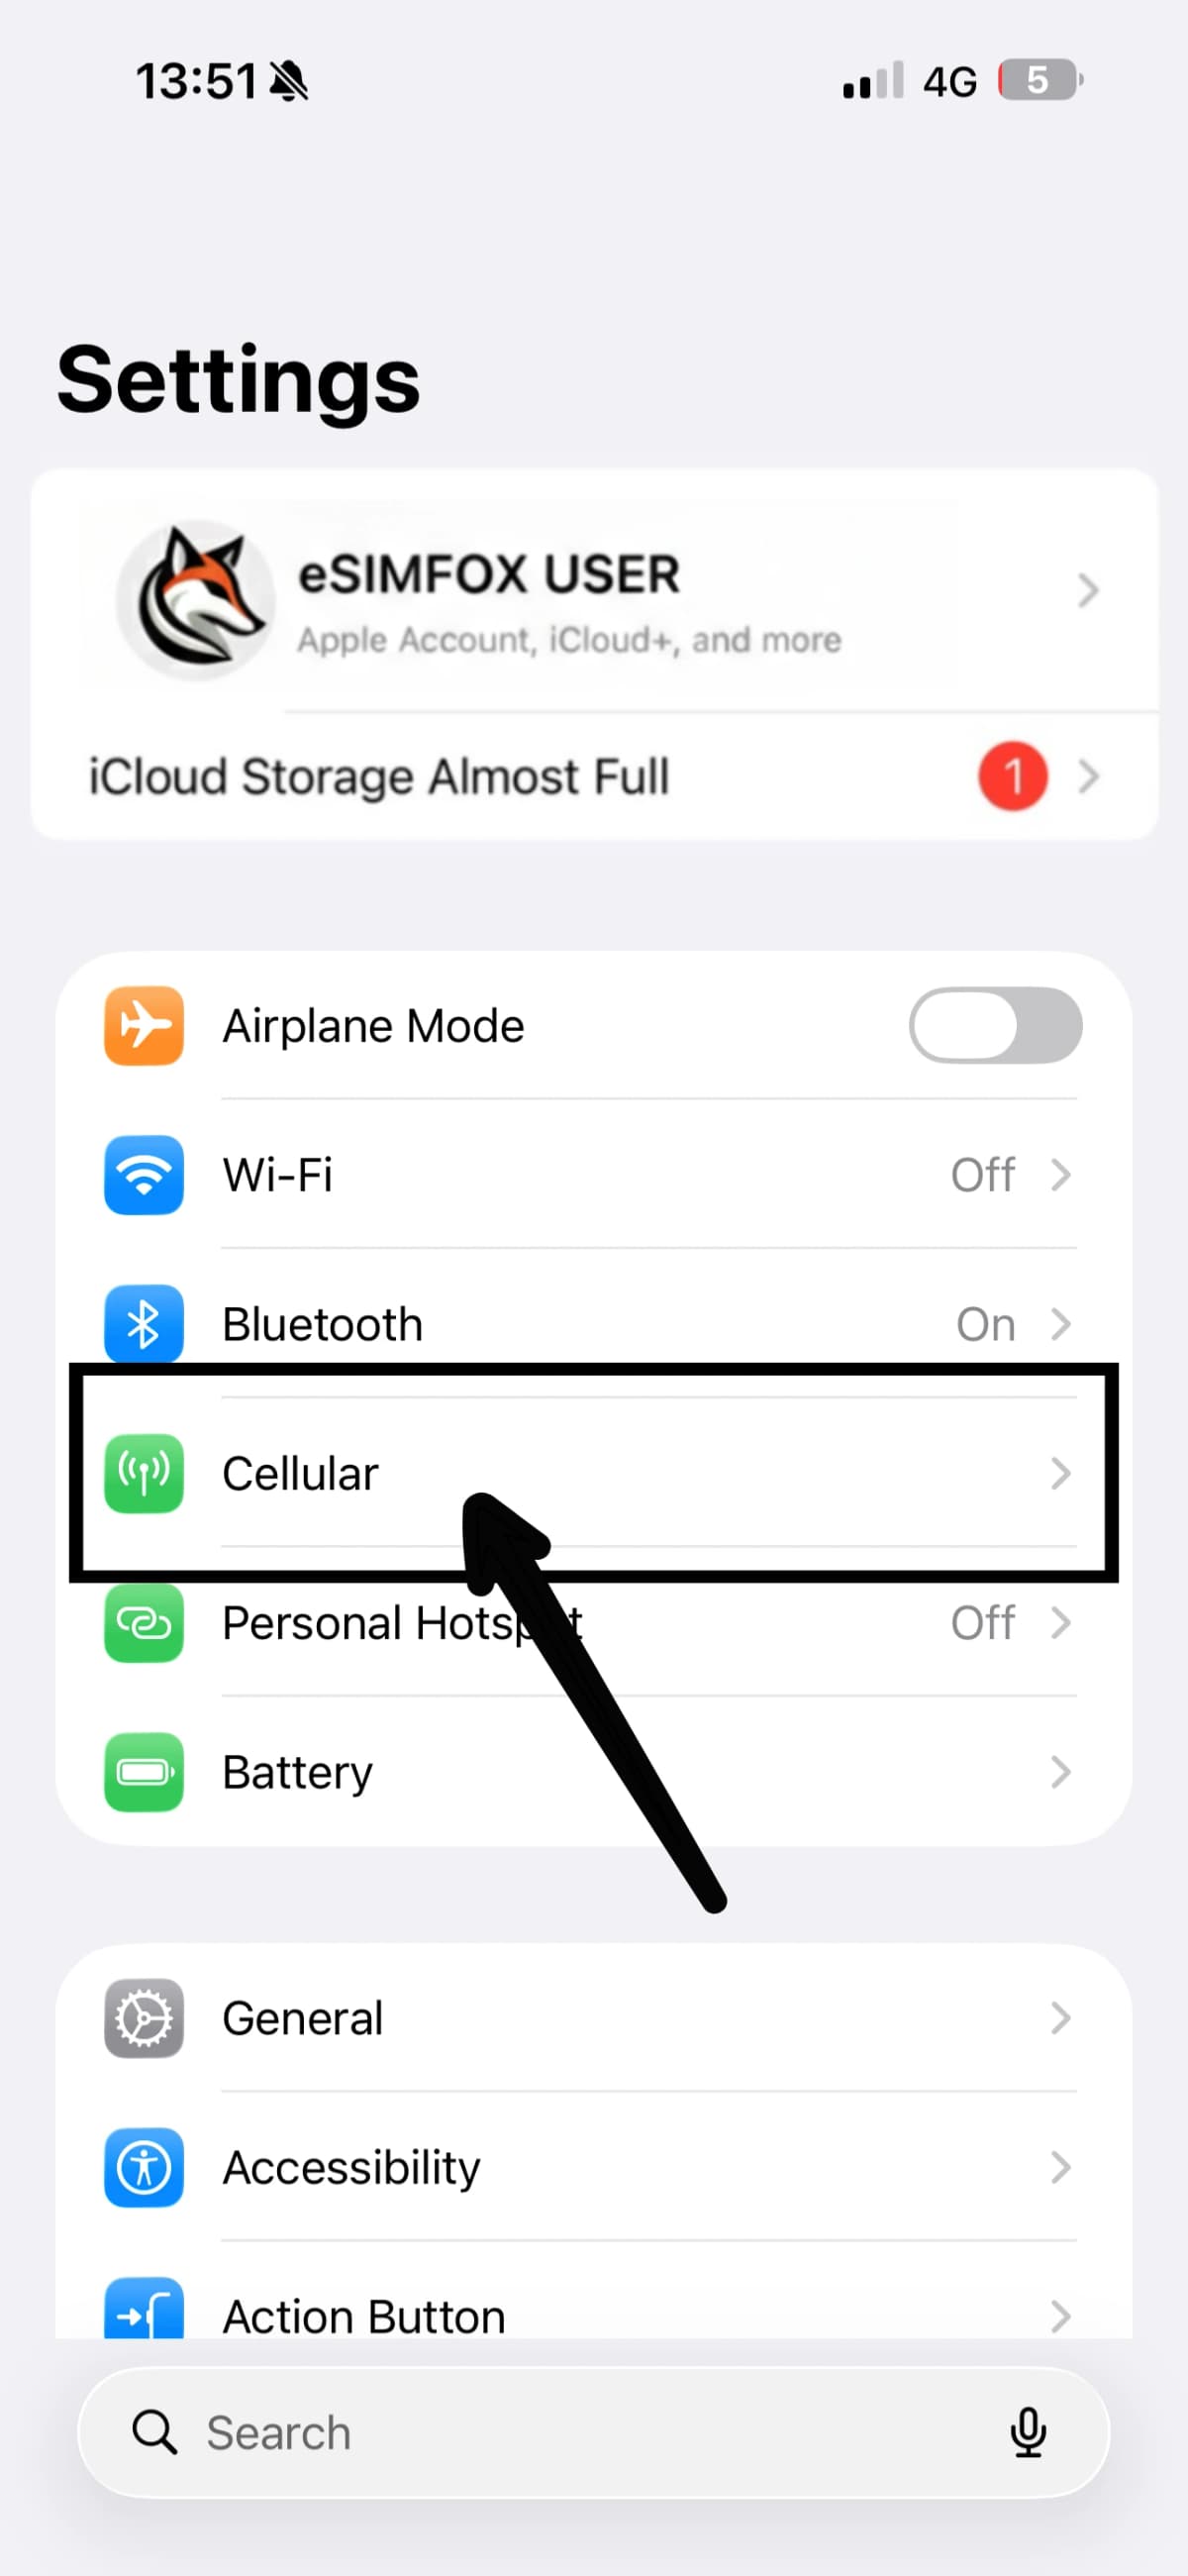
Select Add eSIM.
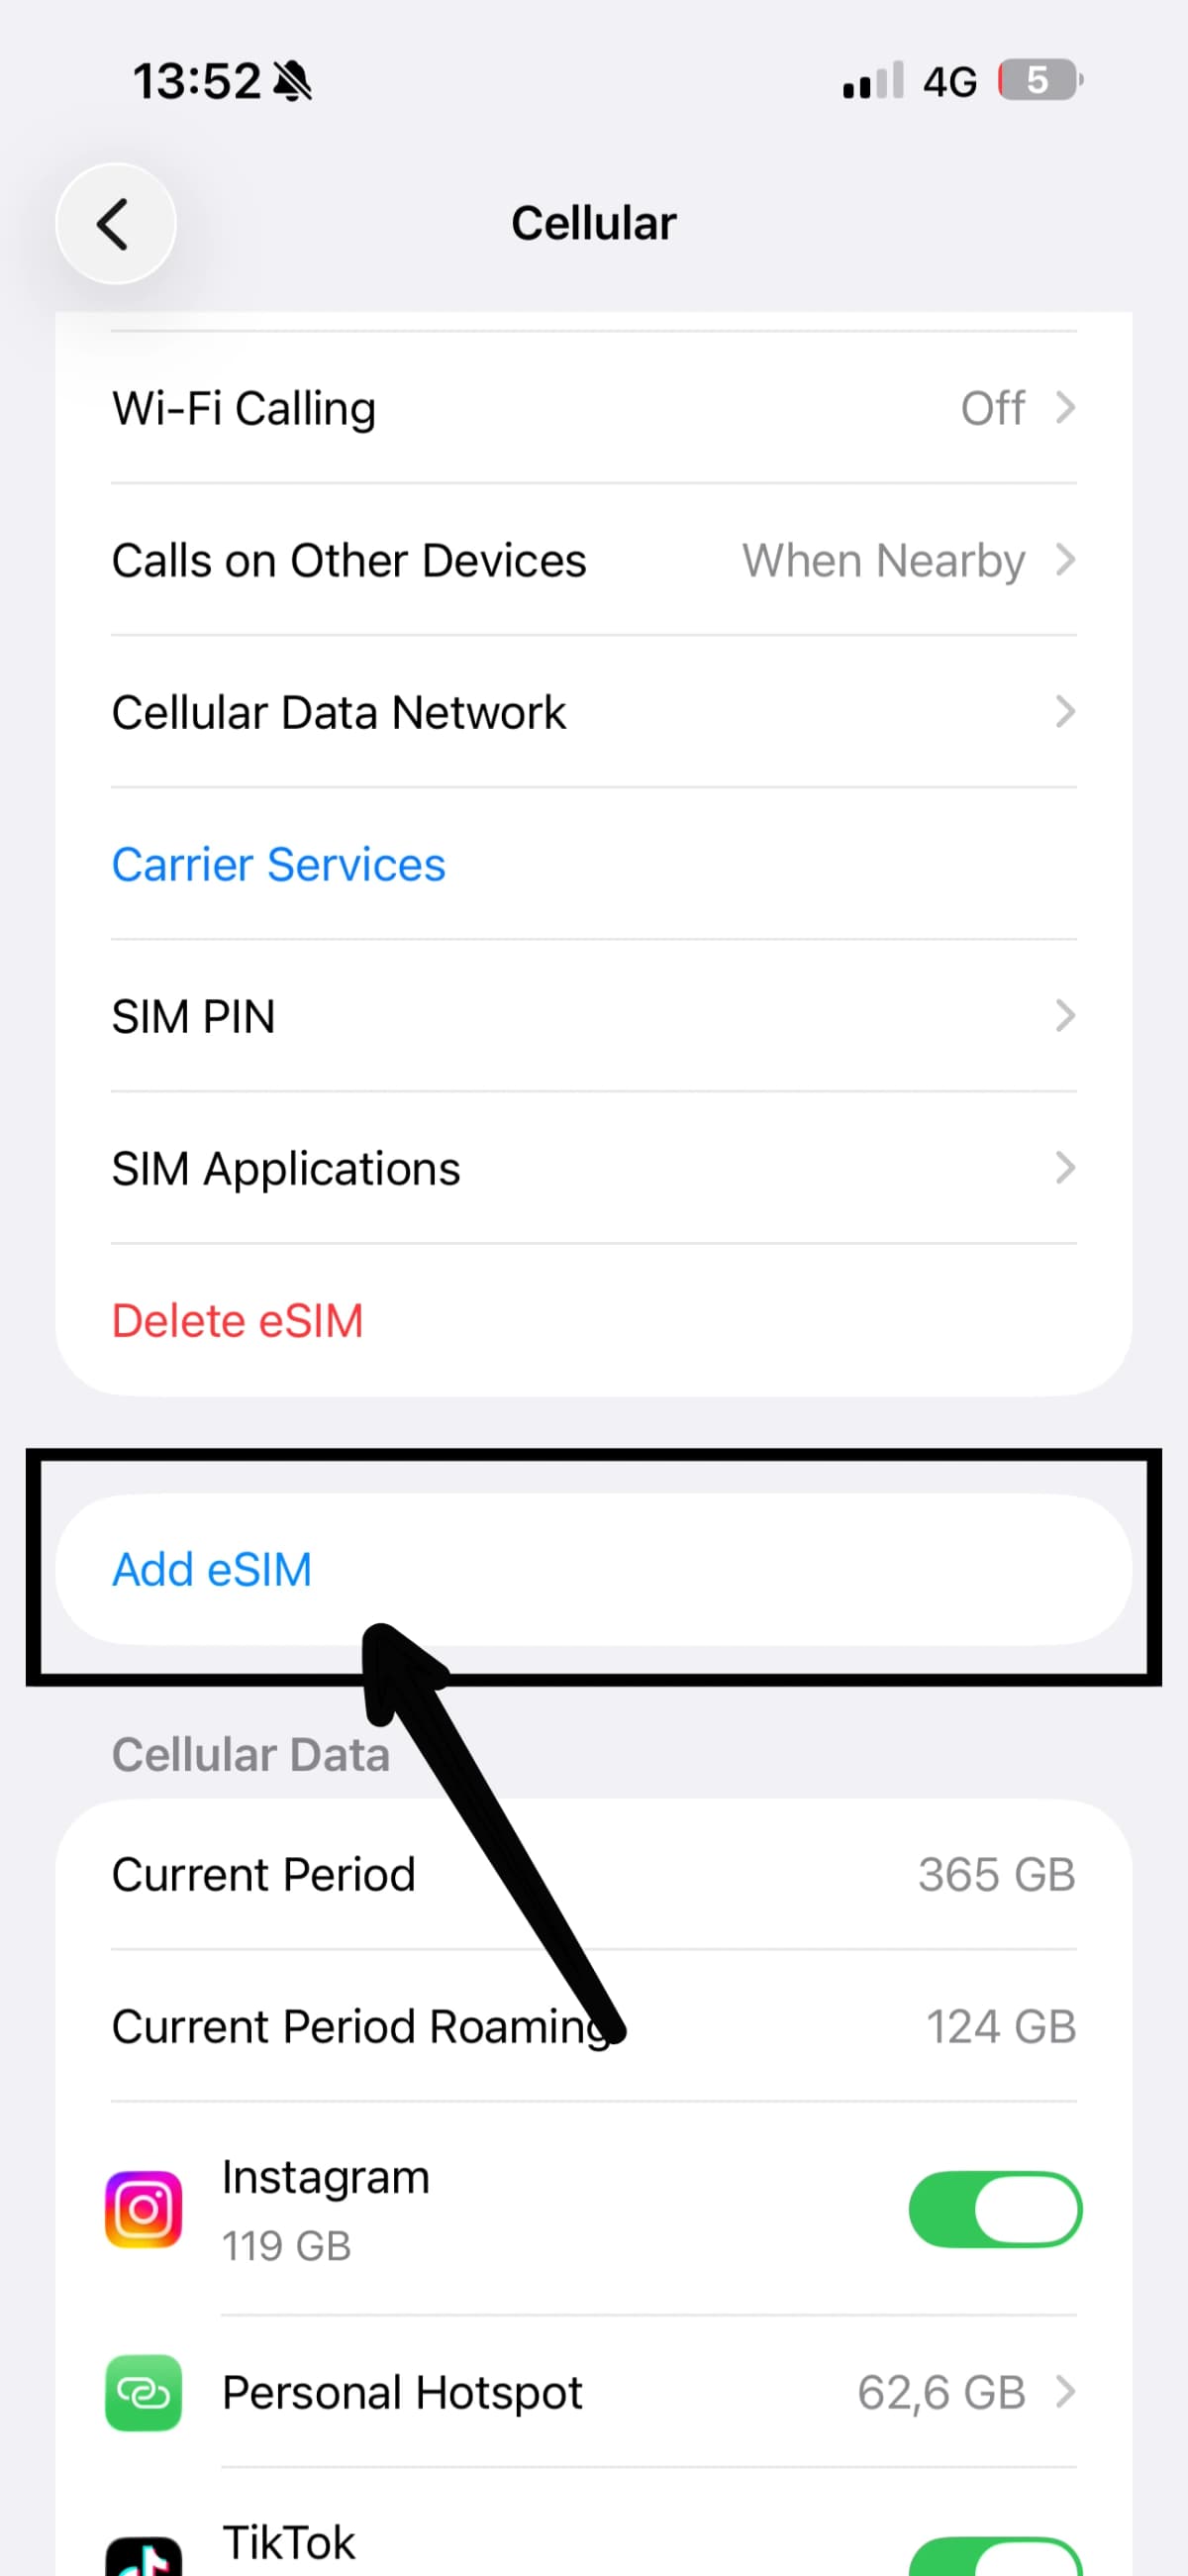
Tap Other Options at the bottom.
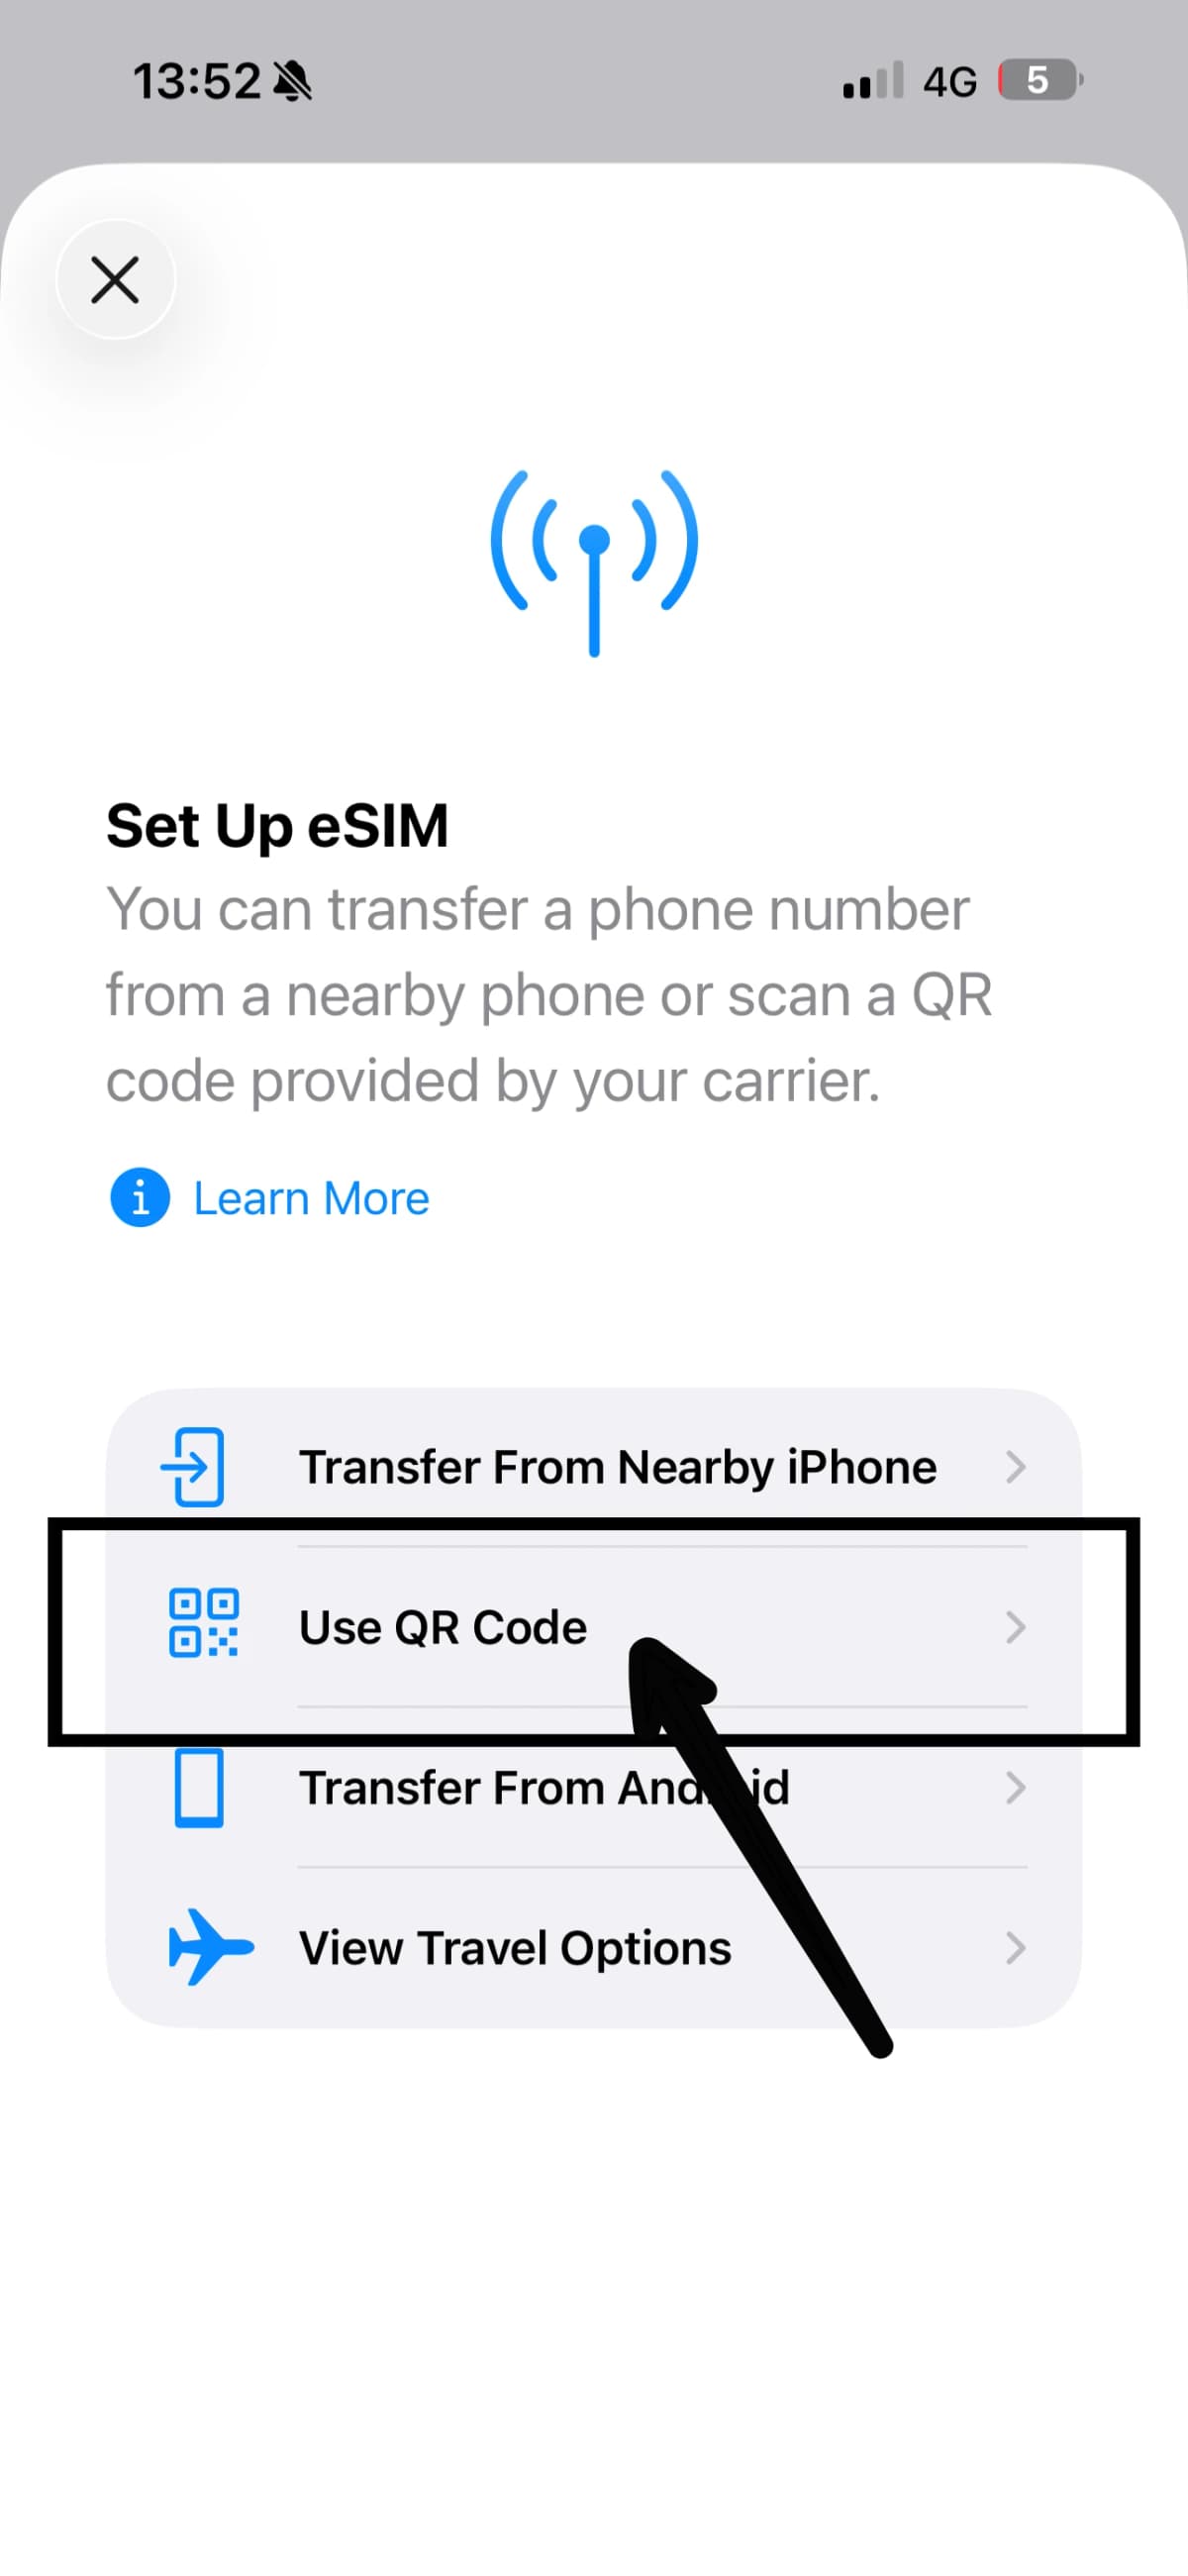
Select Use QR Code to start the scanner.
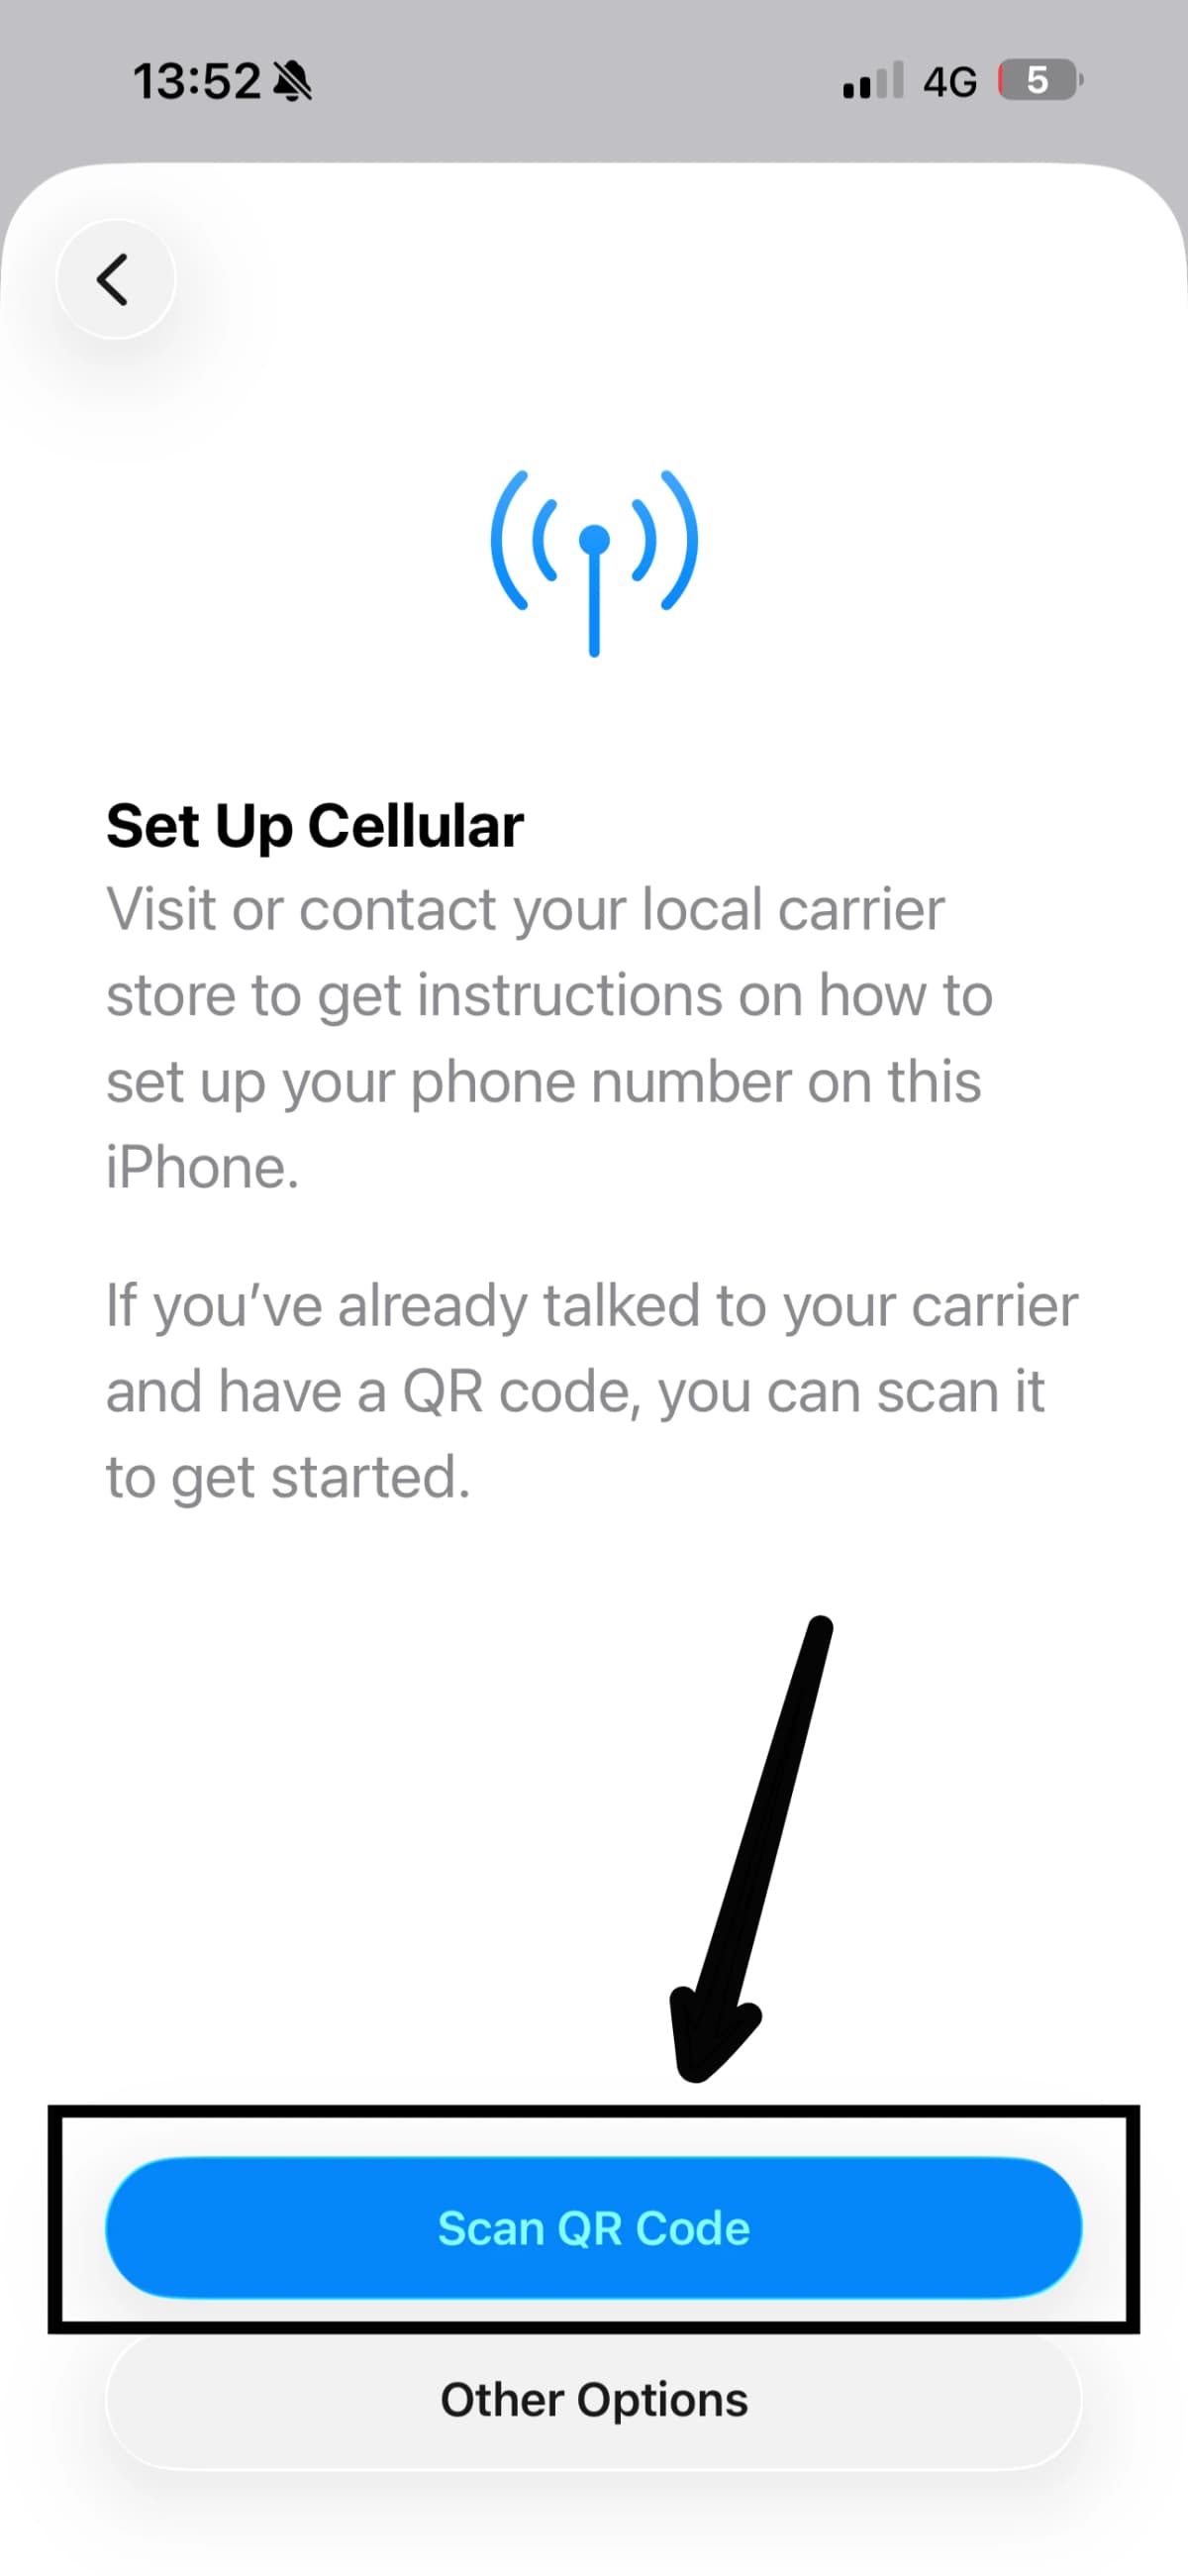
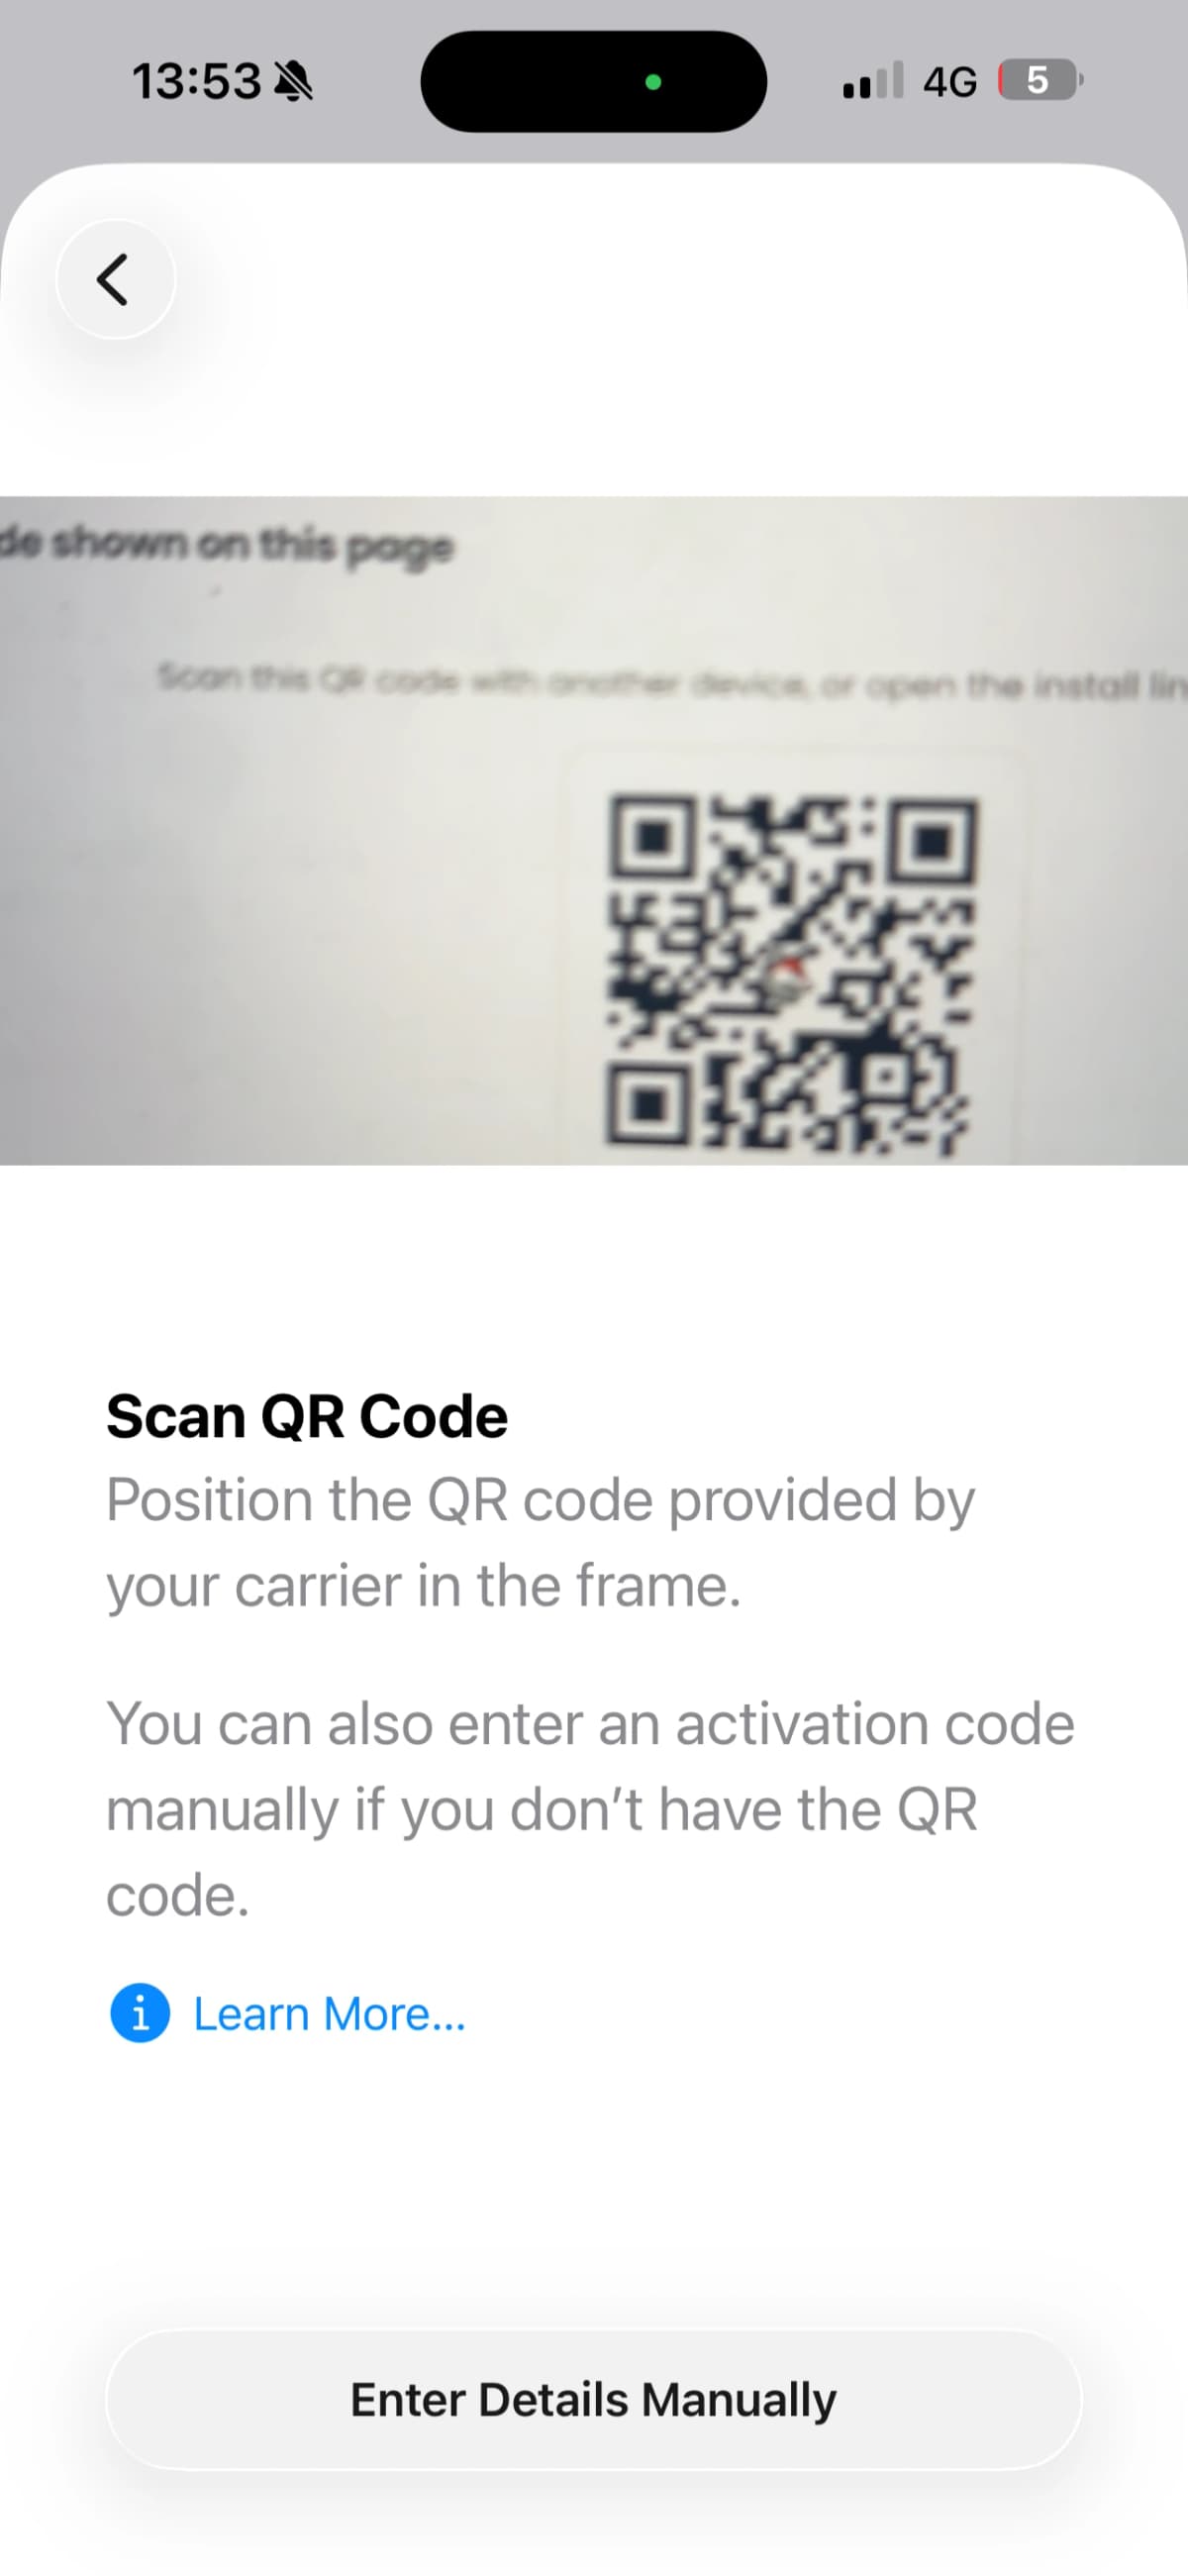
Point the camera at the eSIMFOX QR code from your confirmation email or dashboard.
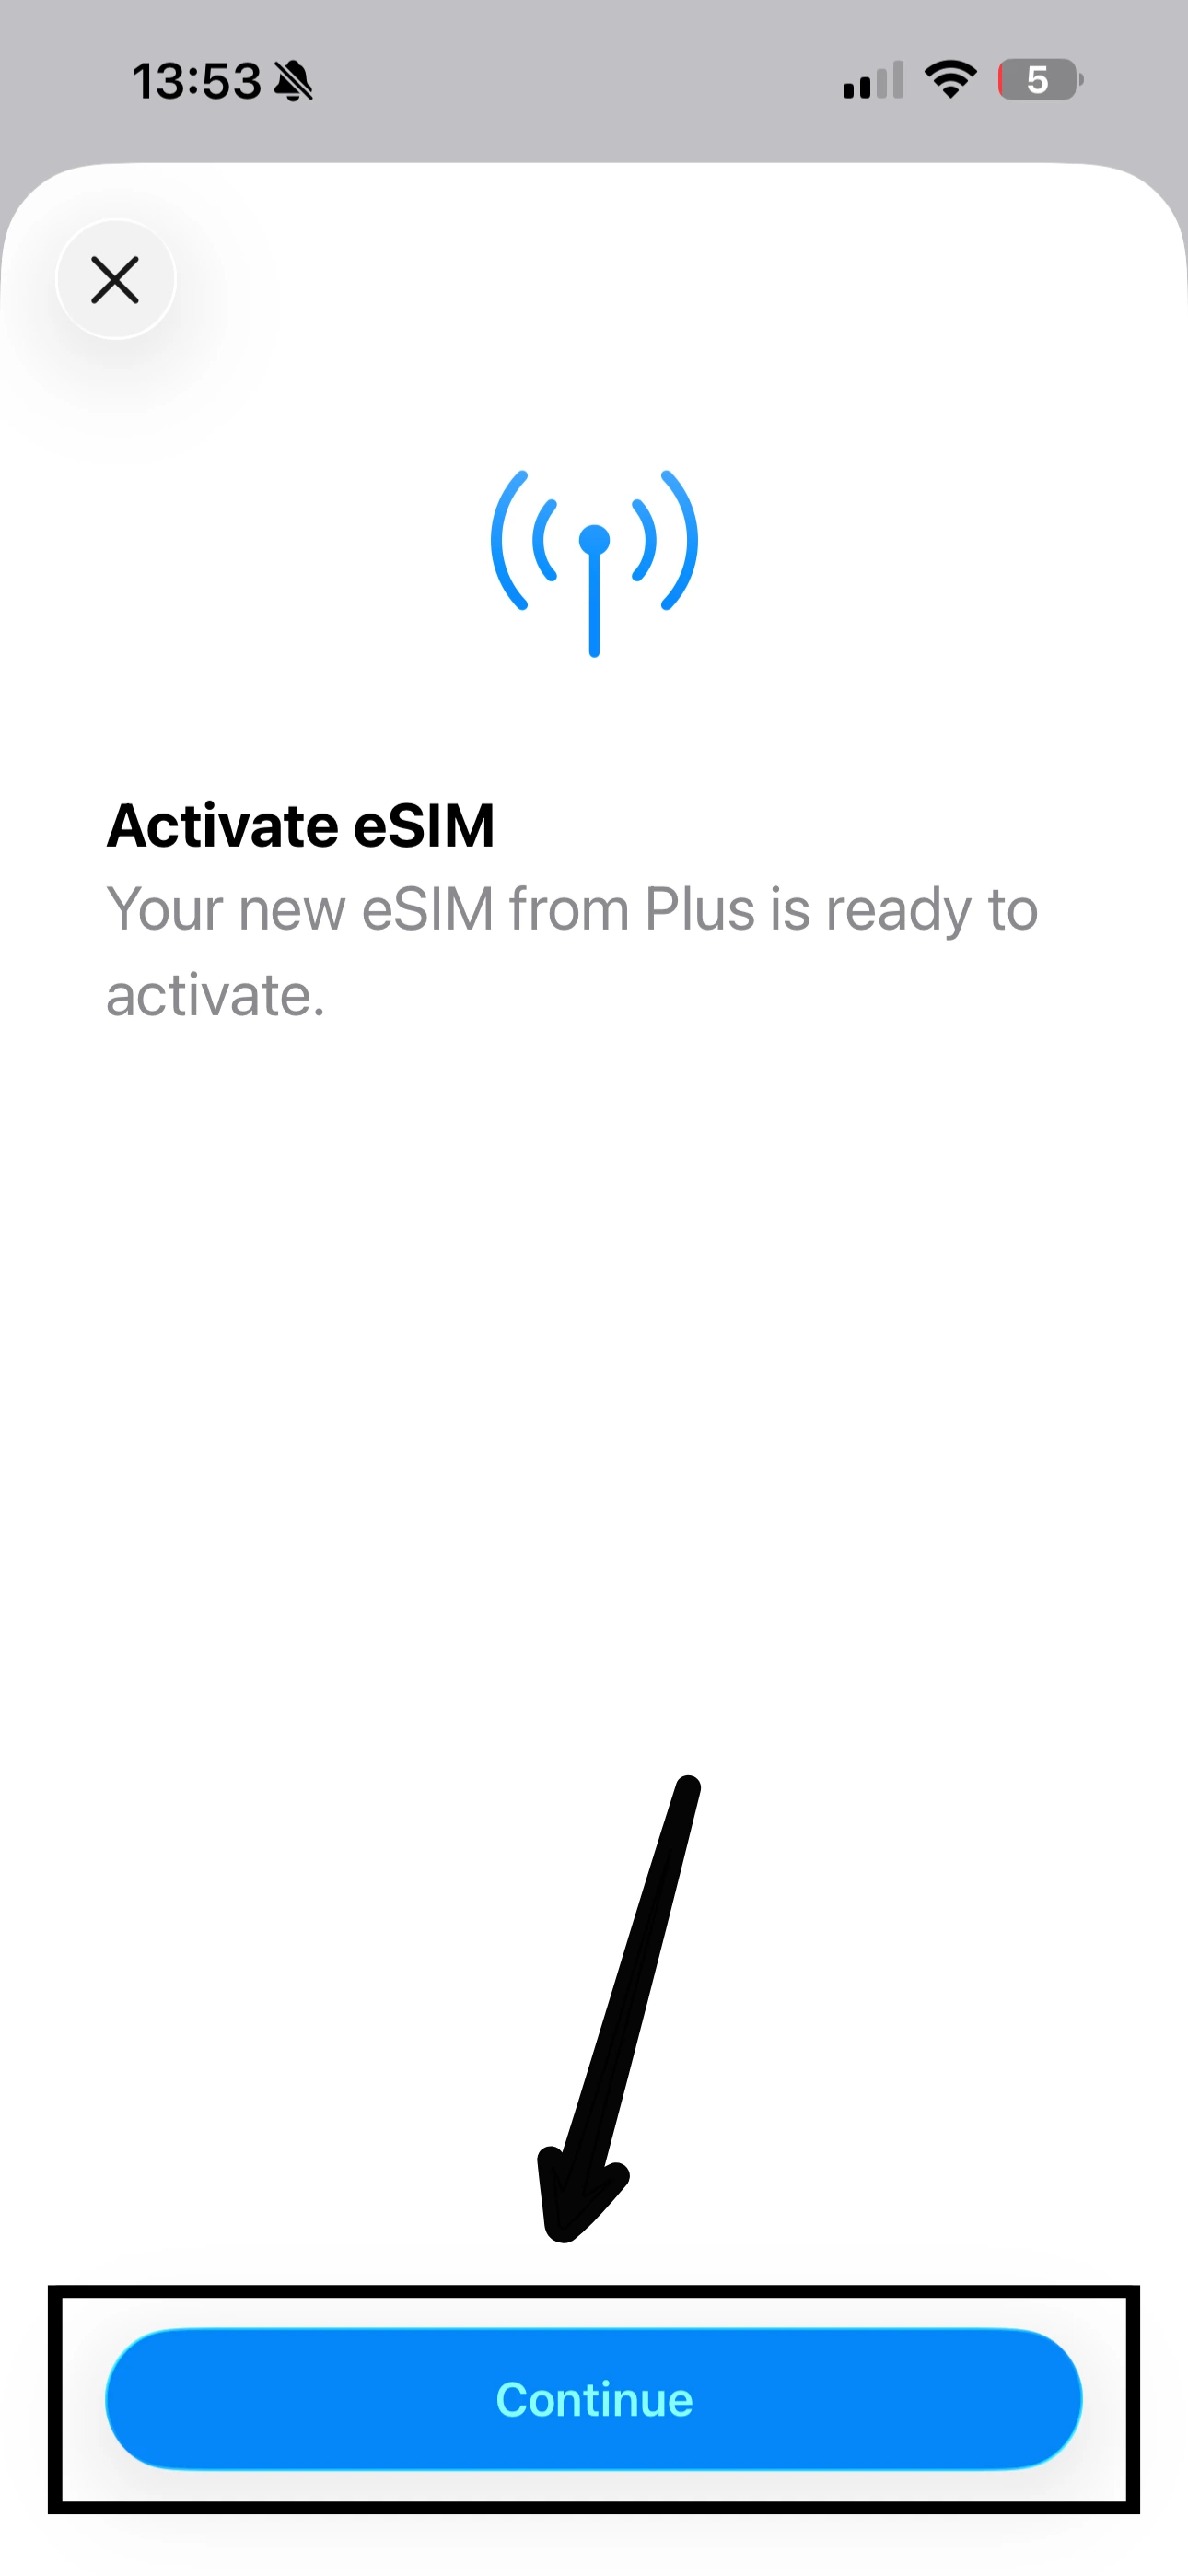
Tap Continue and keep your internet connection on.
Wait a few moments while your iPhone Air completes the activation.
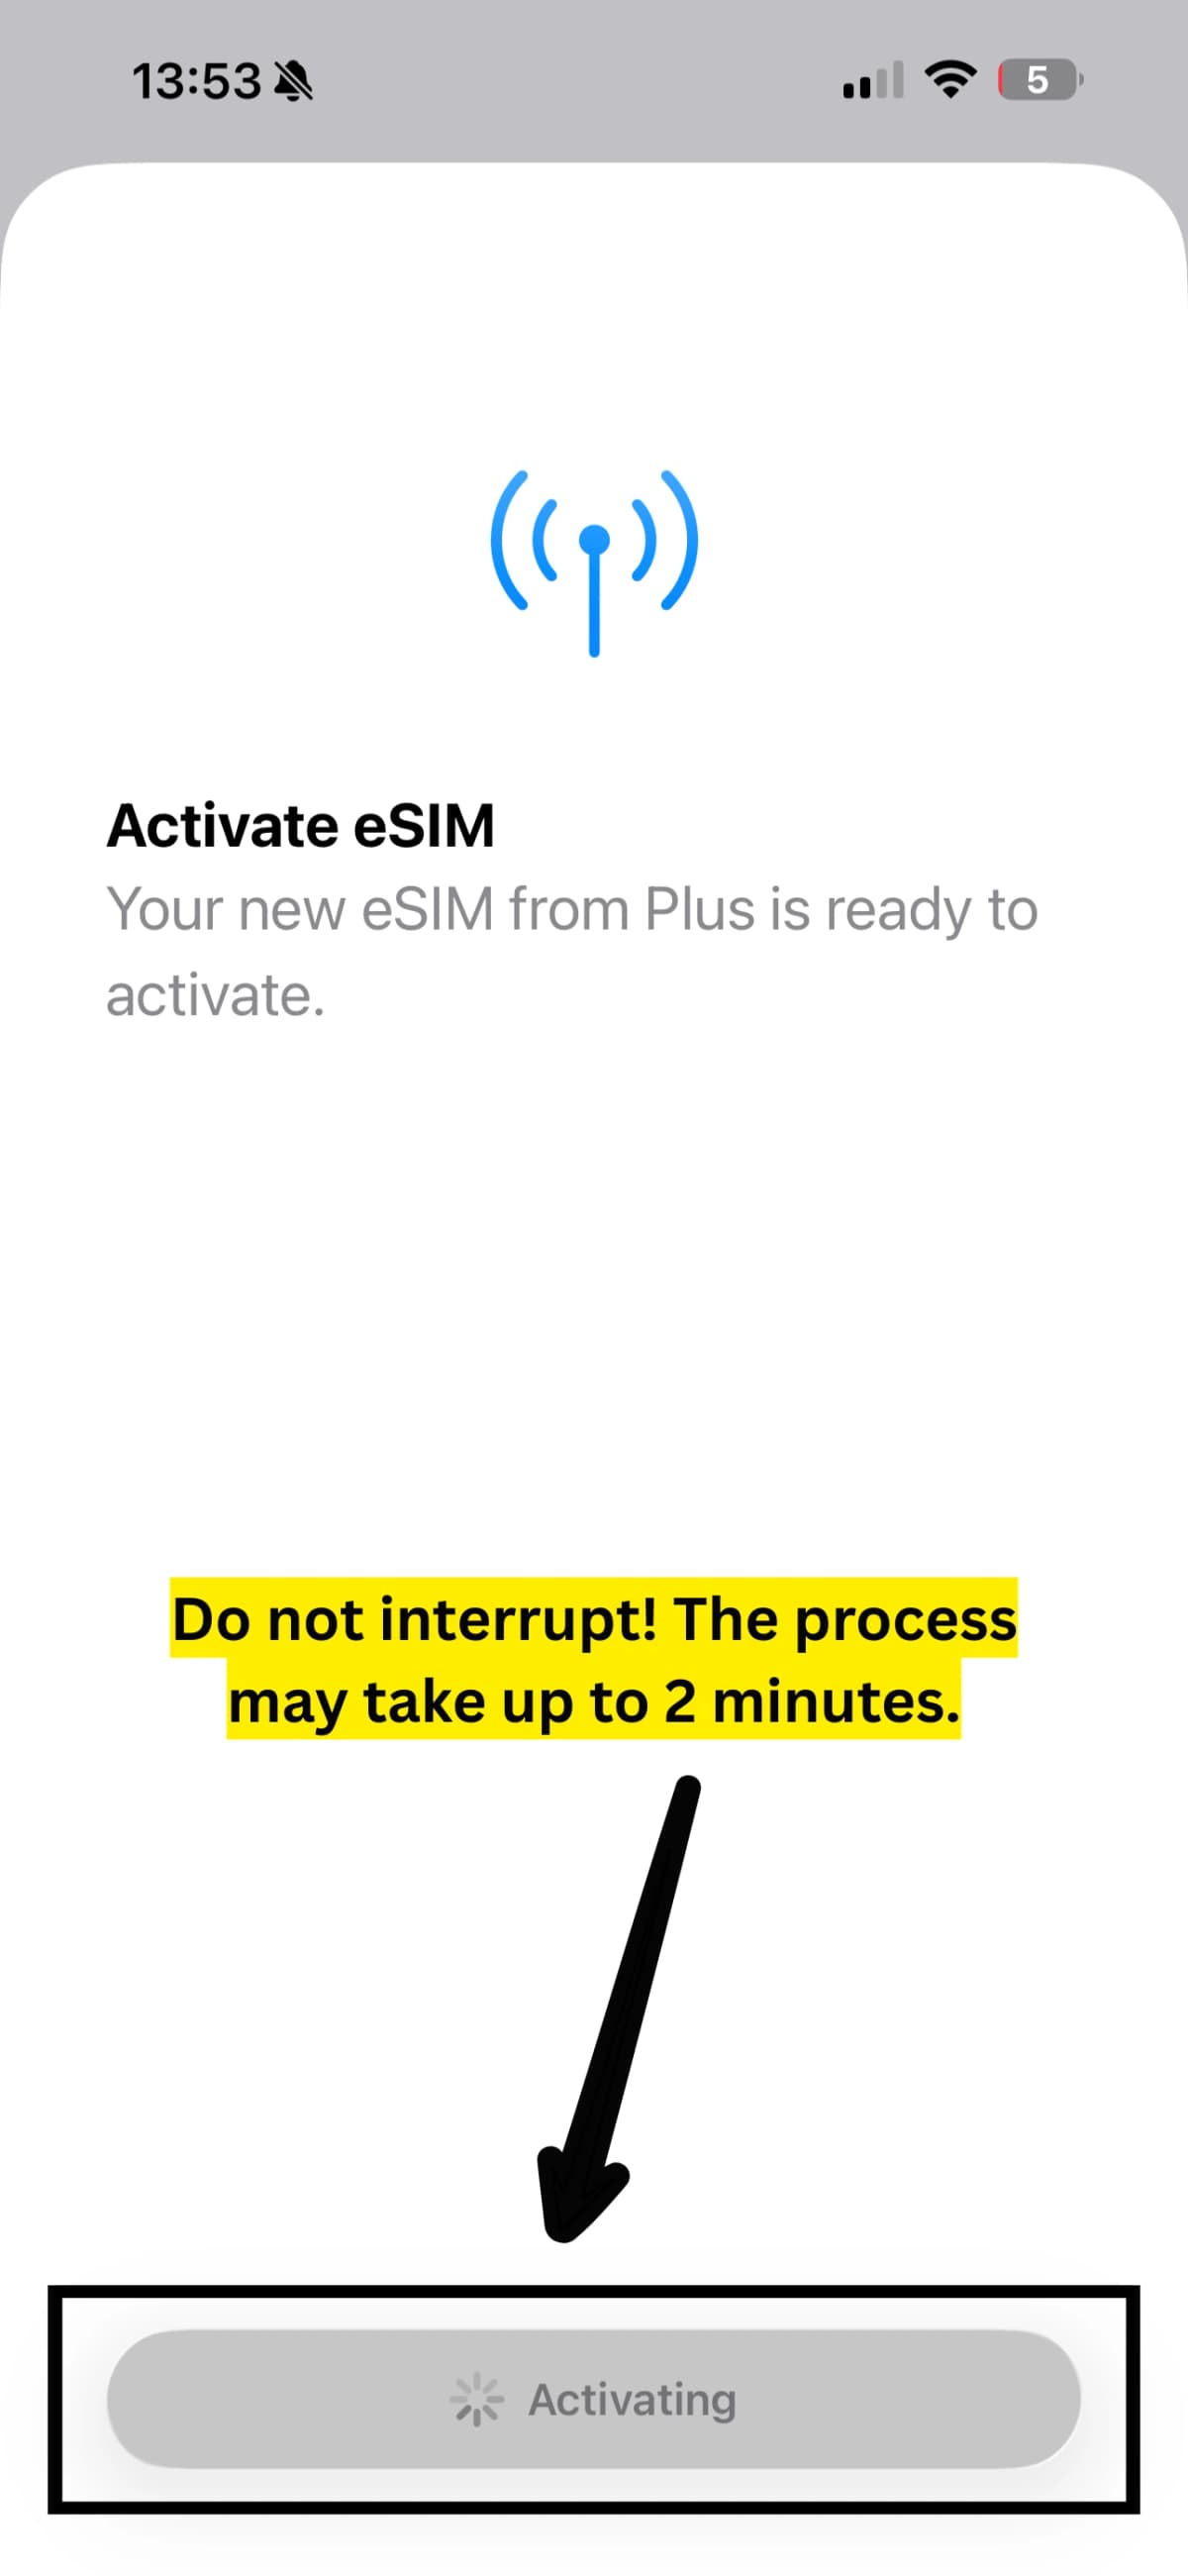
You'll see a confirmation — the eSIM is now on your phone.
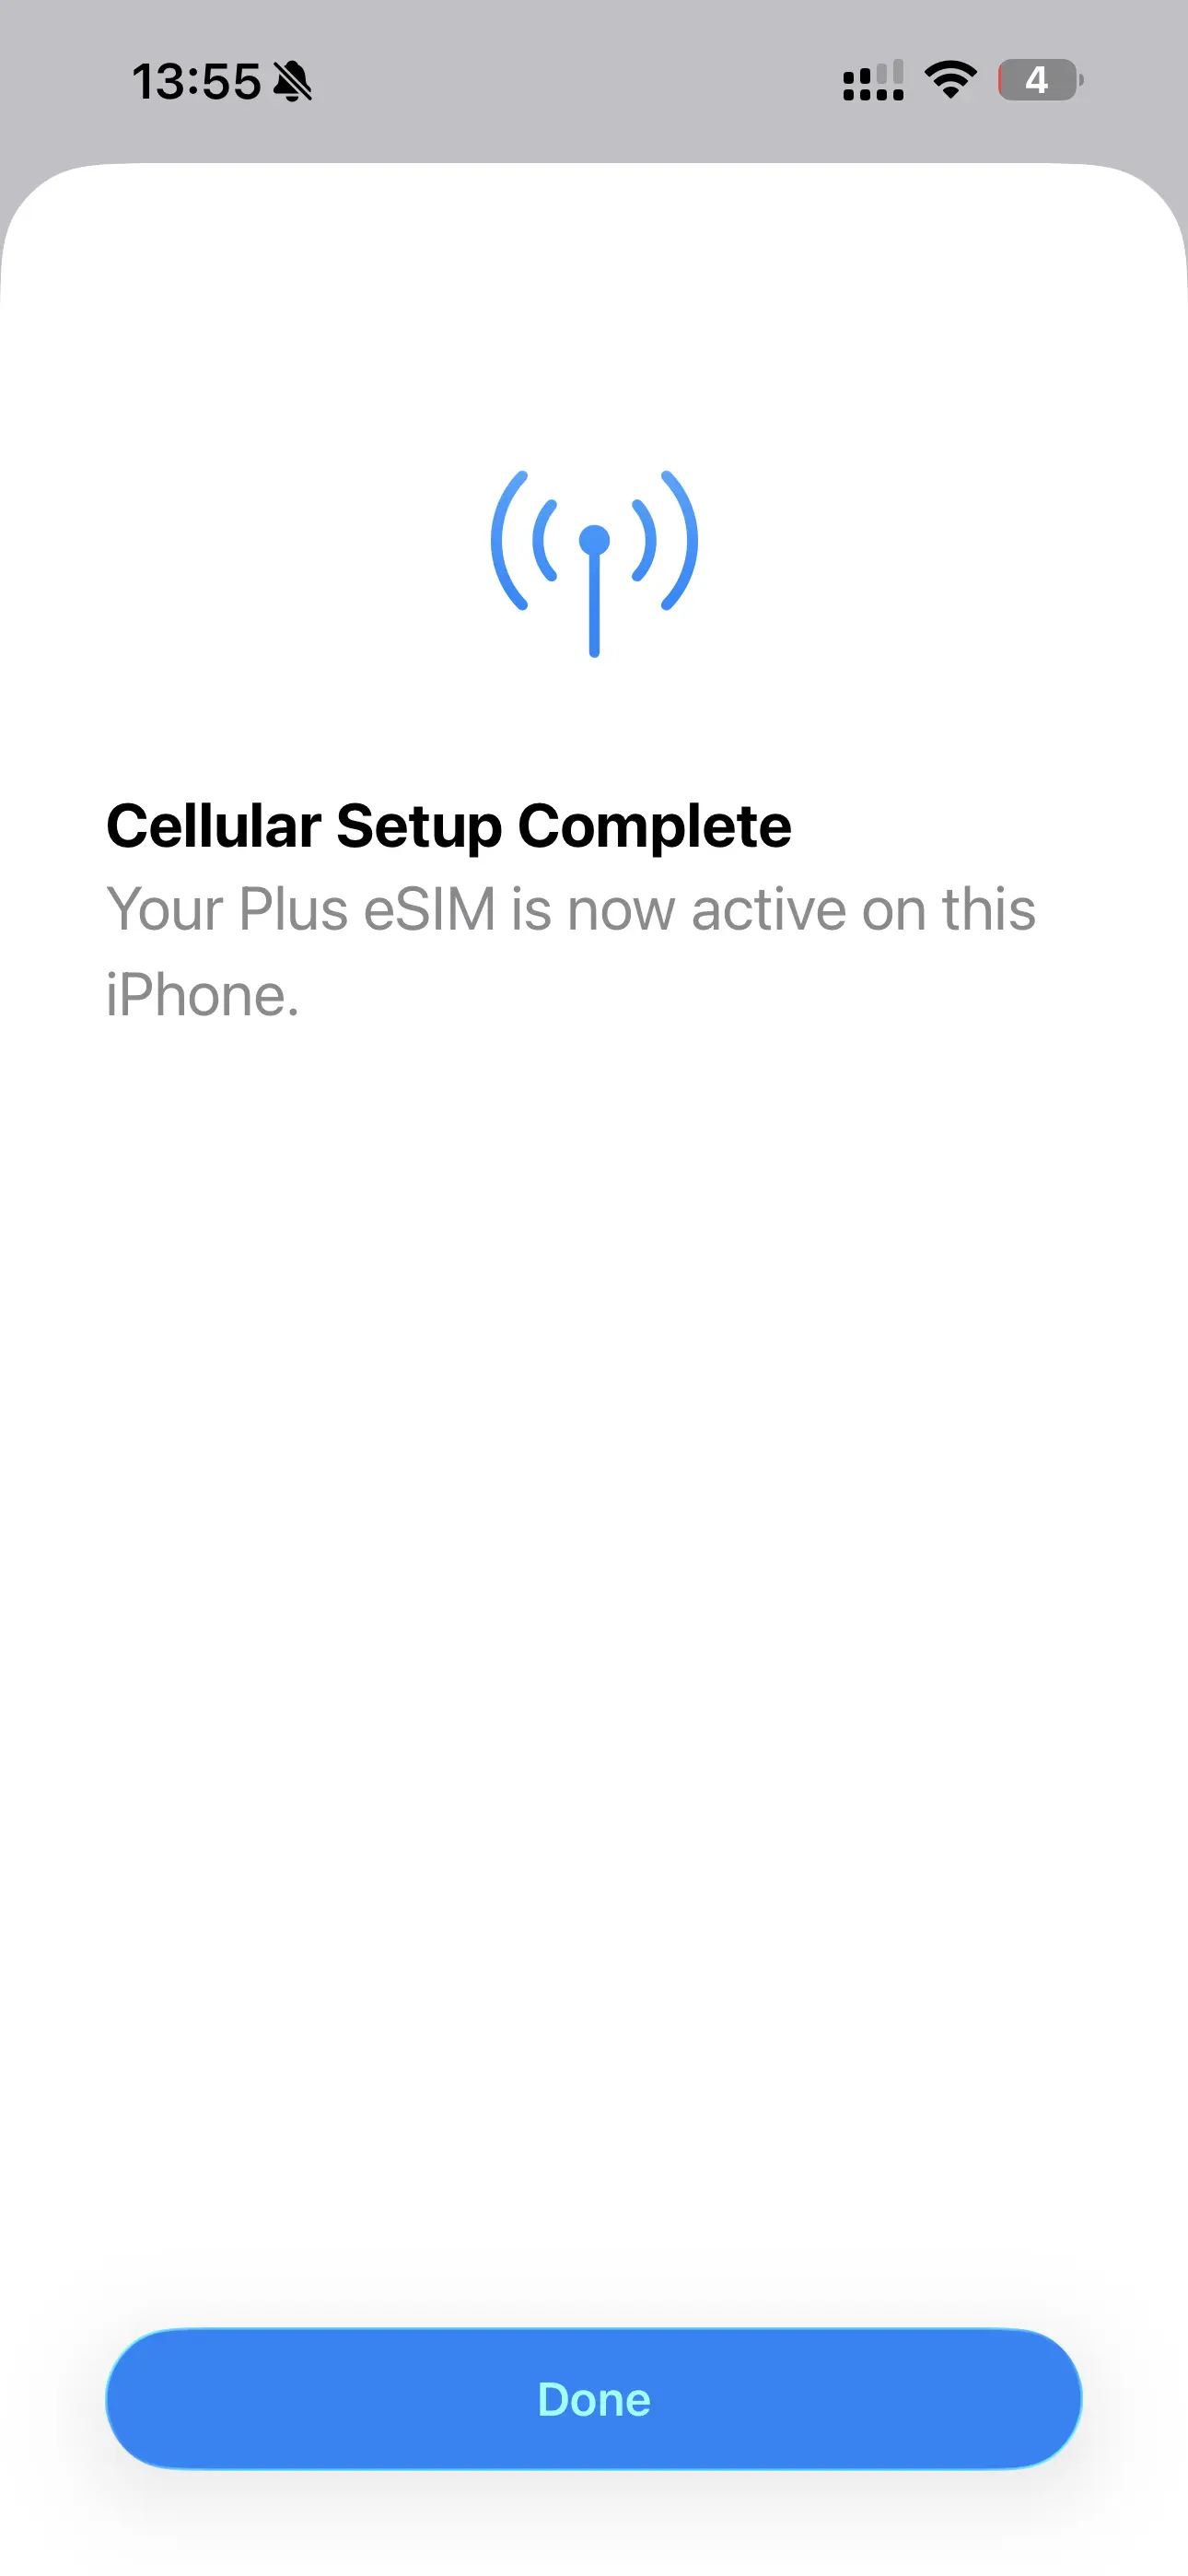
Tap the label field to give your new eSIM a clear name.
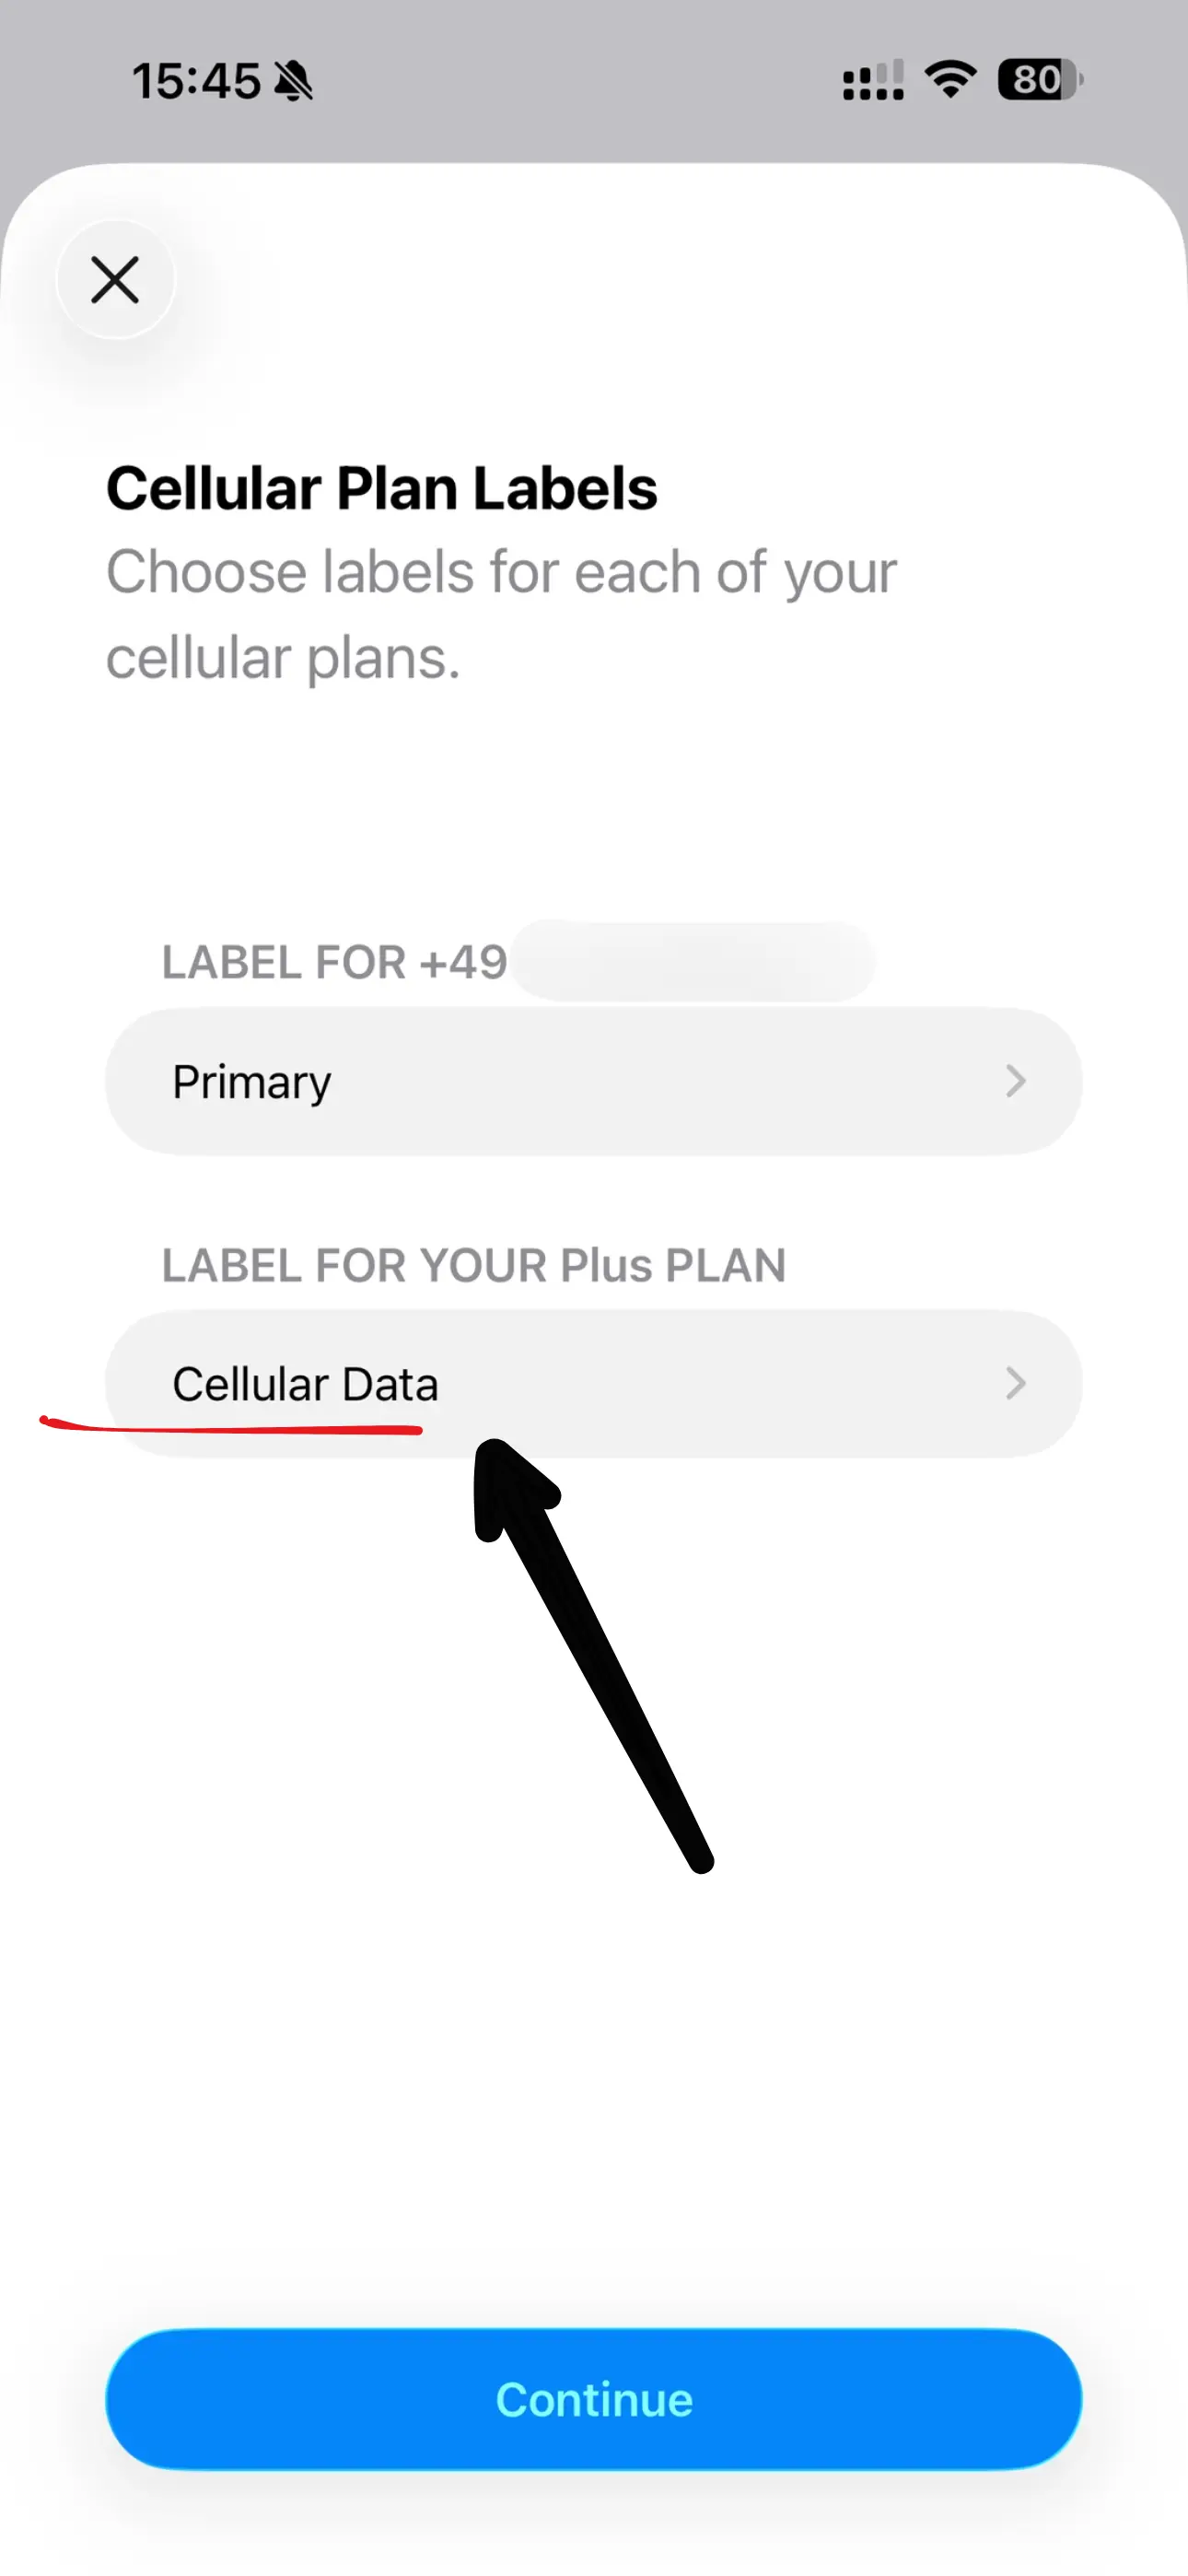
We recommend the name eSIMFOX so you can always tell it apart from your main line.
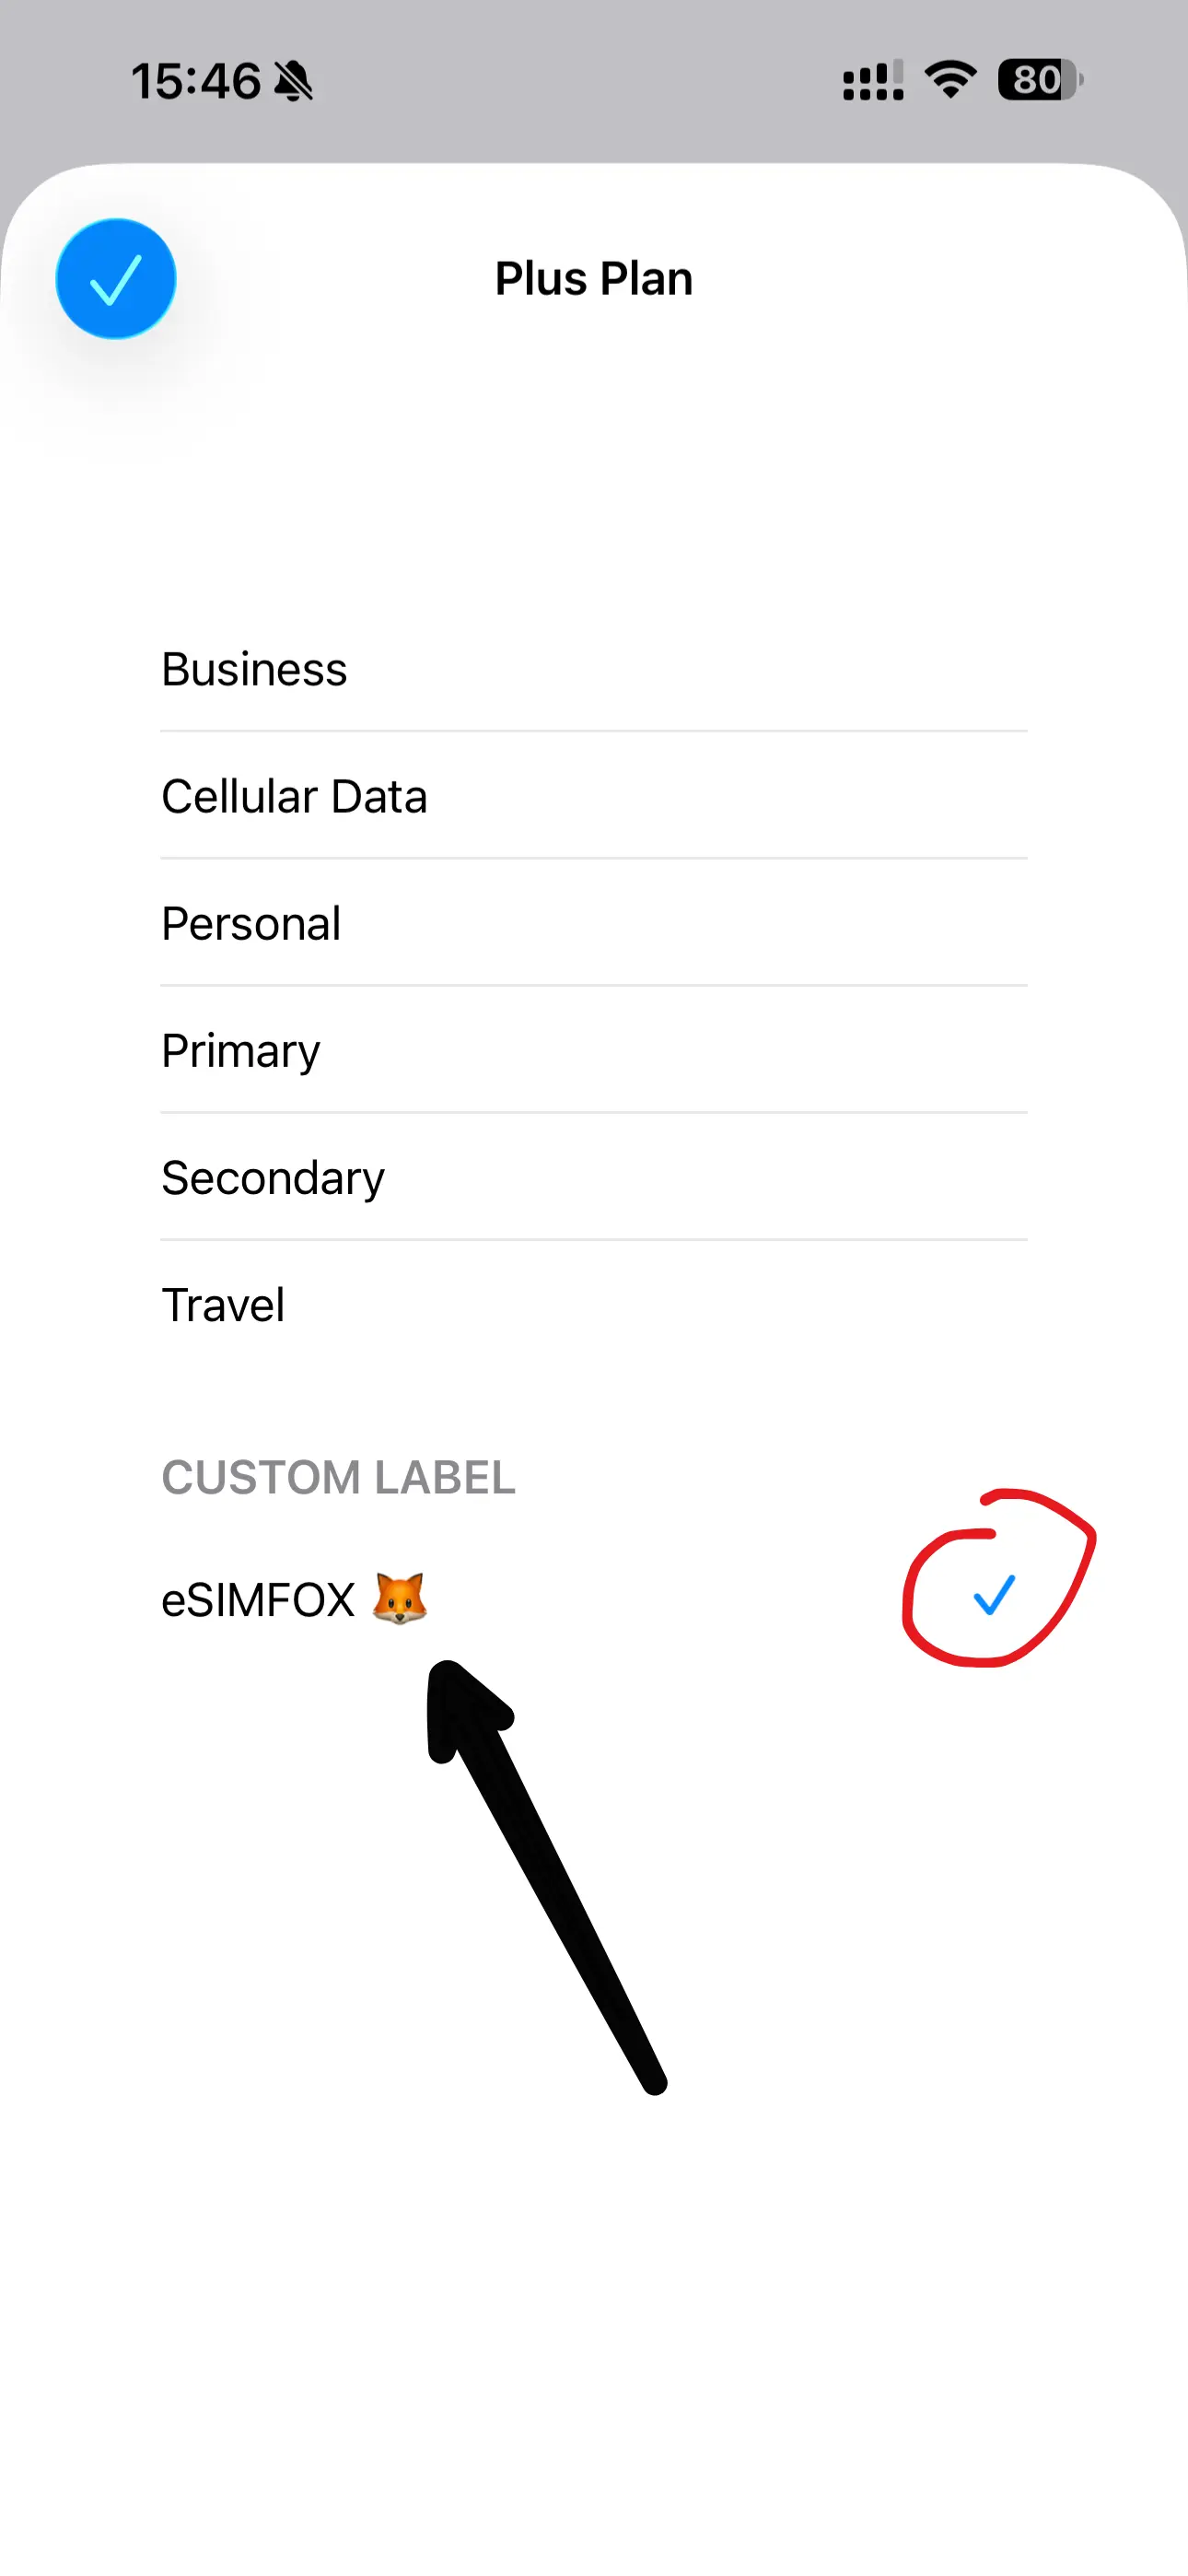
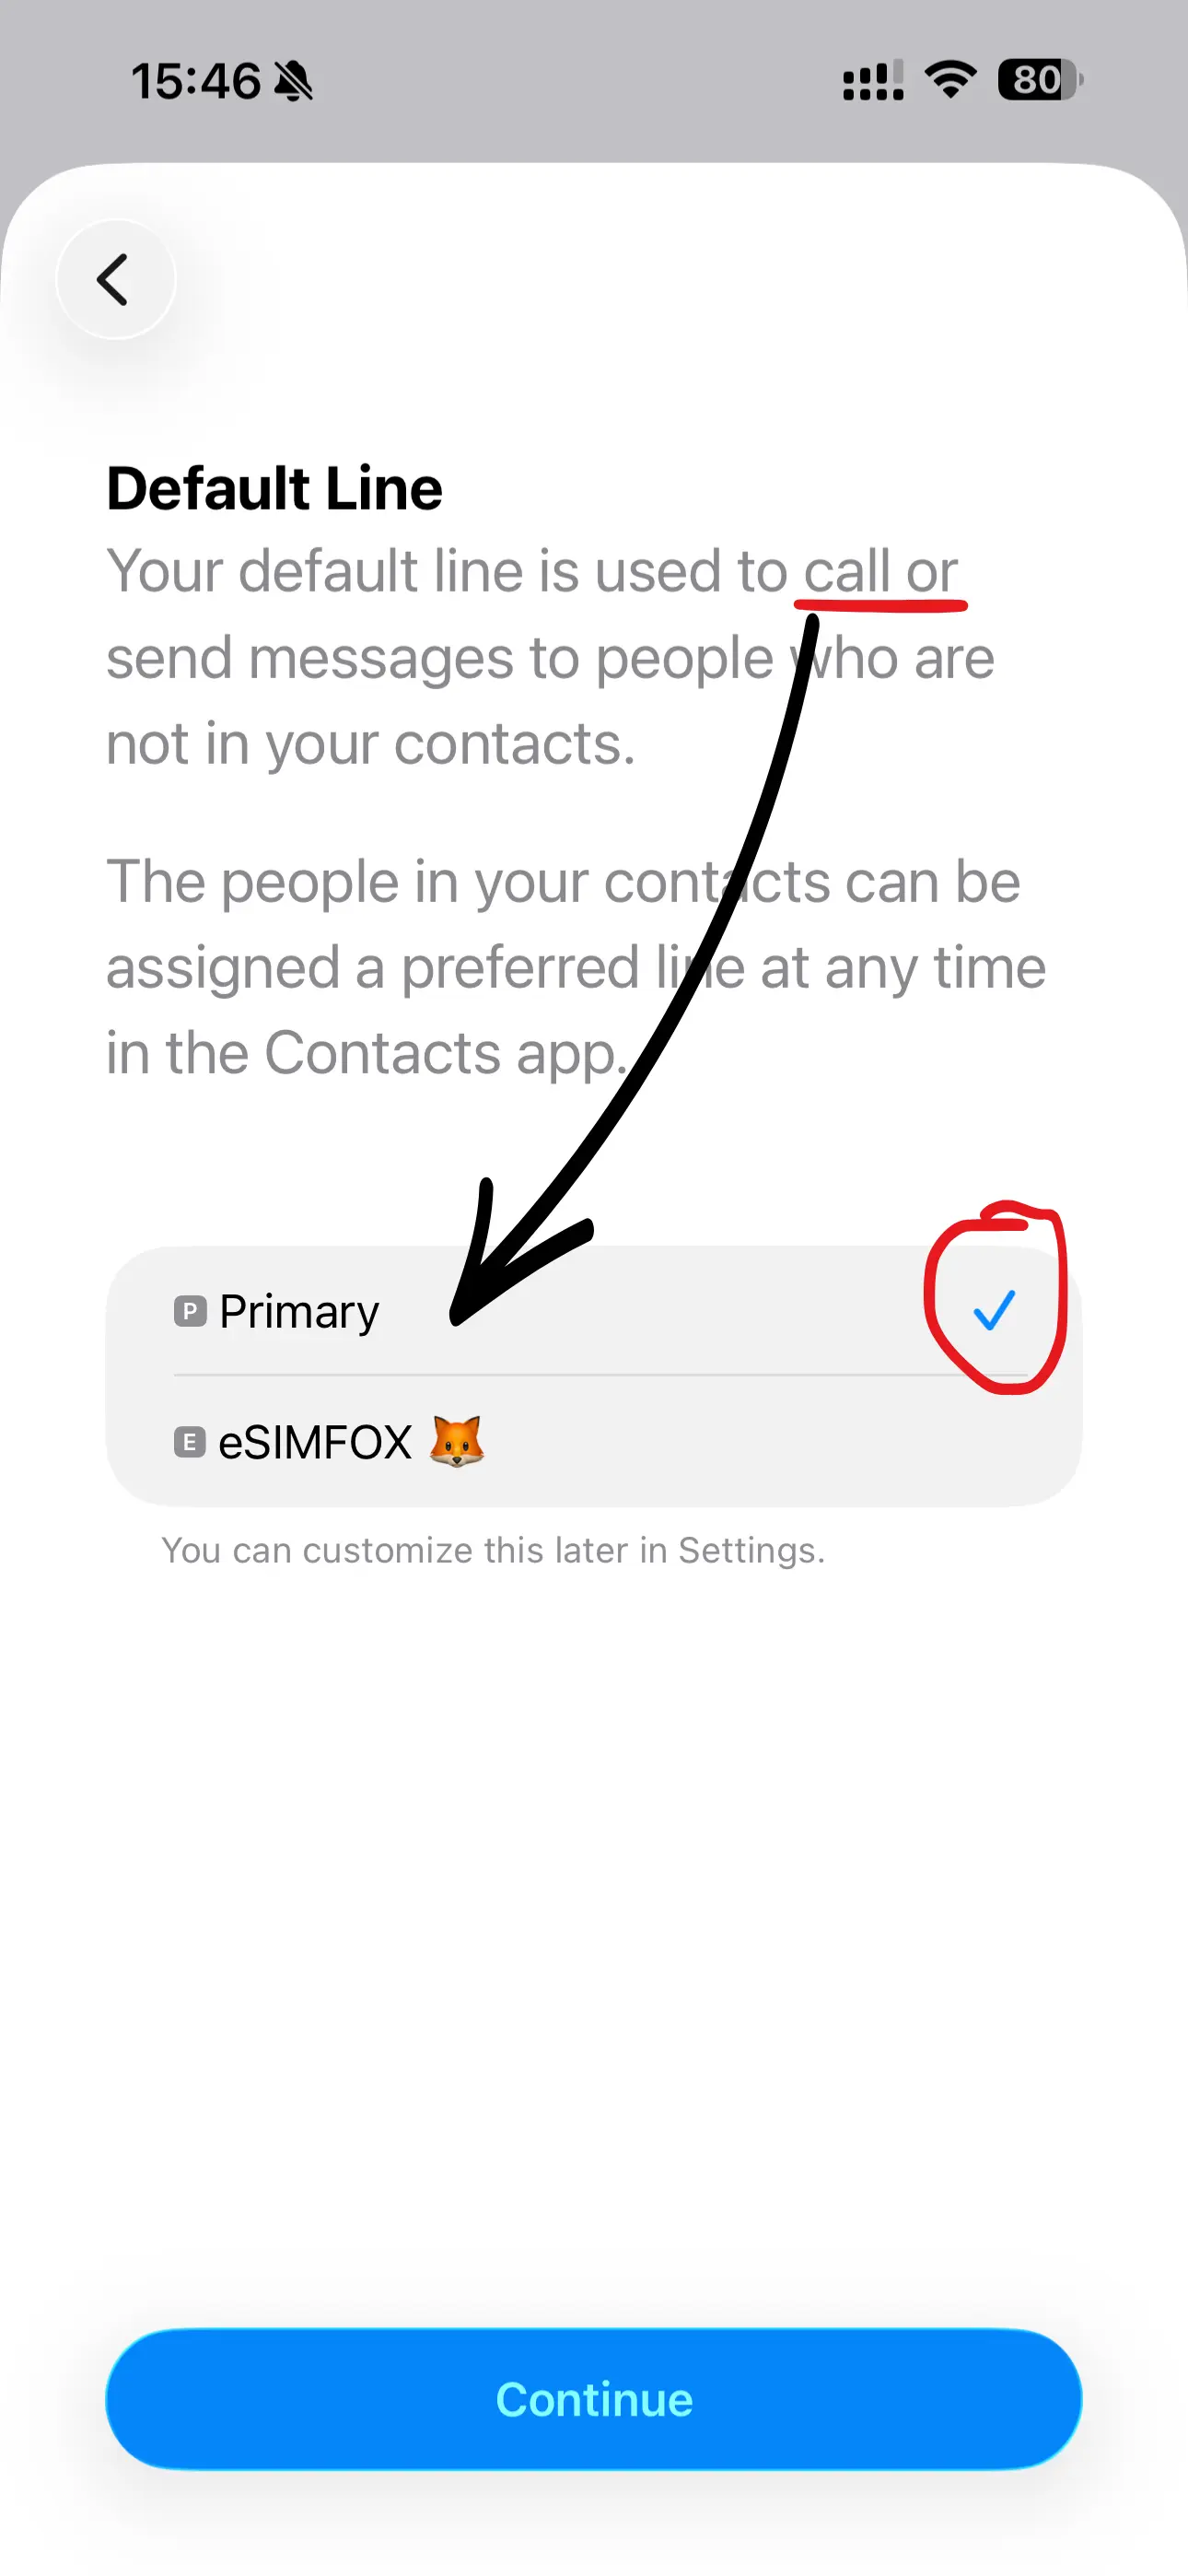
When asked for your default line for calls, keep your Primary line.
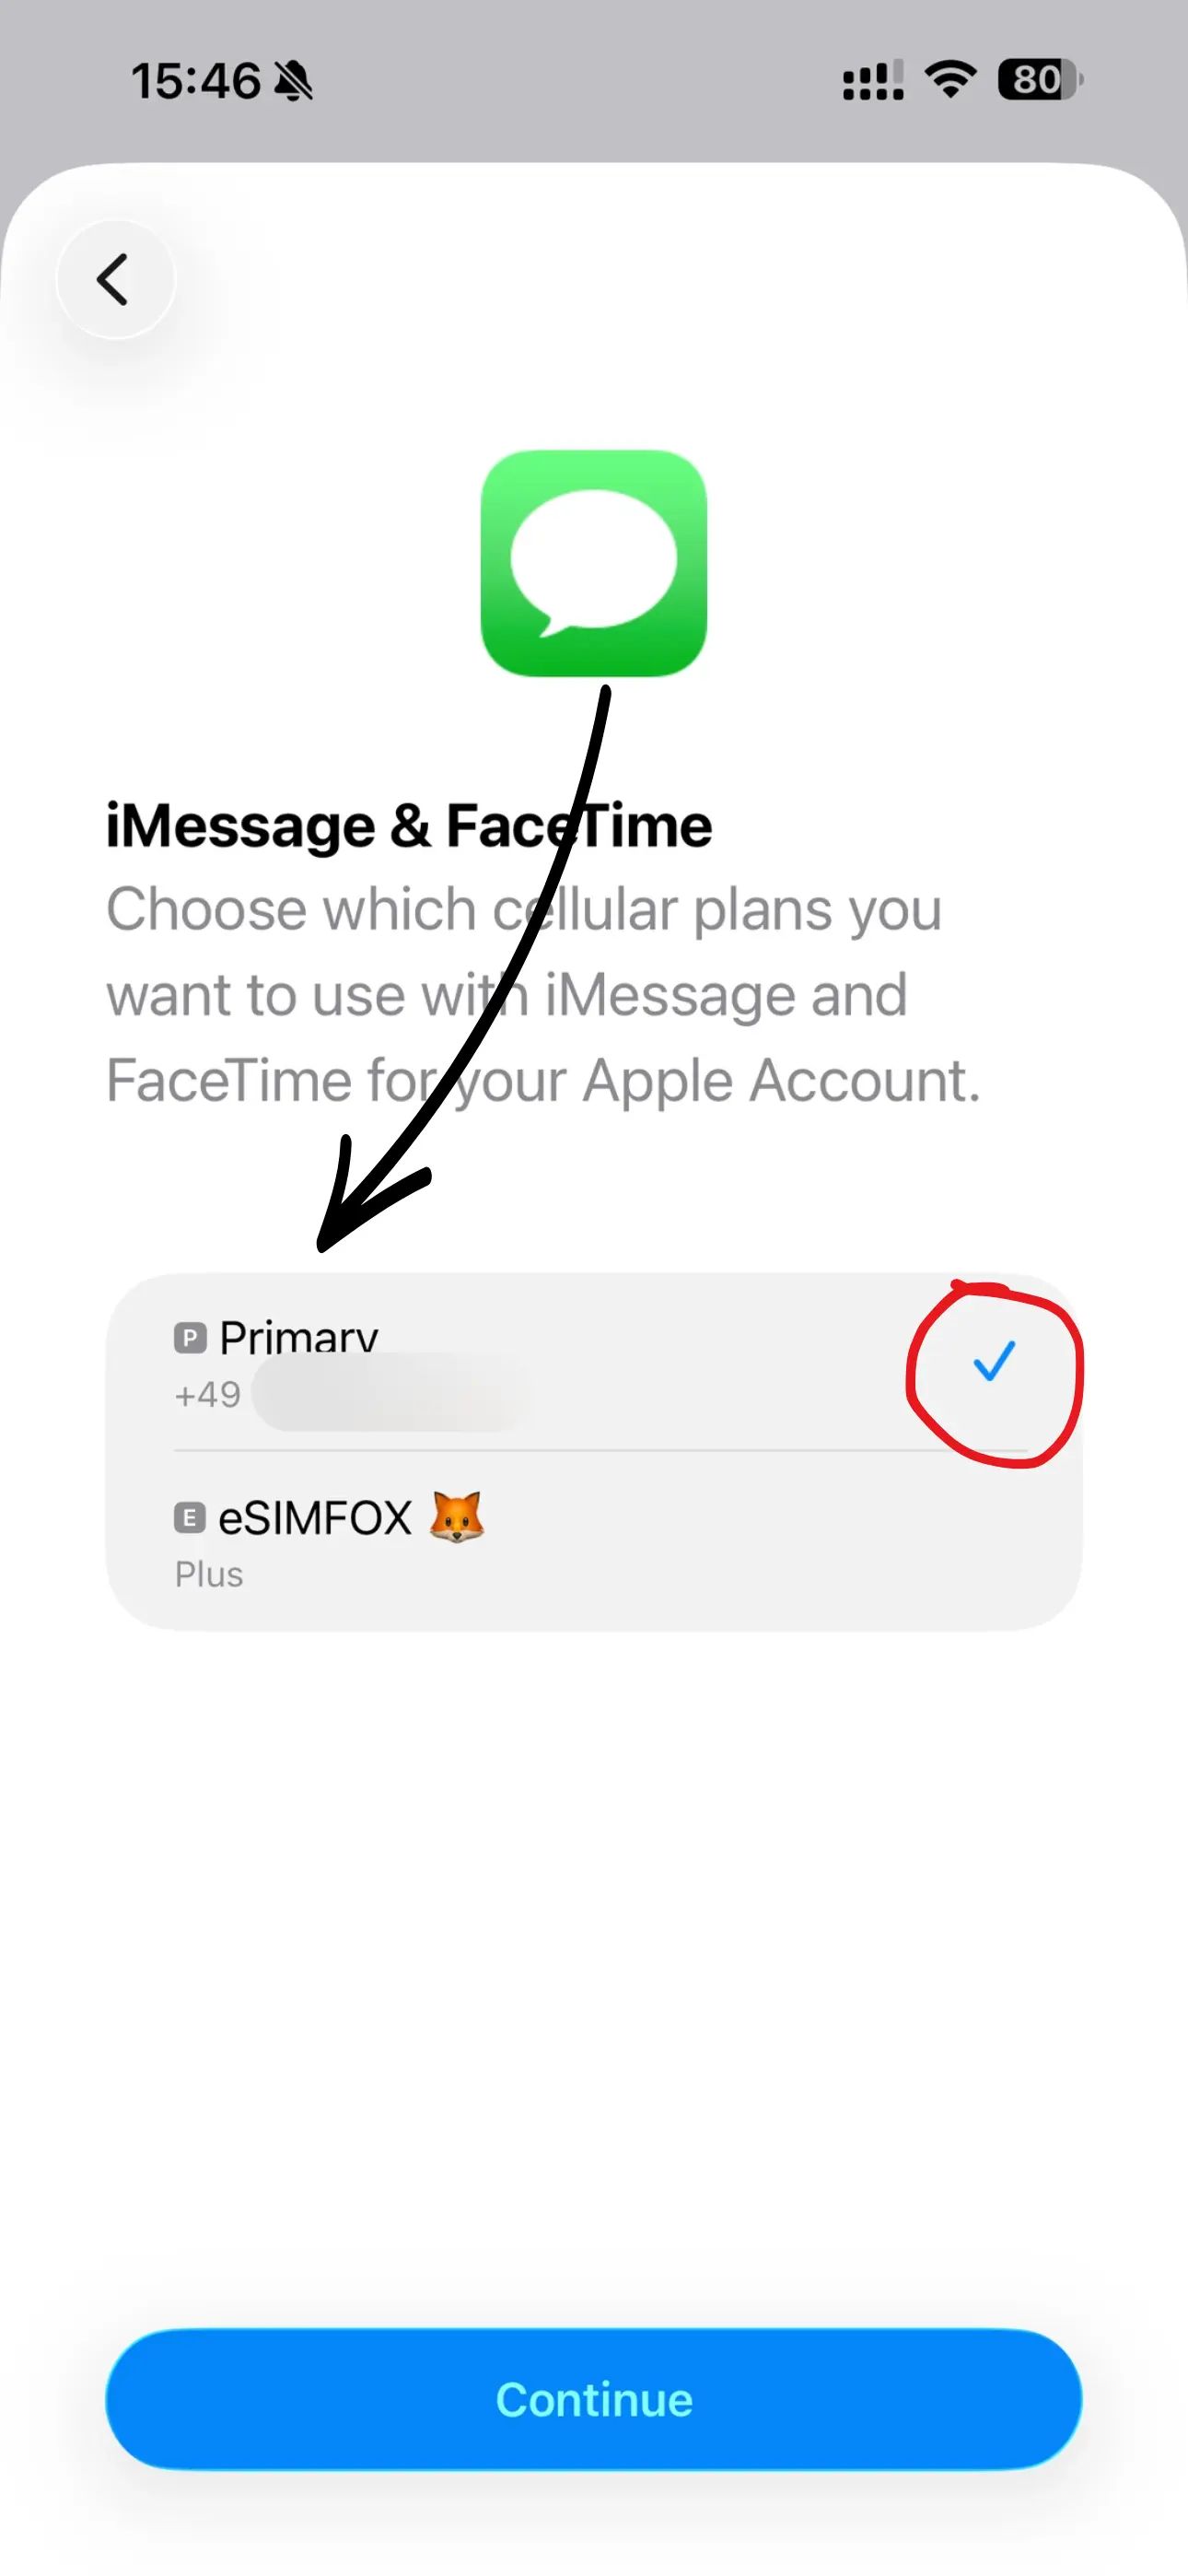
Keep Primary selected for iMessage and FaceTime — they stay on your usual number.
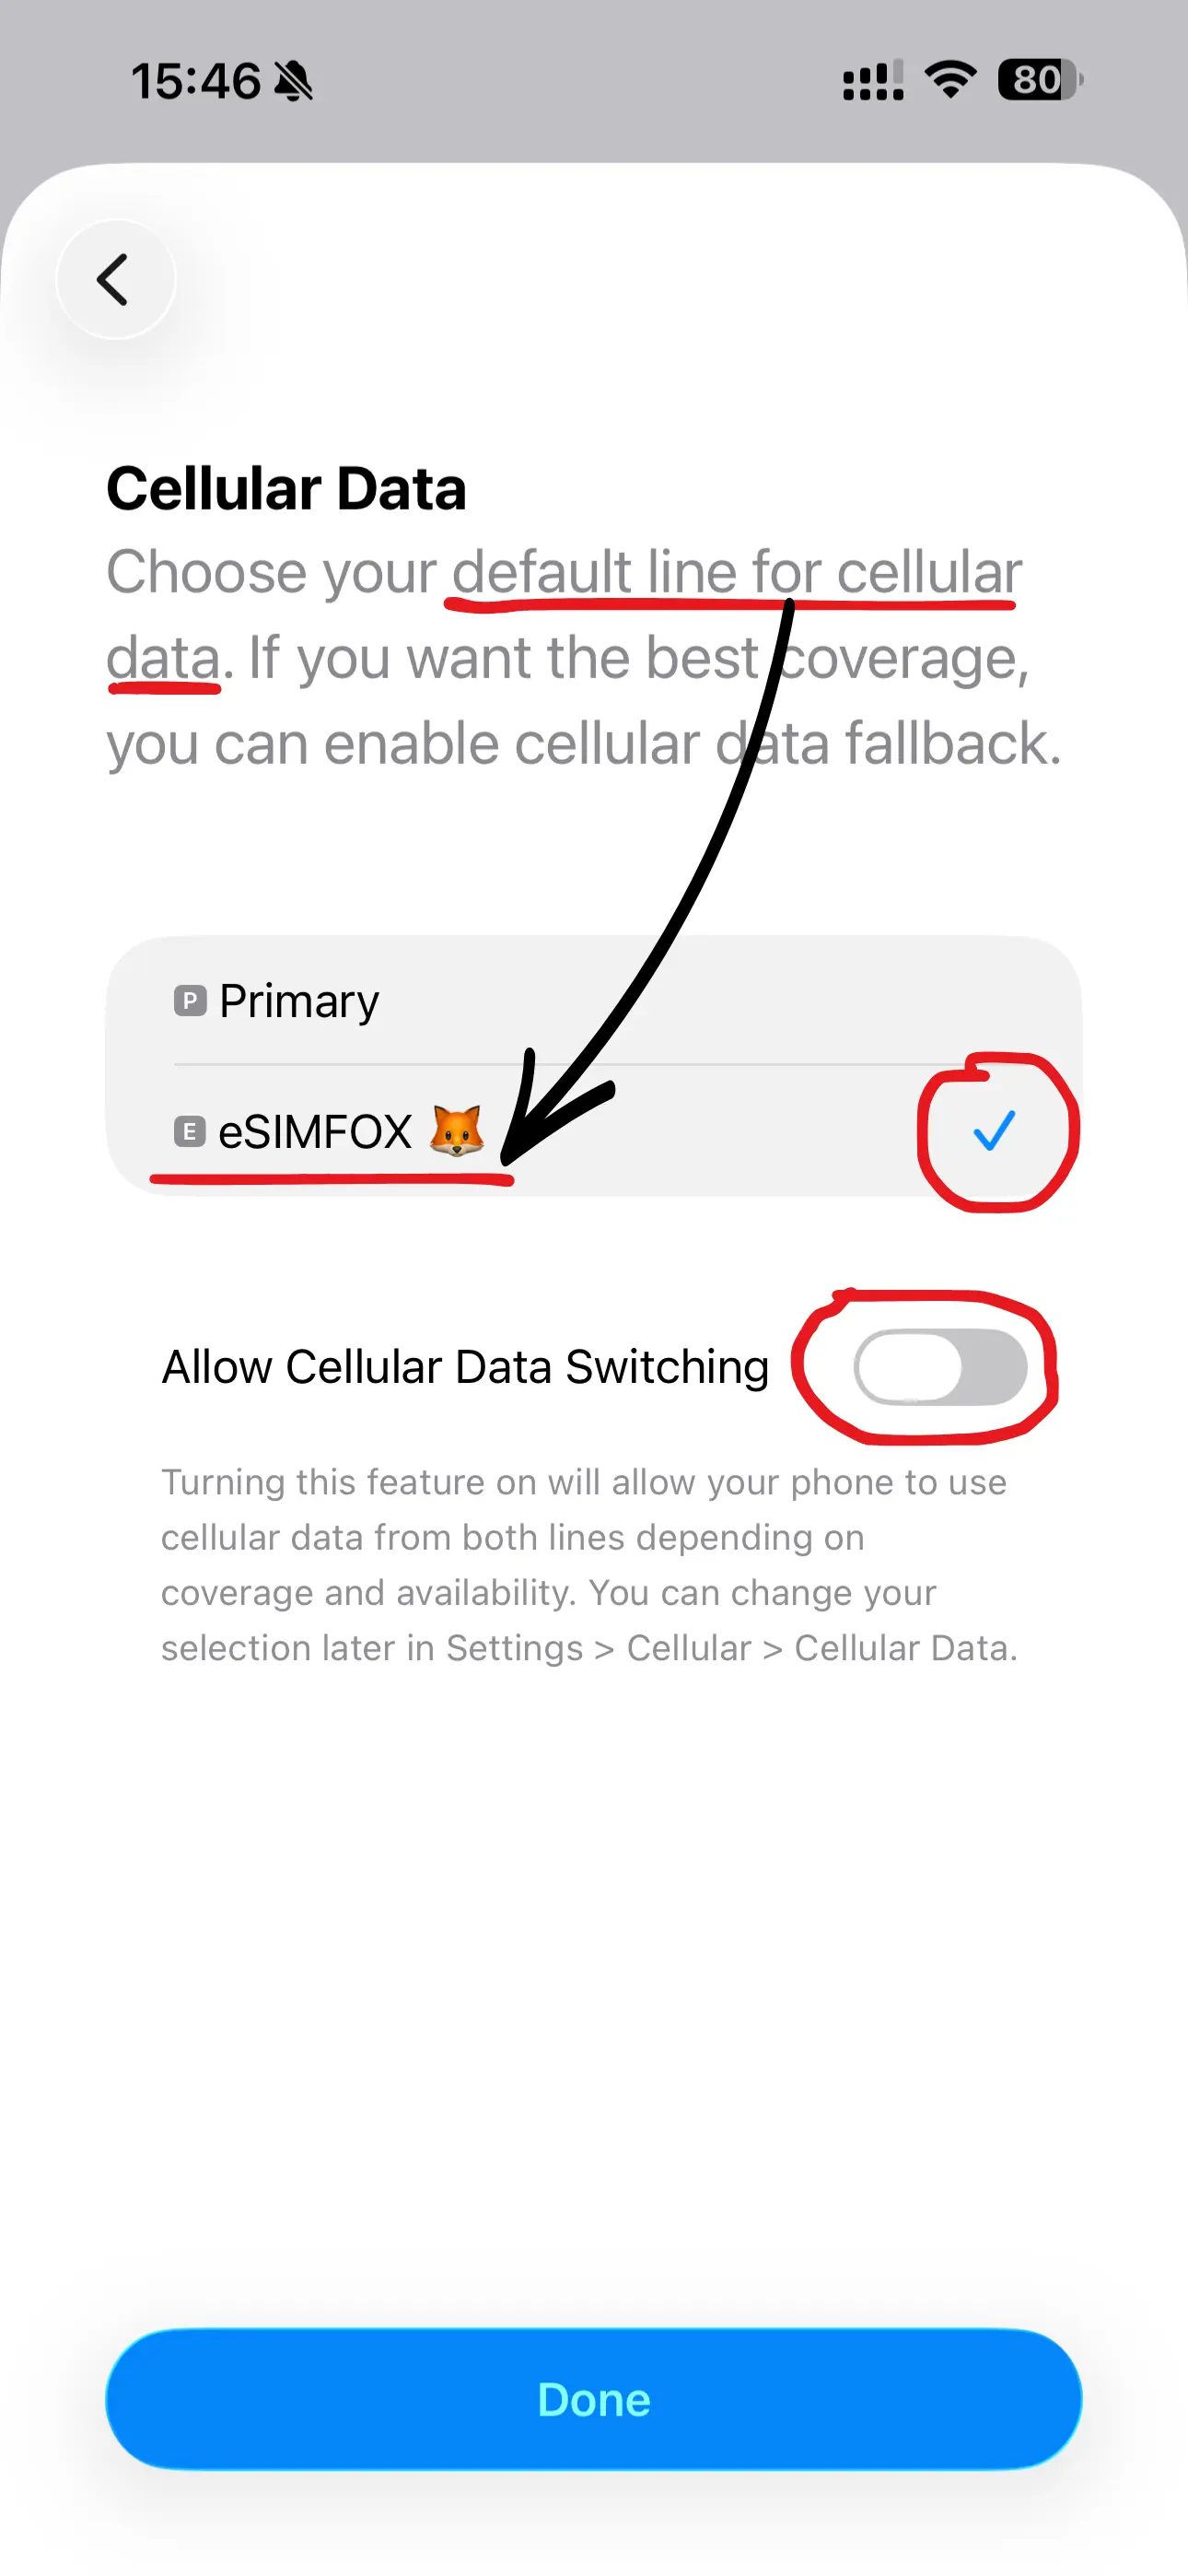
Select your eSIMFOX line for mobile data. Allow Mobile Data Switching must be OFF.
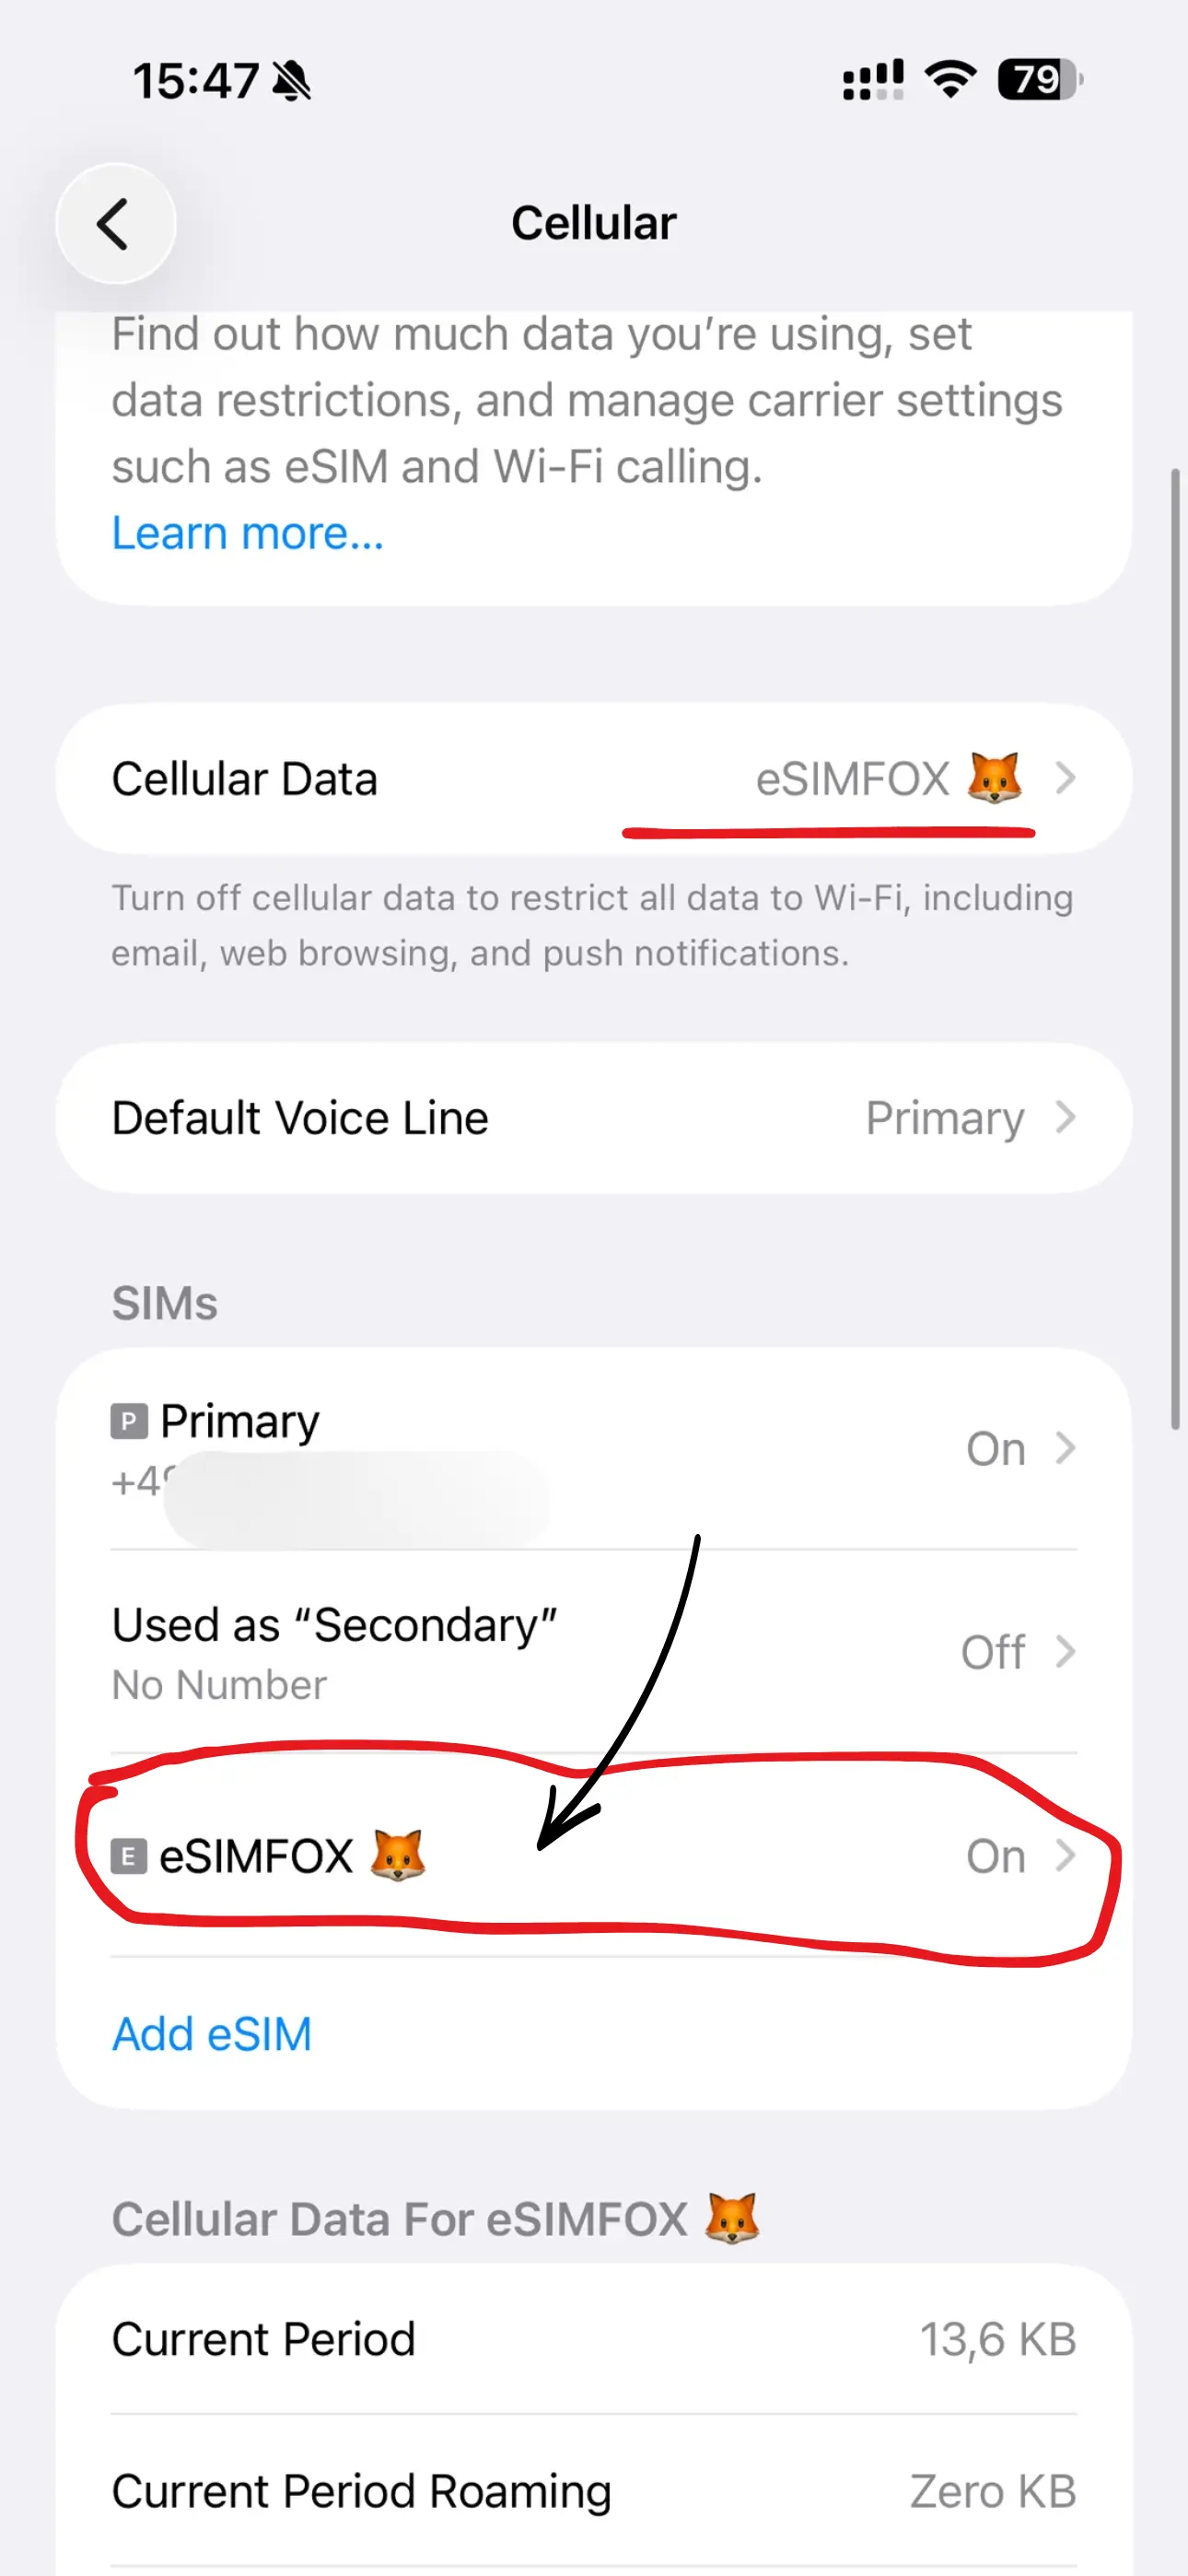
Under Mobile Data the eSIM should now be selected as the line. Then open the eSIM tab — usually listed under your phone number.
Switch Data Roaming on for the eSIM. Travel eSIMs need it — it doesn't cost extra.
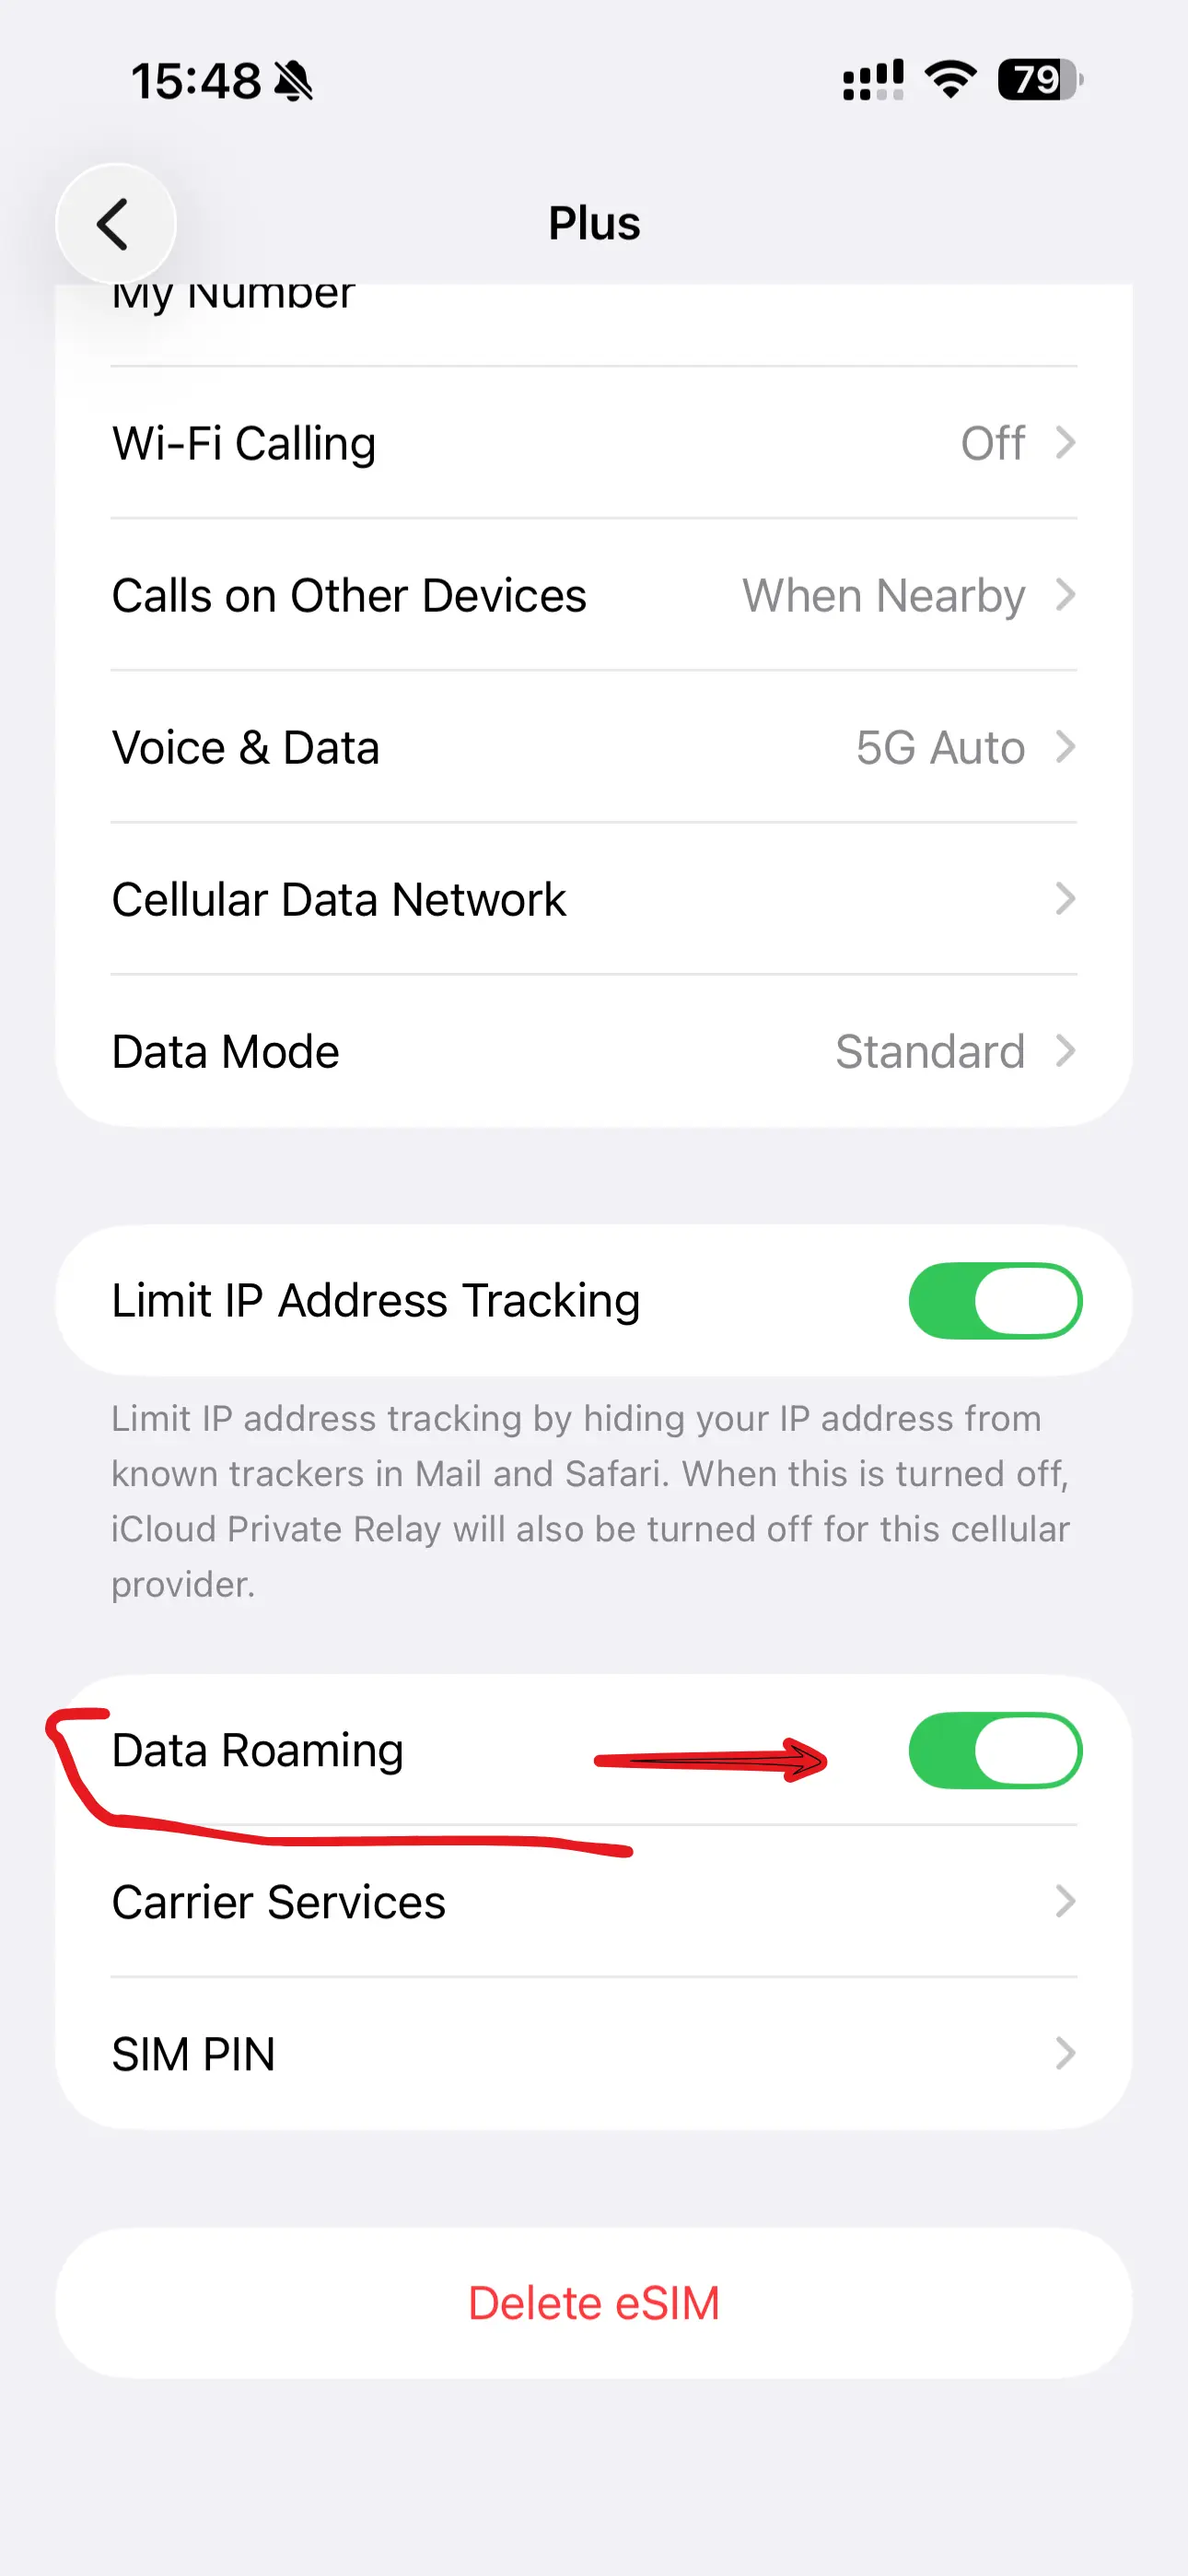
In Voice & Data, choose Allow 5G for the fastest connection.
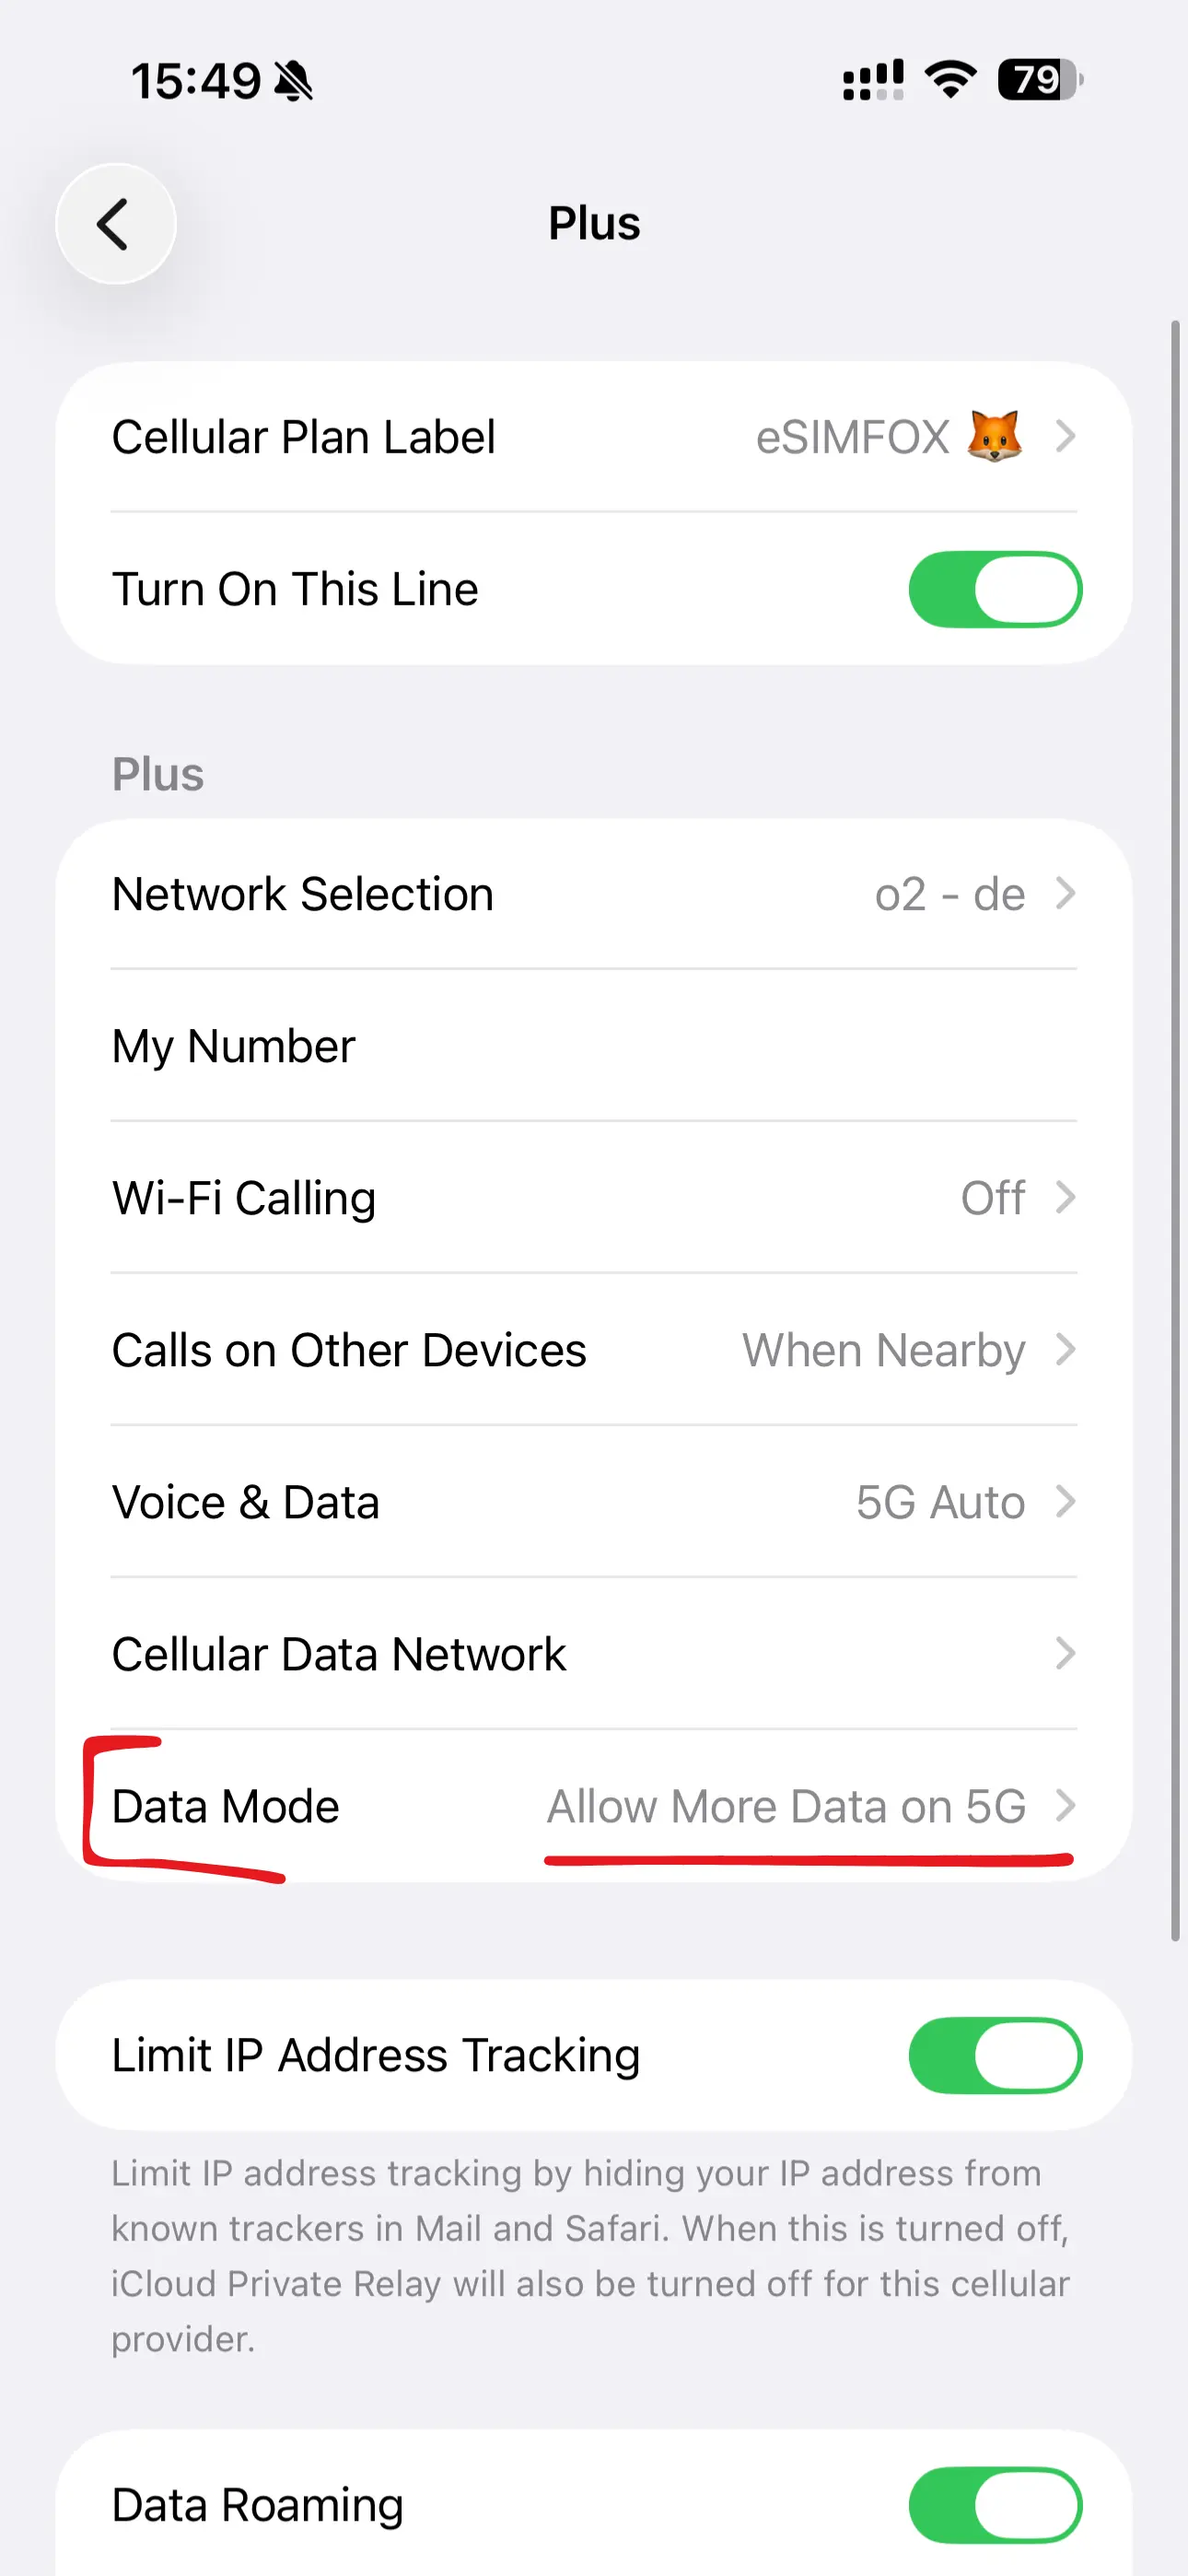
That's it! Under Roaming (current period) you can check your data usage any time. The plan starts on first connection in your destination.
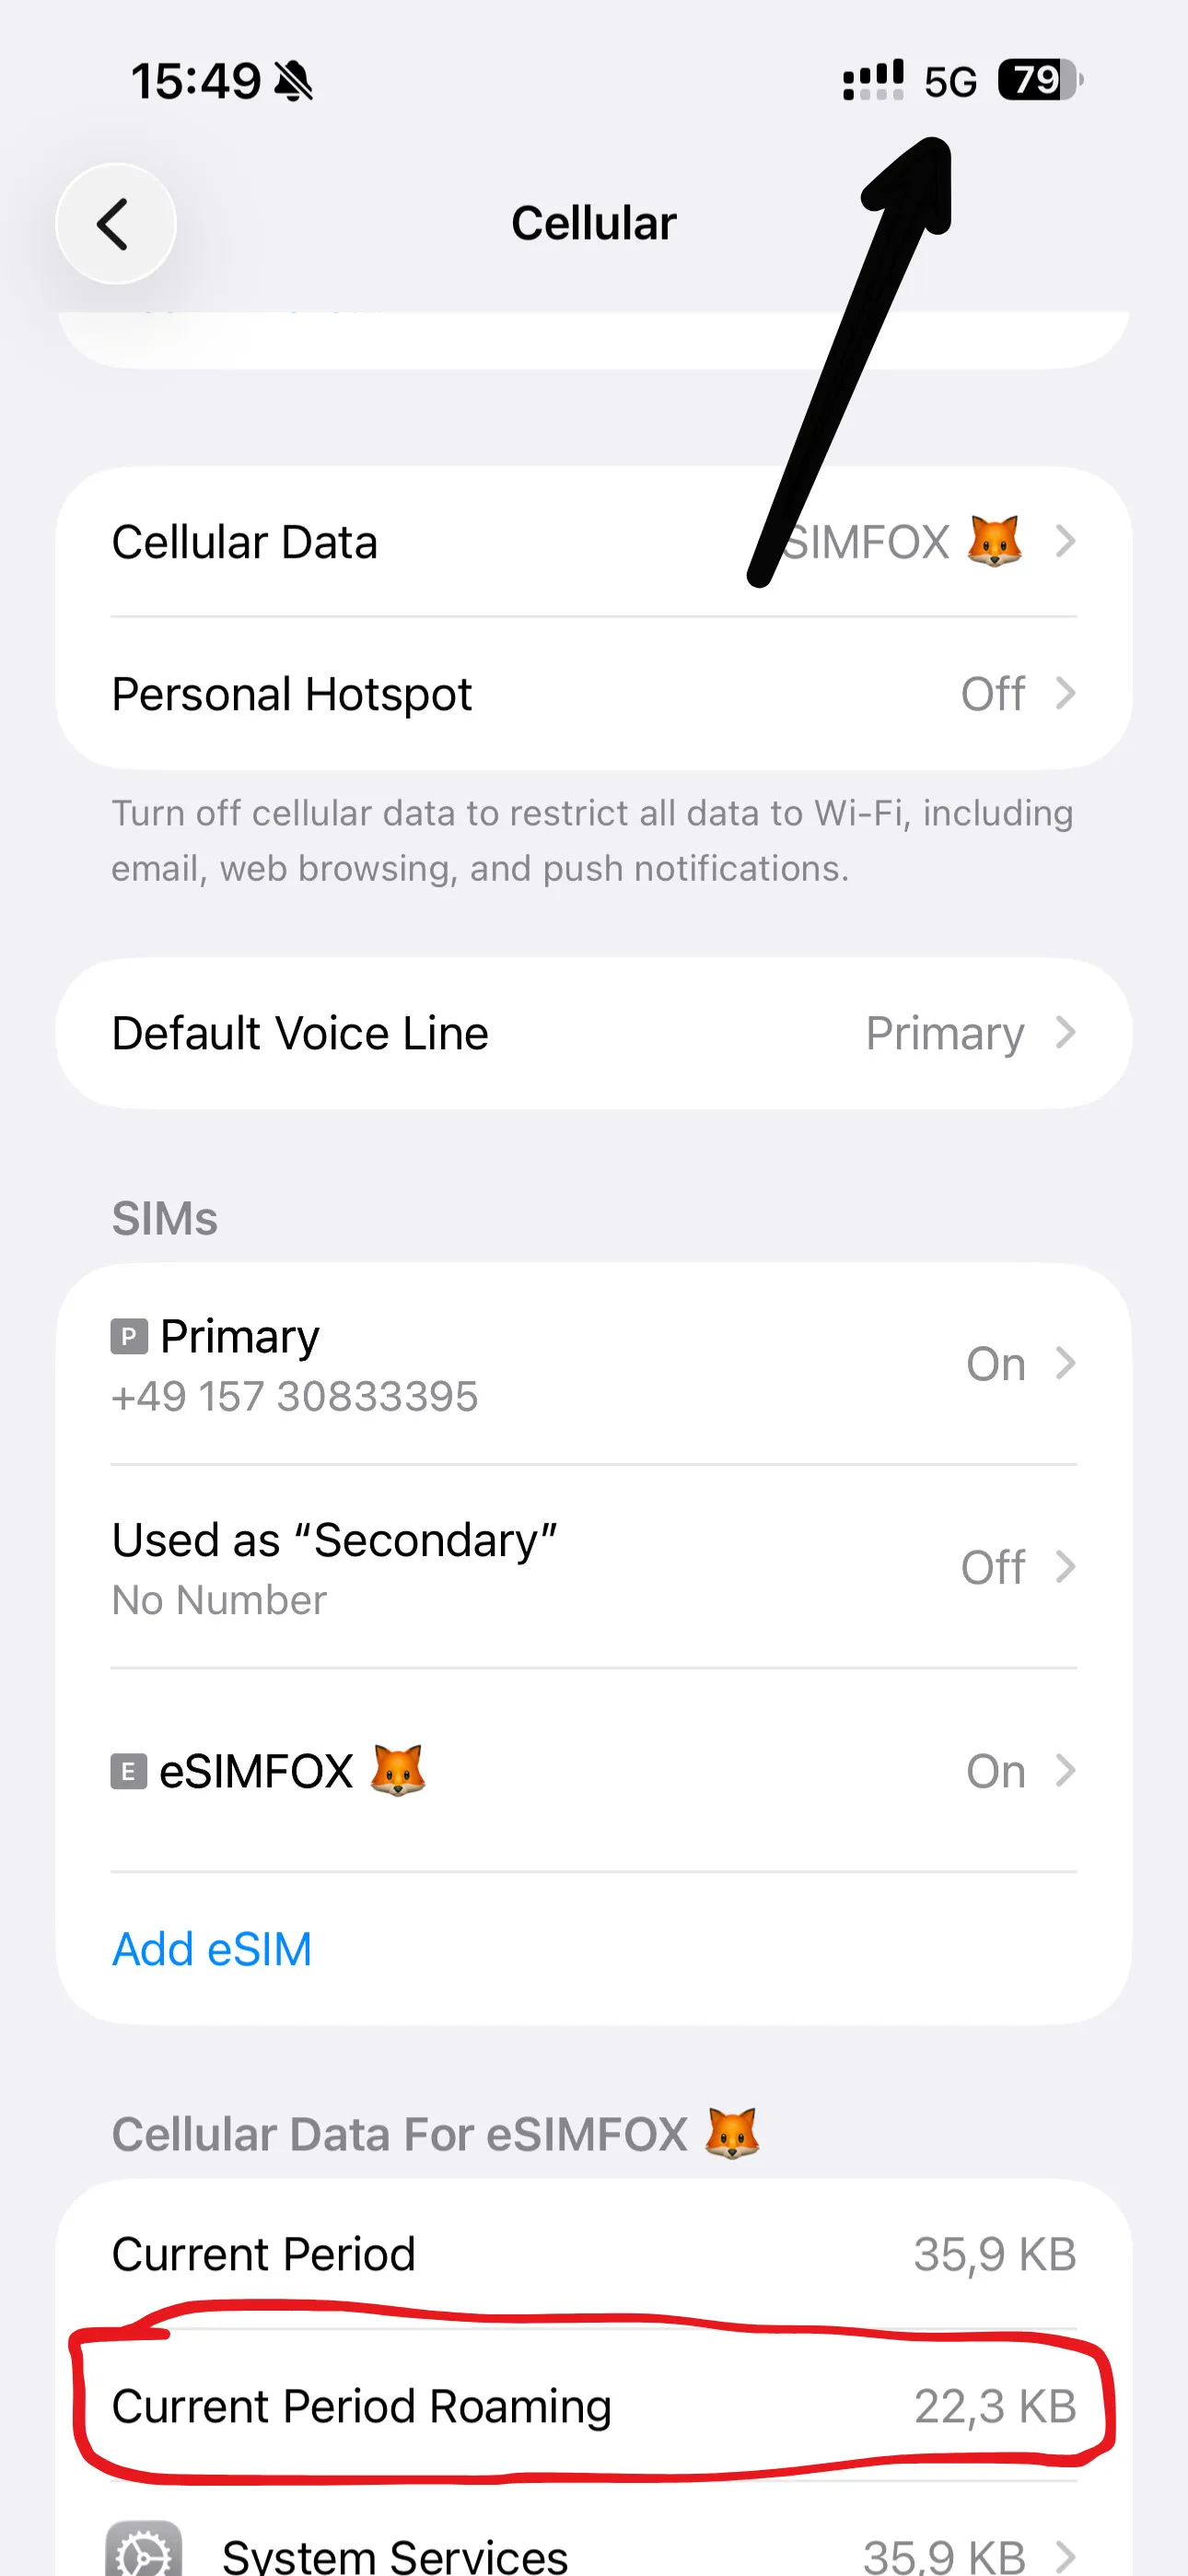
Open the Settings app on your iPhone Air.
Tap the Cellular menu item (called Mobile Service in some regions).
Select Add eSIM.
Tap Other Options at the bottom.
Select Use QR Code — the manual option is behind the scanner screen.
Tap Enter Details Manually at the bottom of the scanner.
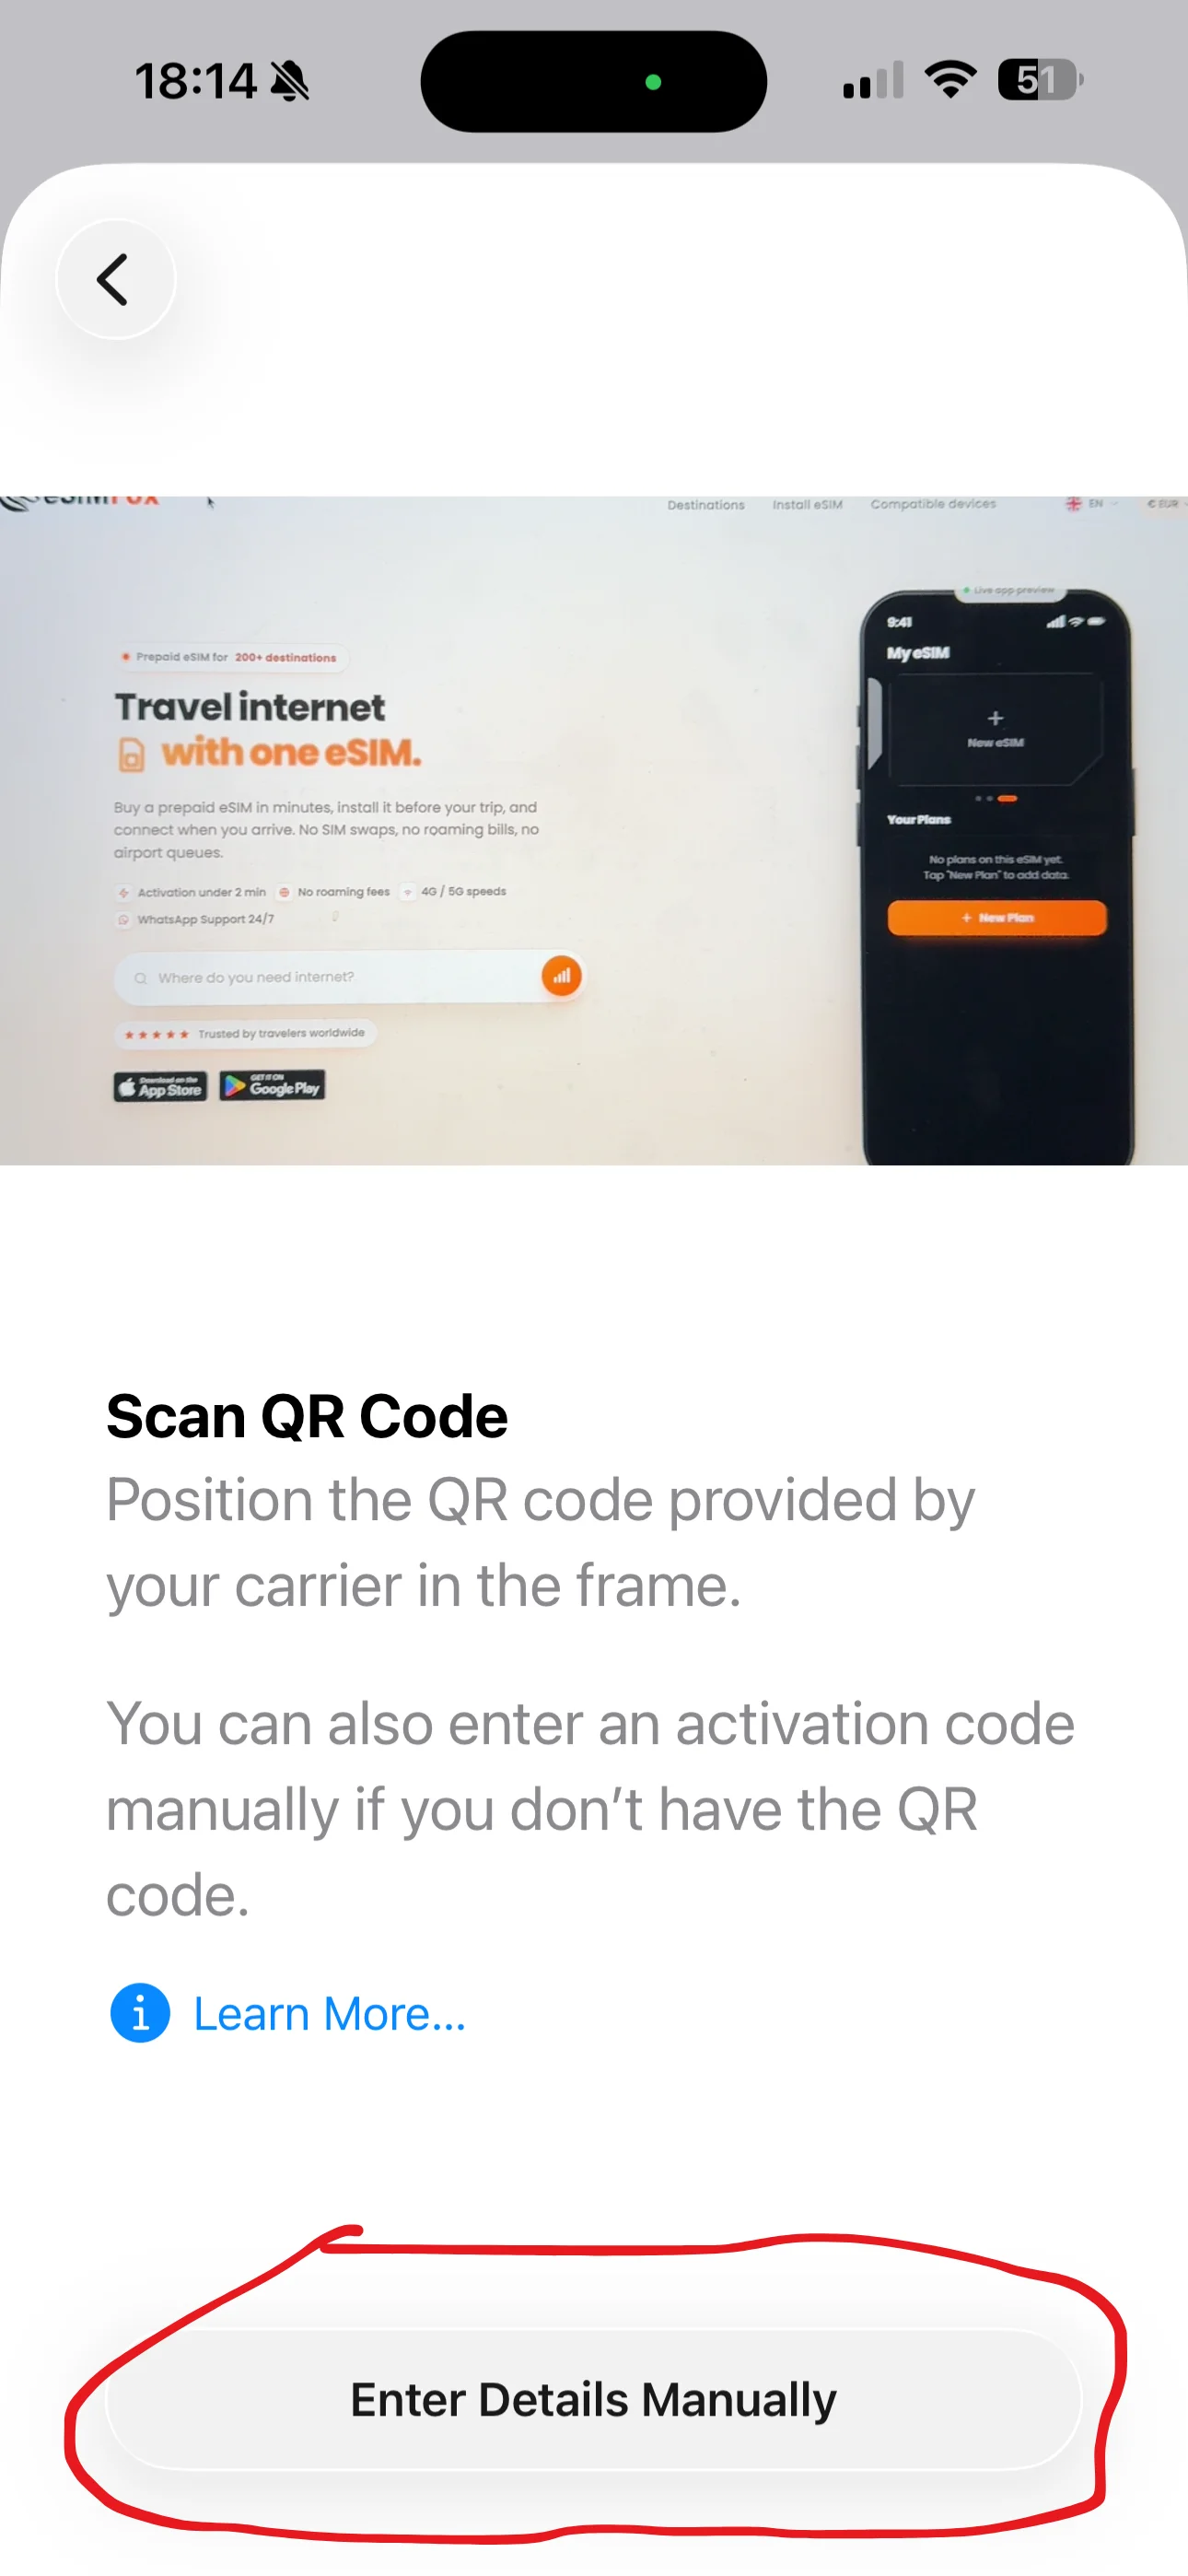
Type the SM-DP+ address and activation code from our email — without https://.
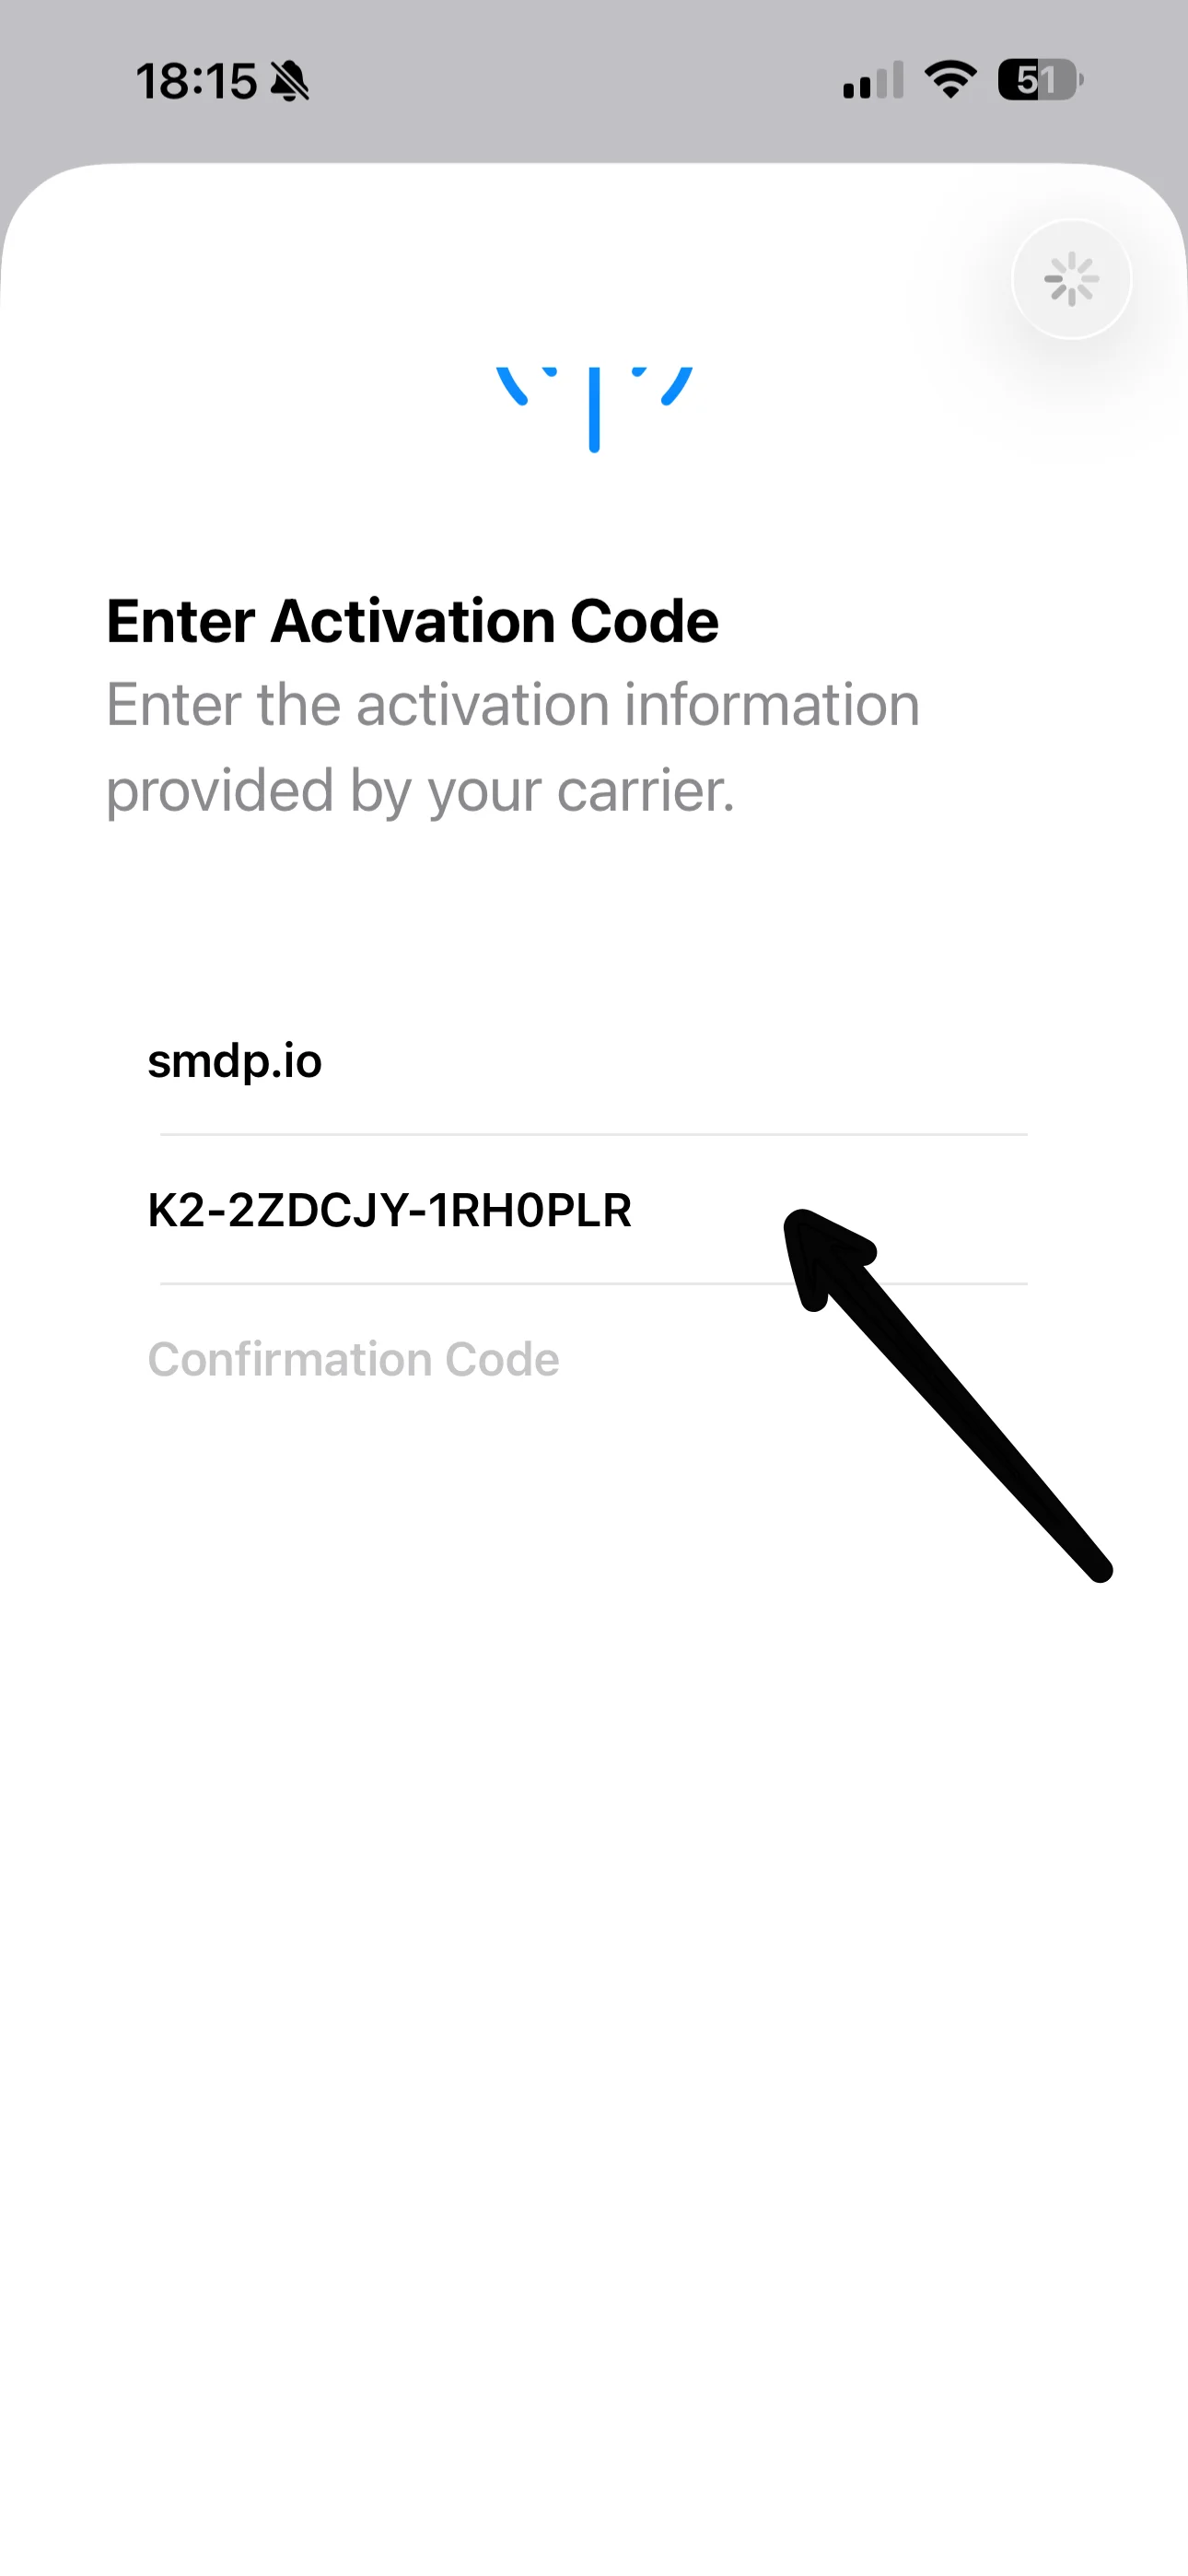
Tap Continue and keep your internet connection on.
Wait a few moments while your iPhone Air completes the activation.
You'll see a confirmation — the eSIM is now on your phone.
Tap the label field to give your new eSIM a clear name.
We recommend the name eSIMFOX so you can always tell it apart from your main line.
When asked for your default line for calls, keep your Primary line.
Keep Primary selected for iMessage and FaceTime — they stay on your usual number.
Select your eSIMFOX line for mobile data. Allow Mobile Data Switching must be OFF.
Under Mobile Data the eSIM should now be selected as the line. Then open the eSIM tab — usually listed under your phone number.
Switch Data Roaming on for the eSIM. Travel eSIMs need it — it doesn't cost extra.
In Voice & Data, choose Allow 5G for the fastest connection.
That's it! Under Roaming (current period) you can check your data usage any time. The plan starts on first connection in your destination.
Open the eSIMFOX app on your iPhone Air and go to the My eSIM tab.
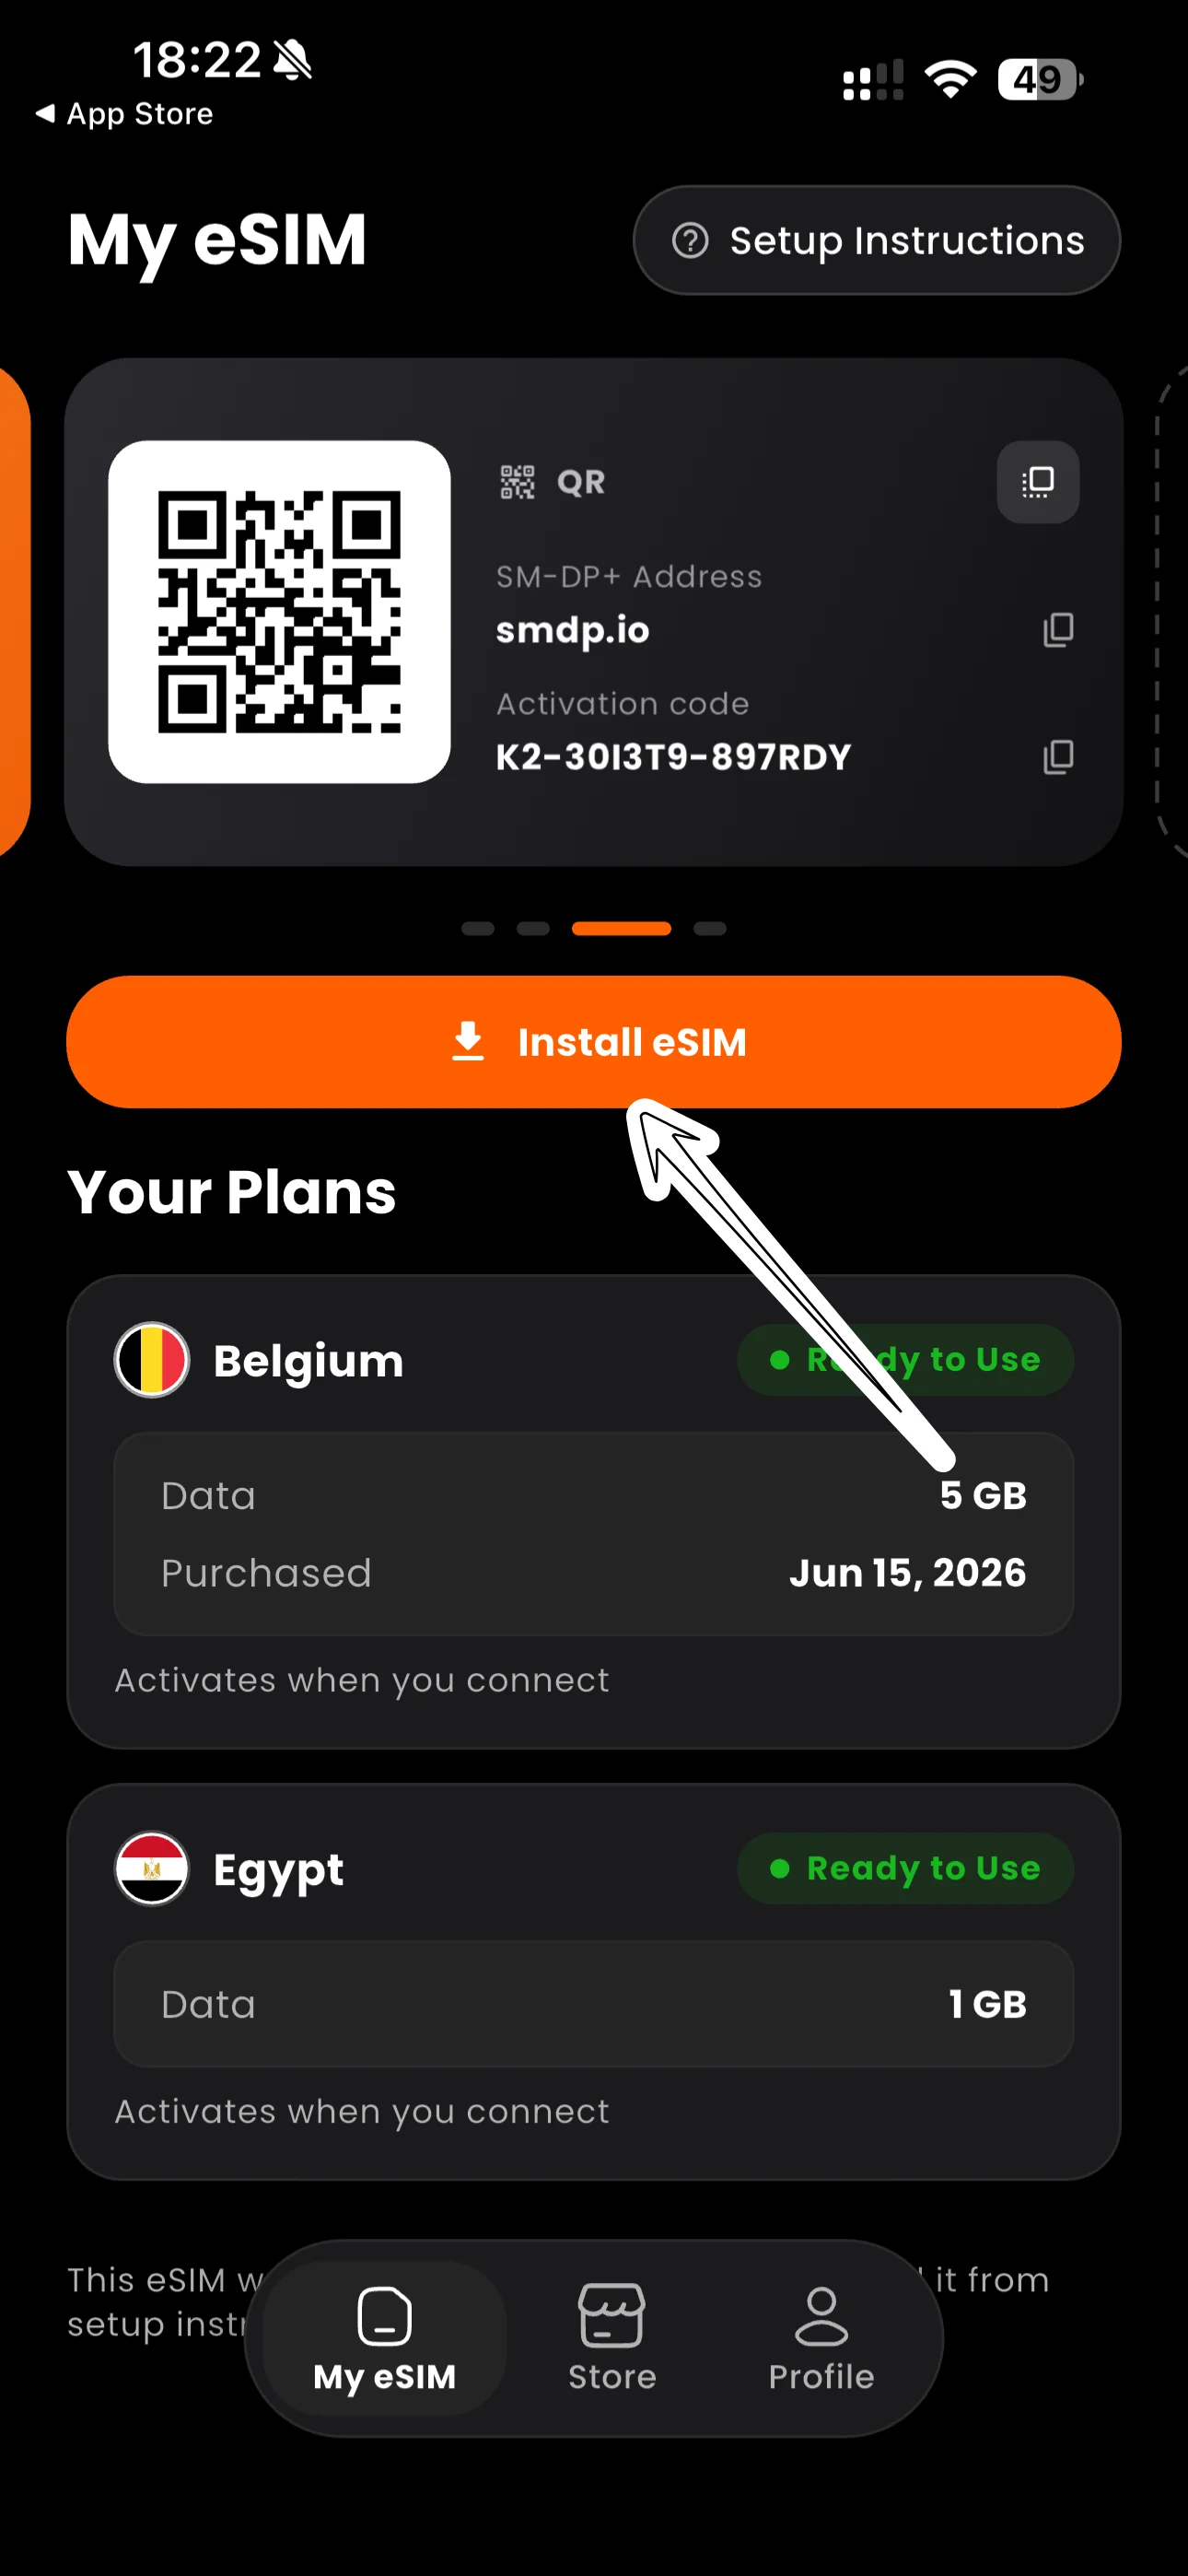
Tap the Install eSIM button. Your iPhone Air opens the eSIM setup automatically.
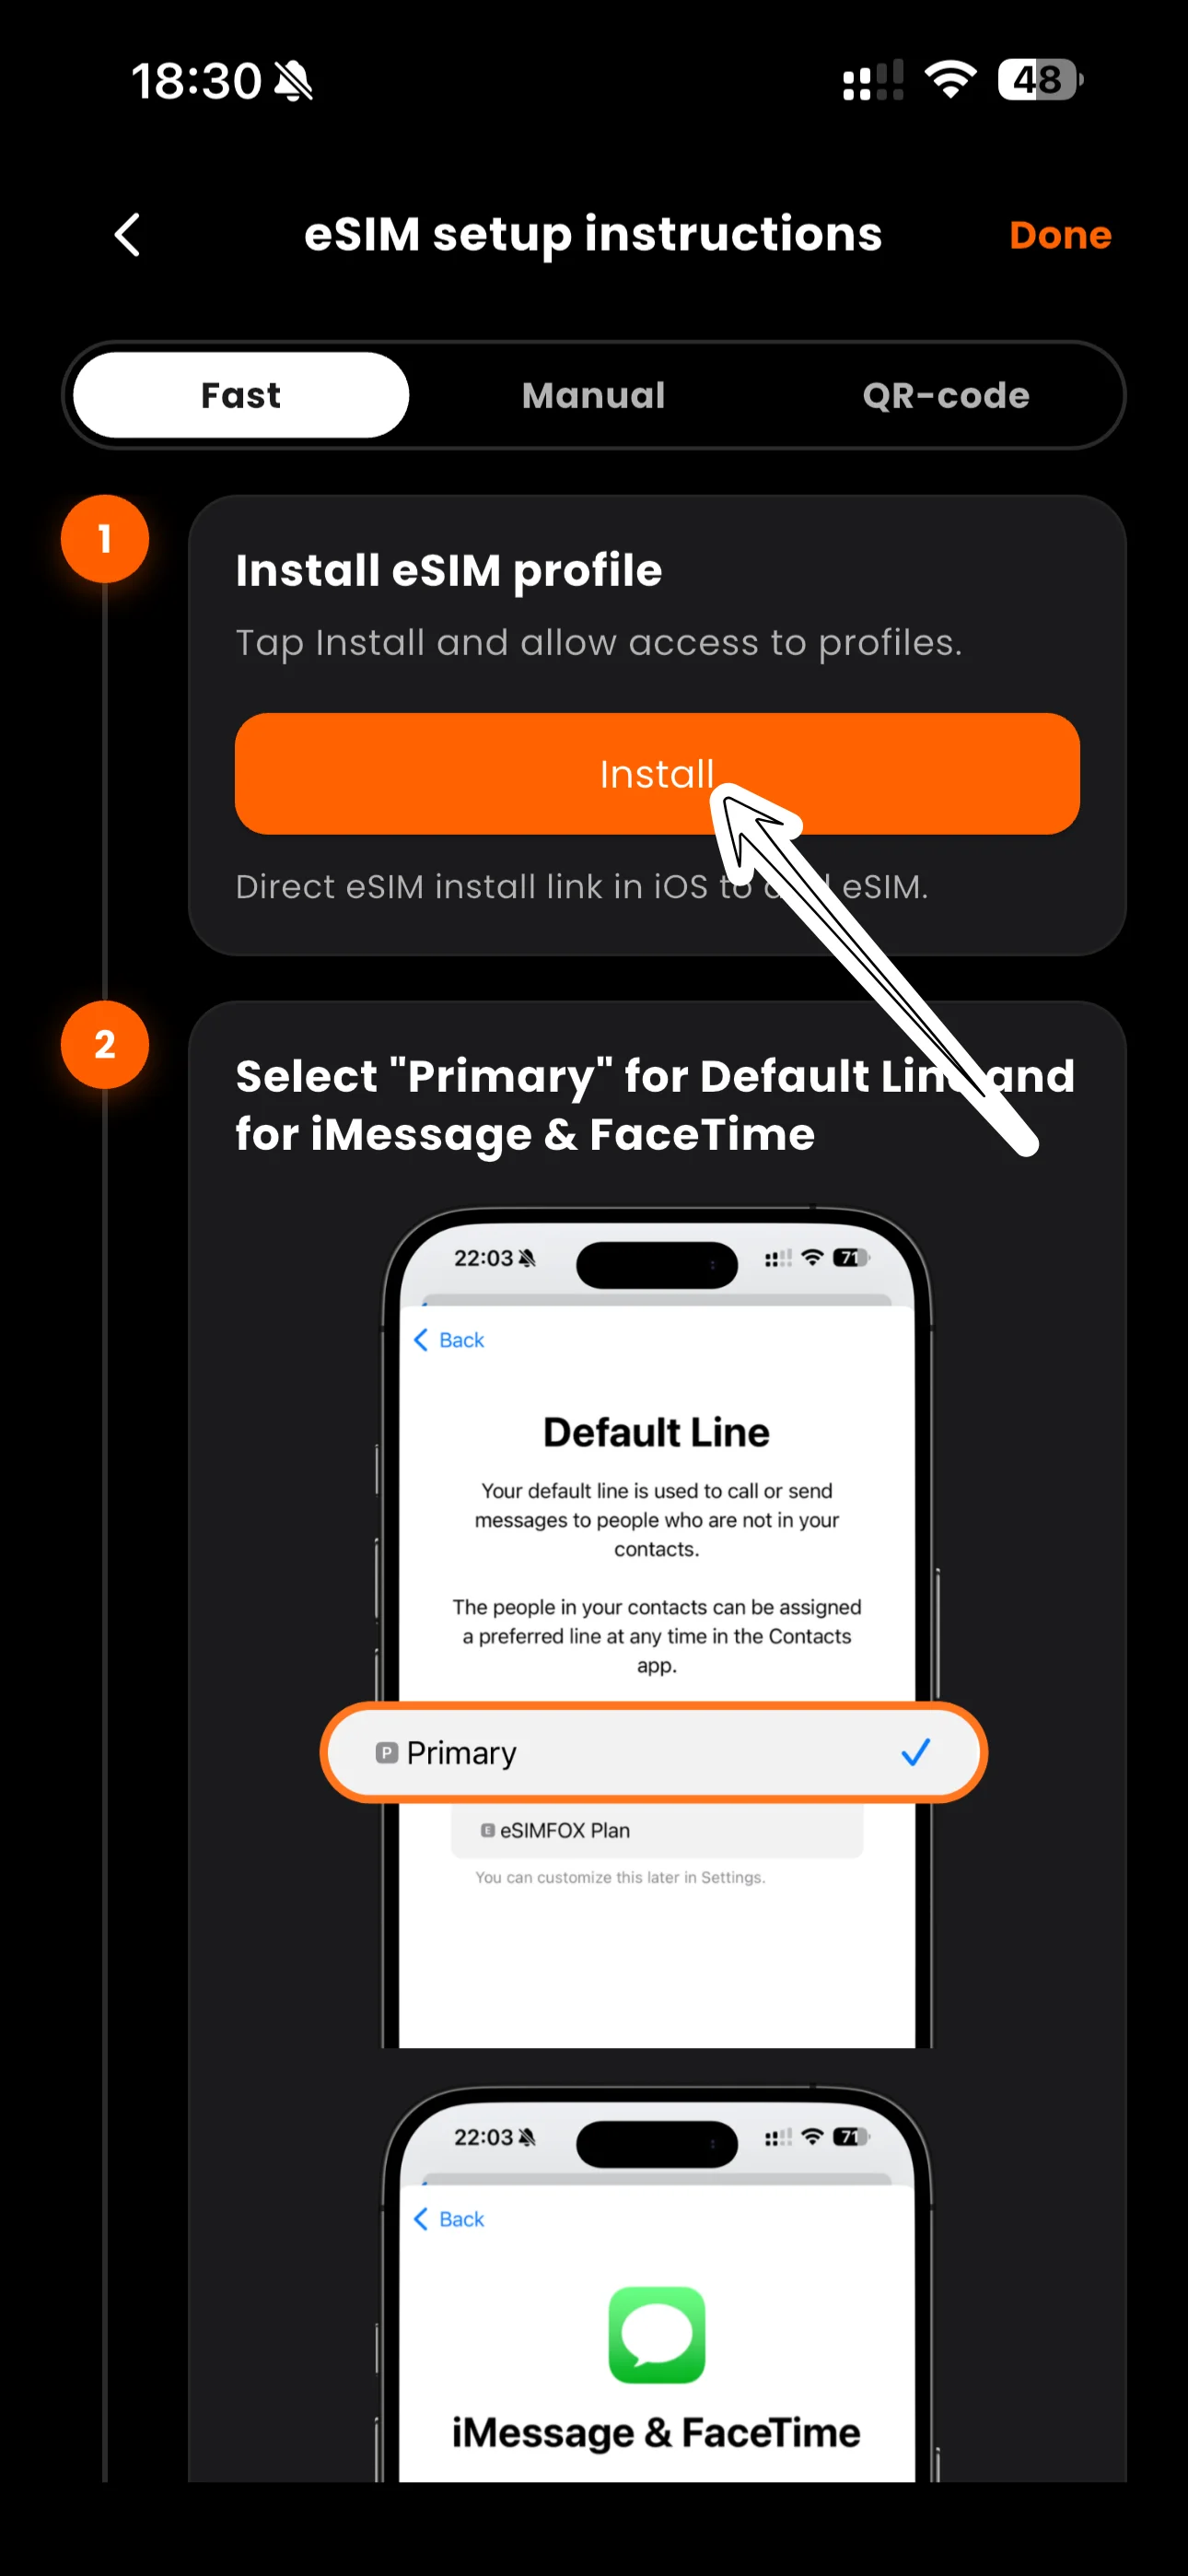
Follow the on-screen steps to complete the installation.
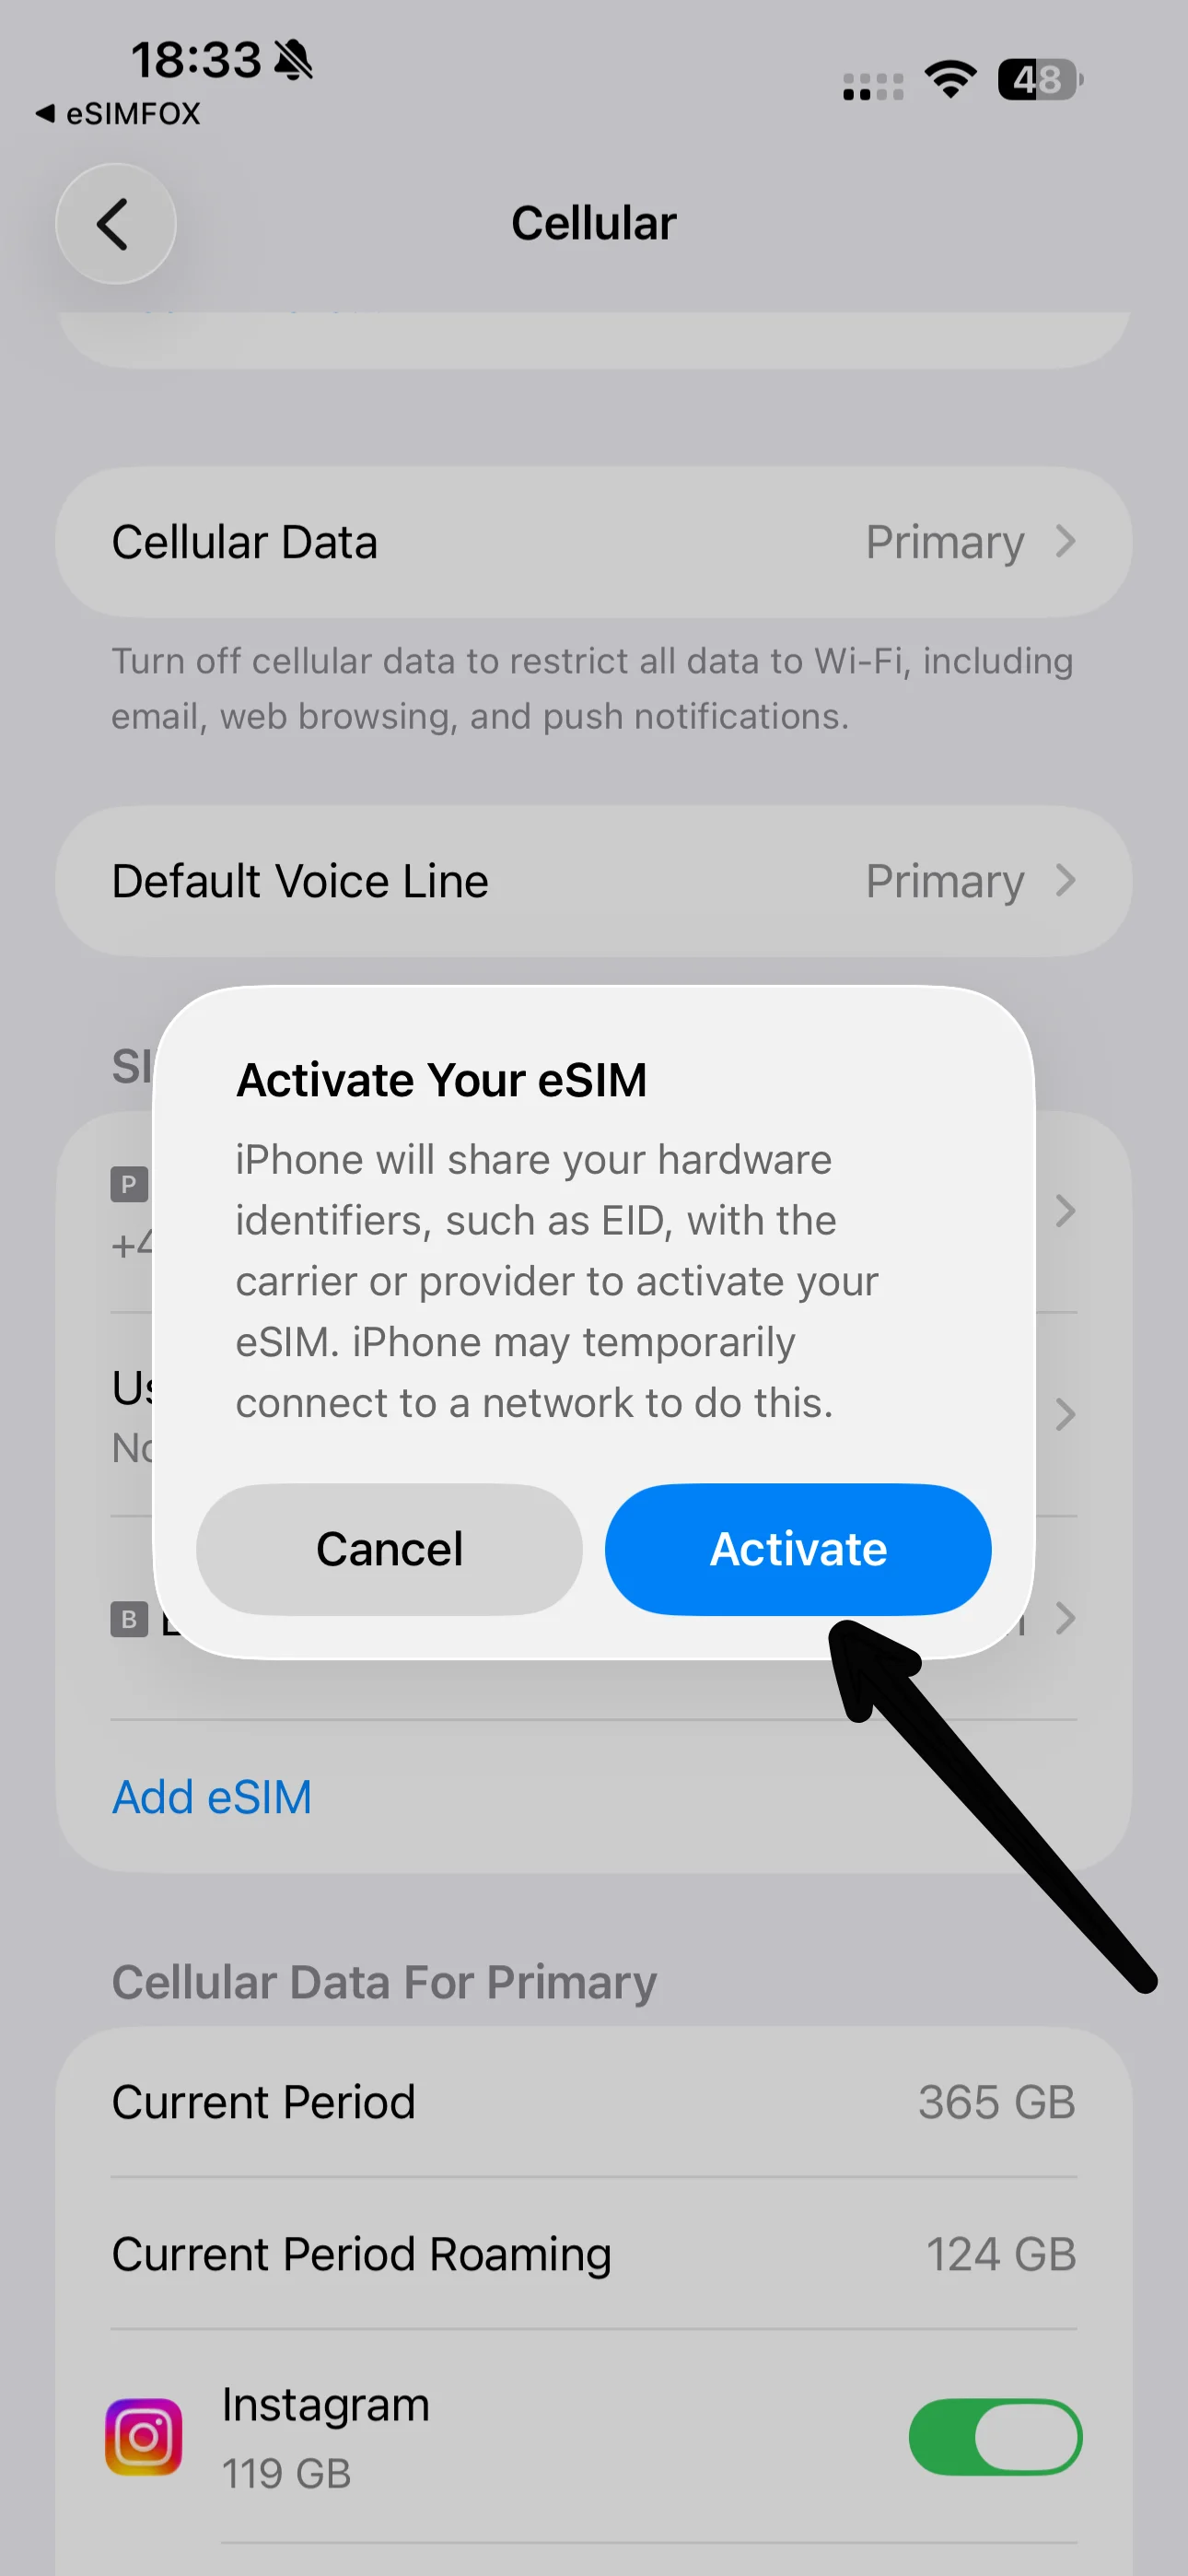
Wait a few moments while your iPhone Air completes the activation.
You'll see a confirmation — the eSIM is now on your phone.
Tap the label field to give your new eSIM a clear name.
We recommend the name eSIMFOX so you can always tell it apart from your main line.
When asked for your default line for calls, keep your Primary line.
Keep Primary selected for iMessage and FaceTime — they stay on your usual number.
Select your eSIMFOX line for mobile data. Allow Mobile Data Switching must be OFF.
Under Mobile Data the eSIM should now be selected as the line. Then open the eSIM tab — usually listed under your phone number.
Switch Data Roaming on for the eSIM. Travel eSIMs need it — it doesn't cost extra.
In Voice & Data, choose Allow 5G for the fastest connection.
That's it! Under Roaming (current period) you can check your data usage any time. The plan starts on first connection in your destination.
Installation adds the eSIM profile to your iPhone Air — that's what the steps above do, and you can do it at home before you travel.
Your data package doesn't start at installation. The plan's validity begins the first time the eSIM connects to a network in your destination.
To get online after landing, make sure the eSIM is selected for mobile data and data roaming is switched on for the eSIM line — then your phone connects automatically.
Small settings that make the difference between "it just works" and a support ticket.
Validity begins when the eSIM first connects in your destination — not when you install.
Mobile data must run through the eSIMFOX line, or you'll use your home plan.
Required for the eSIM. It never triggers roaming fees on our plans.
Both lines stay active — receive calls and texts on your usual number.
Share your eSIM data with a laptop or travel companions.
It's reusable — keep it installed and just top up for your next trip.
Nine fixes that solve almost every eSIM issue — most take under a minute.
https:// and without spaces.Open your SIM settings and set the eSIMFOX line as the Mobile Data line. On iPhone: Settings → Mobile Service → Mobile Data. On Android: Settings → Connections / Network → SIM manager → Mobile data.
Turn it on — for the eSIM line only. Travel eSIMs operate as roaming lines by design; enabling it does not create extra charges on your eSIMFOX plan. Leave roaming off on your home SIM to avoid its fees.
If automatic selection picks a network your plan doesn't support: Settings → Mobile Service → [your eSIM] → Network Selection (iPhone) or Settings → Connections → Mobile networks → Network operators (Android). Turn off automatic and choose an operator listed on your plan page. Near land borders your phone may also latch onto a network from the neighboring country — select an operator from your plan's country manually and switch back to automatic when you move away from the border.
Disable automatic data switching. On iPhone: Settings → Mobile Service → Mobile Data → Allow Mobile Data Switching → OFF. On Android, disable Switch mobile data automatically in SIM settings. Otherwise your phone may silently use your expensive home line.
A deleted eSIM cannot be reinstalled with the same QR code — deletion is permanent on the phone side. Contact our support: we'll check the status of your plan and help you get connected again. To avoid this, keep the eSIM installed even between trips.
Open Settings, choose "Add eSIM" (or "Add mobile plan"), scan the QR code from your eSIMFOX email, then enable the eSIM for mobile data and turn on data roaming. The full steps are above.
Yes — and we recommend it. Installing at home over Wi-Fi is calmer than at an airport, and your plan doesn't start until the eSIM first connects in your destination. For some destinations (like Turkey) installing before arrival is required.
Your plan's validity period begins the first time the eSIM connects to a network in your destination — not at purchase, and not at installation.
Yes, for the eSIM line. Travel eSIMs work as roaming lines by design — enabling it doesn't add charges to your eSIMFOX plan. Keep roaming off on your home SIM.
Yes. Both lines stay active: use the eSIM for data and keep your normal SIM for calls and texts on your usual number. Just make sure mobile data runs through the eSIM.
Yes — hotspot and tethering are supported on eSIMFOX plans. Share your connection with laptops, tablets, or travel companions; shared data counts against your plan.
Check three things: data roaming is on for the eSIM, the eSIM is selected as your mobile data line, and you're in your plan's coverage area. Then toggle Airplane Mode or restart.
No — deleting removes the eSIM from your phone permanently and the same QR code can't be used again. Keep it installed even after your trip: it's reusable, and you can simply top up for your next destination. If it was deleted by accident, contact our support.
Real humans, around the clock. Send us a screenshot of your SIM settings and we'll usually spot the issue in minutes.
Or check: All device activation guides · Device compatibility list · Your eSIMFOX dashboard · General installation help